background image

12

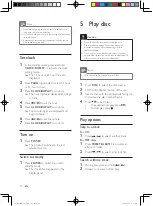
5  Play disc

Caution


Never look at the laser beam inside the unit.


Risk of product damage! Never play discs with 

accessories such as disc stabilizer rings or disc 

treatment sheets. 


Do not push on the disc compartment or put any 

objects other than discs on the disc compartment. It 

may cause the disc player to malfunction.

Note


With some disc/file types, play may differ.

1

 Press 

DISC

 to select the disc source.

2

  Lift the disc doorat the top of the unit.

3

  Insert a disc with the printed side facing up, 

then close the disc compartment.

4

 Press   to start play.

• 

To pause/resume play, press 

.

• 

To stop play, press  .

Play options

Skip to a track

For CD:

1

 Press   /   to select another track.

For MP3 discs: 

1

 Press 

PRESET/ALBUM +/-

 to select an 

album or folder.

2

 Press   / 

 to select a track or file.

Search within a track

1

  During play, press and hold   /   .

2

  Release to resume normal play.

Note


If you are not going to use the remote control for a 

long time, remove the batteries.


Do not use old and new or different types of batteries 

in combination. 


Batteries contain chemical substances, so they should 

be disposed of properly. 

Set clock
1

  In the standby mode, press and hold 

CLOCK/DISPLAY

 to activate the clock 

setting mode.


»

The 12 hour or 24 hour format is 

displayed.

2

 Press 

PROG

 repeatedly to select 12 hour 

or 24 hour format.

3

 Press 

CLOCK/DISPLAY

 to confirm.


»

The hour digits are displayed and begin 

to blink.

4

 Press   /   to set the hour.

5

 Press 

CLOCK/DISPLAY

 to confirm.


»

The minute digits are displayed and 

begin to blink.

6

 Press   /   to set the minute.

7

 Press 

CLOCK/DISPLAY

 to confirm.

Turn on
1

 Press 

POWER

.


»

The product switches to the last 

selected source.

Switch to standby

1

 Press 

POWER

 to switch the unit to 

standby mode.


»

The clock (if set) appears on the 

display panel.

EN

DCM186B_79_UM_V1.0.indd   12

2011/8/29   11:13:00

Summary of Contents for DCM186B

Page 1: ...Register your product and get support at www philips com welcome DCM186B EN User manual DCM186B_79_UM_V1 0 indd 1 2011 8 29 11 12 55 ...

Page 2: ... Connect power 11 4 Get started 11 Prepare the remote control 11 Set clock 12 Turn on 12 5 Play disc 12 Play options 12 6 Play from iPod iPhone 13 Compatible iPod iPhone 13 Listen to iPod iPhone through this player 14 Charge the iPod iPhone 14 Remove the iPod iPhone 14 7 Adjust volume level and sound effect 14 Adjust volume level 14 Enhance bass 14 Select a preset sound effect 14 Mute sound 14 8 L...

Page 3: ... may result in bodily injury property damage or damage to the unit Install all batteries correctly and as marked on the unit Do not mix batteries old and new or carbon and alkaline etc 1 Important Safety Know these safety symbols This bolt of lightning indicates uninsulated material within your unit may cause an electrical shock For the safety of everyone in your household please do not remove pro...

Page 4: ... Lifestyle may void the user s authority to operate the equipment Remove batteries when the unit is not used for a long time Batteries battery pack or batteries installed shall not be exposed to excessive heat such as sunshine fire or the like o Apparatus shall not be exposed to dripping or splashing p Do not place any sources of danger on the apparatus e g liquid filled objects lighted candles q ...

Page 5: ...ratus This product complies with the radio interference requirements of the European Community Your product is designed and manufactured with high quality materials and components which can be recycled and reused When this crossed out wheeled bin symbol is attached to a product it means that the product is covered by the European Directive 2002 96 EC Please inform yourself about the local separate...

Page 6: ... Philips To fully benefit from the support that Philips offers register your product at www Philips com welcome Introduction With this unit you can enjoy audio from audio CDs iPod players iPhone and other external devices listen to radio stations You can enrich sound output with the sound effect Dynamic Bass Boost DBB Digital Sound Control DSC The unit supports the following media format EN DCM186...

Page 7: ...8 Overview of the main unit b a c d e f g h g i j k l DSC EN DCM186B_79_UM_V1 0 indd 8 2011 8 29 11 12 57 ...

Page 8: ...pen or close the disc tray b POWER Switch on the unit Switch to standby mode c SOURCE Select a source Disc Tuner MP3 LINK or iPod iPhone d Start or pause play e Stop play or erase a program f MP3 LINK Jack for external audio device g iPod iPhone dock h DSC Select a preset sound setting POP JAZZ CLASSIC or ROCK i MODE Select repeat shuffle play mode j Skip to the previous next track Search within a...

Page 9: ... the iPod iPhone menu f Navigate through the iPod iPhone menu g Fast reverse or fast forward within a track or disc Skip to the previous next track Tune to a radio station Adjust time h DBB Turns on or off dynamic bass enhancement i Start or pause play j VOL Adjust volume k Stop play or erase a program l PRESET ALBUM Skip to the previous next album Select a preset radio station m MUTE Mute volume ...

Page 10: ...of explosion Keep batteries away from heat sunshine or fire Never discard batteries in fire To insert the remote control battery 1 Open the battery compartment 2 Insert 2 AAA batteries not supplied with correct polarity as indicated 3 Close the battery compartment 3 1 2 Connect power Caution Risk of product damage Make sure that the power supply voltage corresponds to the voltage printed on the ba...

Page 11: ...rack 1 During play press and hold 2 Release to resume normal play Note If you are not going to use the remote control for a long time remove the batteries Do not use old and new or different types of batteries in combination Batteries contain chemical substances so they should be disposed of properly Set clock 1 In the standby mode press and hold CLOCK DISPLAY to activate the clock setting mode Th...

Page 12: ...repeatedly to select REP ONE The current track is played repeatedly REP ALL all tracks are played repeatedly 2 To return to normal play press REP ALL repeatedly until repeat mode is no longer displayed Random play 1 Press SHUF SHUF is displayed all tracks are played randomly 2 To return to normal play press SHUF again Note Repeat and shuffle mode can not be activated at the same time Program track...

Page 13: ...d iPhone through this player 1 Place the iPod iPhone in the dock The unit switches to iPod iPhone mode automatically To start pause resume play press To skip to a track press To search during play press and hold then release to resume normal play To navigate the menu press MENU then press to select and press OK to confirm Charge the iPod iPhone When the unit is connected to power the docked iPod i...

Page 14: ... the antenna as far as possible fromTV VCR or other radiation source For optimal reception fully extend and adjust the position of the antenna 8 Listen to radio Tune to a radio station 1 Press TUN to select FM 2 Press and hold for more than 2 seconds SEARCH is displayed The radio tunes to a station with strong reception automatically 3 Repeat step 2 to tune to more stations To tune to a weak stati...

Page 15: ...sc Tuner or iPod iPhone as the source for the alarm timer 1 Make sure that you have set the clock correctly 2 In standby mode press and hold TIMER 3 Press DISC TUN or iPhone iPod to select a source 4 Press TIMER to confirm The hour digits are displayed and begin to blink 5 Press to set the hour 6 Press TIMER to confirm The minute digits are displayed and begin to blink 7 Press to set the minute 8 ...

Page 16: ... Bit rates 32 256 kbps variable bit rates 10 Product information Note Product information is subject to change without prior notice Specifications Amplifier Rated Output Power 15W RMS Frequency Response 60 16kHz 3dB Signal to Noise Ratio 65dBA Aux Input 0 5V RMS 20kohm Disc LaserType Semiconductor Disc Diameter 12cm 8cm Support Disc CD DA CD R CD RW MP3 CD Audio DAC 24Bits 44 1kHz Total Harmonic D...

Page 17: ...oting Caution Never remove the casing of this apparatus To keep the warranty valid never try to repair the system yourself If you encounter problems when using this apparatus check the following points before requesting service If the problem remains unsolved go to the Philips web site www philips com welcome When you contact Philips ensure that the apparatus is nearby and the model number and ser...

Page 18: ...commercial purpose misused improperly or inappropriately installed operated or repaired abused damaged or not maintained in accordance with the manufacturer s instructions 3 Even when we do not have to repair or replace the Goods we may decide to do so anyway In some cases we may decide to substitute the Goods with a similar alternative product of our choosing All such decisions are at our absolut...

Page 19: ... 2011 Koninklijke Philips Electronics N V All rights reserved DCM186B_79_UM_V1 1 DCM186B_79_UM_V1 0 indd 24 2011 8 29 11 13 02 ...

Reviews: