background image

25

Language 
settings

Options

Description

[Off]

Turn off subtitle 
language display.

[Disc 
menu]

[English]

Select DVD menu 
language. Options 
available are 
depends on 
DVD disc.

[

ࡩ฼ᇓ໗

]

[

ᐥᦥɻʼ

]

3

Tap 

 to exit.

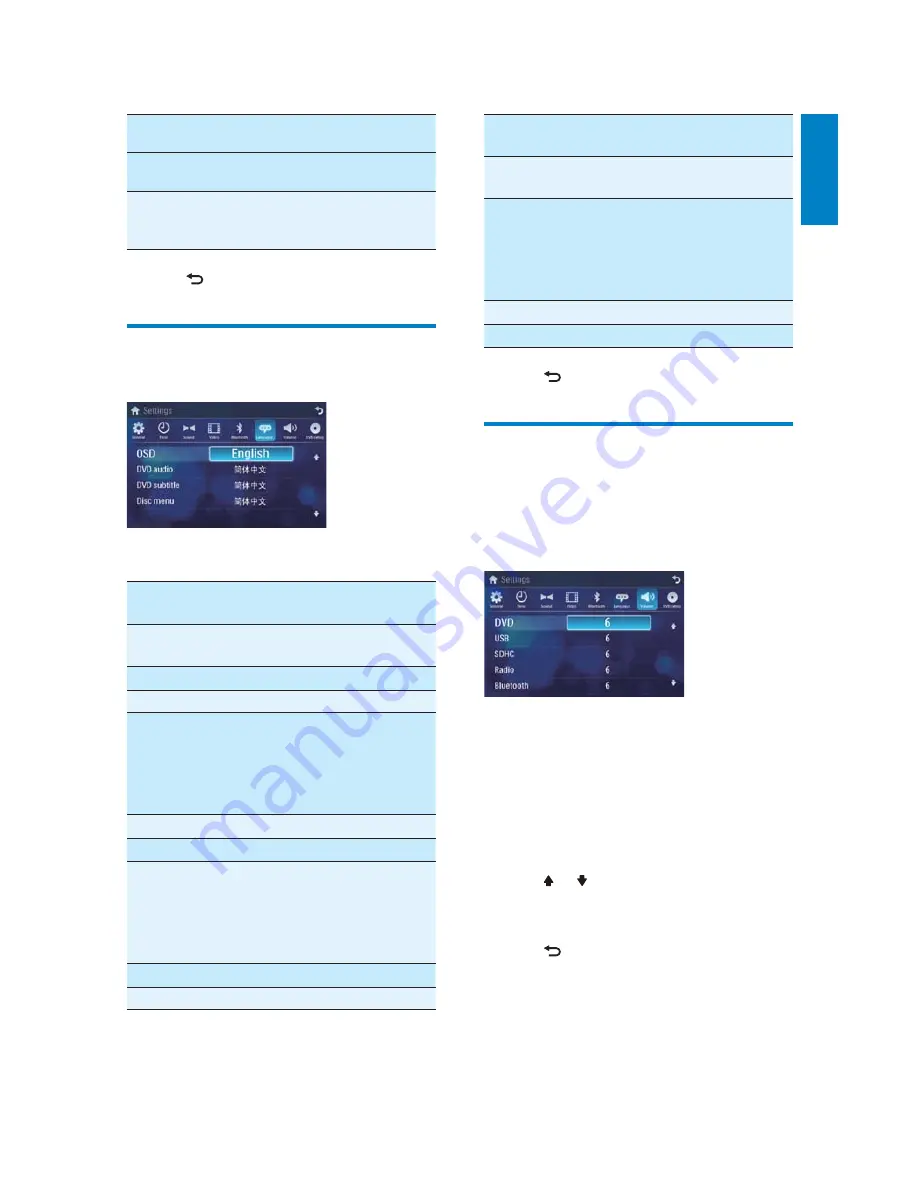
Adjust volume settings

You can set different volume for different modes. 

1

Tap 

[Volume]

.

The volume setting sub-menu is 

»

displayed.

2

Tap on a source.

‡

[DVD]

/

[USB]

‡

[CMMB]

‡

[Radio]

‡

[Bluetooth]

‡

[AV-IN1]

‡

[AV-IN2]

3

Tap   or   to assign value: 0 to 12.

:KHQVZLWFKHVWRWKHVRXUFHWKH

»

volume increases automatically.

4

Tap 

 to exit.

Bluetooth 
settings

Options

Description

[Off]

Answer phone call 
manually.

[Pairing 
code]

Set code for pairing 
the unit with other 
Bluetooth devices.

3

Tap 

 to exit.

Adjust language settings

1

Tap 

[Language]

.

2

Tap an option repeatedly to select:

Language 
settings

Options

Description

[OSD]

[English]

Select on-screen-
display language.

[

ࡩ฼ᇓ໗

]

[

ᐥᦥɻʼ

]

[DVD 
audio]

[English]

Select DVD audio 
language. Options 
available are 
depends on 
DVD disc.

[

ࡩ฼ᇓ໗

]

[

ᐥᦥɻʼ

]

[DVD 
subtitle]

[English]

Select DVD subtitle 
language. Options 
available are 
depends on 
DVD disc.

[

ࡩ฼ᇓ໗

]

[

ᐥᦥɻʼ

]

English

EN

Summary of Contents for CID3292

Page 1: ...www philips com welcome Register your product and get support at EN User manual 3 ZH CN Ⴌ߀ Ҭ 31 CID3292 ...

Page 2: ...e language 17 Rotate pictures 17 Zoom 17 Select slide show duration 17 7 Play with Bluetooth device 18 Pair the Bluetooth enabled devices 18 Make a call 18 Receive call 19 Listen to music from Bluetooth device 19 Adjust Bluetooth settings 20 8 Adjust sound 20 Adjust volume 20 Mute 20 Select preset equalizer 20 Adjust fader balance 21 Set Dynamic Bass Boost DBB 21 9 Adjust settings 22 Display syste...

Page 3: ...oes not apply Use of controls or adjustments or performance of procedures other than herein may result in hazardous radiation exposure or other unsafe operation This unit is designed for negative ground earth 12 V DC operation only 7R UHGXFH WKH ULVN RI WUDIÀF DFFLGHQW GR no watch video during driving 7R HQVXUH VDIH GULYLQJ DGMXVW WKH YROXPH to a safe and comfortable level Improper fuses can cause...

Page 4: ...y This apparatus includes this label This product complies with the radio interference requirements of the European Community Recycling Your product is designed and manufactured ZLWK KLJK TXDOLW PDWHULDOV DQG FRPSRQHQWV which can be recycled and reused When you see the crossed out wheel bin V PERO DWWDFKHG WR D SURGXFW LW PHDQV WKH product is covered by the European Directive 2002 96 EC Never disp...

Page 5: ...FKDVH DQG ZHOFRPH WR 3KLOLSV 7R IXOO EHQHÀW IURP WKH VXSSRUW WKDW 3KLOLSV RIIHUV UHJLVWHU RXU SURGXFW at www philips com welcome Introduction LWK WKH FDU HQWHUWDLQPHQW V VWHP RX FDQ Quickly found routine through the navigation system And you can also enjoy Audio video JPEG pictures from 9 9 RU USB devices External devices FM or AM MW radio Audio from Bluetooth enabled devices HVLGHV RX FDQ PDNH UH...

Page 6: ...e unit b AV IN External equipment audio video in socket c MAP Open the cover to insert remove USB device or map card d VOL MUTE Adjust volume Turn the unit on or off Turn mute on or off e DISP Adjust screen brightness Turn on off the screen display f MENU Return to the home menu g Built in microphone f h i j e d c b a g Engl is h EN ...

Page 7: ...crews 3 Get started Caution Use of controls or adjustments or performance of procedures other than herein may result in hazardous radiation exposure or other unsafe operation Always follow the instructions in this chapter in sequence Install the car audio These instructions are for a typical installation RZHYHU LI RXU FDU KDV GLIIHUHQW UHTXLUHPHQWV make the corresponding adjustment If you have DQ ...

Page 8: ...ection 5 Take off the two screws on the top side of the unit 6 Slide the unit into the dashboard until a click sound is heard 7 Fix the unit onto the dashboard with screws 8 Reconnect the negative terminal of the car battery Engl is h EN ...

Page 9: ...ch video or adjust settings while you drive 1 Press to turn on the unit The available OSD On Screen Display languages are displayed Yellow Yellow Rear display Rear display Radio antenna GPS antenna Optional accessory White White Red Red Brown Amplifier AV system AV system AUX AUX Red White Yellow Red White Yellow Remark Connect the AV IN wire which is marked as c to the AV IN socket on front panel...

Page 10: ...r 2 seconds The screen is turned off 7R WXUQ RQ WKH VFUHHQ SUHVV DISP To adjust screen brightness 1 Press DISP Brightness bar is displayed 2 Rotate VOL to adjust brightness Set date and time 1 Press MENU The main menu is displayed 2 Tap Settings 3 Tap Time The date time setup menu is displayed Set date 1 Tap Date 2 Tap the displayed date information A submenu is displayed 3 Tap or WR VHW HDU PRQWK...

Page 11: ...ade the PDSµ VHFWLRQ 1 Tap the upper left corner to display home menu 2 Tap Navigation The navigation menu is displayed in a few seconds 3 Refer to the map manual to operate the navigation tool Tip You can press NAVI to enter exit the navigation system Upgrade the navigation map Note Navigation map card is not included in the unit 1 Turn off the car audio system 2 Open the MAP card cover 3 Press o...

Page 12: ...als can be broadcast Store radio stations in memory You can store up to 6 stations in each band Store stations manually 1 Tune to the station 2 Tap 3 Tap Save 5 Listen to radio Tune to a radio station 1 Tap to display home menu 2 Tap Radio Band and frequency information is displayed 3 Tap on FM or AM to select band FM band options FM1 FM2 FM3 AM band options AM1 AM2 4 ULHÁ WDS or to tune to a radi...

Page 13: ...itches to Radio mode automatically You can play DVD discs with the following region codes DVD region code Country China 4 Tap one of the channels 01 to 06 to save the select band Store stations automatically RX FDQ VHDUFK IRU D VWDWLRQ ZLWK LQWUR VHDUFK which broadcasts a 10 second preview of each detected radio station 1 Select band 2 Tap 3 Tap Search Auto search starts The six strongest stations...

Page 14: ...cept for the upper left FRUQHU WR GLVSOD PHQX RQ WKH VFUHHQ LI necessary 2 Tap The search screen is displayed Connect USB device Note Ensure that the device contains playable content 1 Open the USB door 2 Insert the USB device to the USB socket Play starts automatically Note 7R UHPRYH WKH 86 GHYLFH VZLWFK WR GLVF UDGLR RU RWKHU VRXUFH ÀUVW Play Pause 1 2QFH D GLVF RU 86 GHYLFH LV LQVHUWHG play sta...

Page 15: ... A B off is displayed Random play RX FDQ SOD DXGLR WUDFNV ÀOHV LQ UDQGRP RUGHU 1 XULQJ SOD WDS repeatedly to turn random play on or off is highlighted start random play turns gray cancel random play 3 7DS WKH QXPEHUV WR HQWHU FKDSWHU ÀOH QXPEHU WKHQ WDS 7R FOHDU WKH SUHYLRXV LQSXW WDS 7R FOHDU DOO LQSXW WDS Repeat one all XULQJ SOD RX FDQ VHOHFW GLIIHUHQW UHSHDW SOD modes For DVD VCD movie disc 1 ...

Page 16: ... audio language For video discs that contain two or more audio channels 1 XULQJ SOD WDS DQ ZKHUH H FHSW IRU WKH upper left corner to display menu on the VFUHHQ LI QHFHVVDU 2 Tap to display the 2nd menu 3 Tap repeatedly The audio channel information is displayed on the upper line of the screen Select audio mode KHQ RX SOD 9 V RX FDQ VHOHFW DQ DXGLR mode R L Stereo 1 XULQJ SOD WDS DQ ZKHUH H FHSW IR...

Page 17: ... enabled phones through the unit You can also listen to music from a Bluetooth enabled device Pair the Bluetooth enabled devices 7R FRQQHFW RXU OXHWRRWK GHYLFH WR WKH XQLW you need to pair the device to the unit Pairing needs only to be done once You can pair up to eight devices Note The operational range between this unit and a Bluetooth device is approximately 10 meters 30 feet Before you connec...

Page 18: ...KH FRQWURO RQ WKH XQLW WR play music stored on the device 1 Pair the phone with the unit 2 Tap to return to home menu 3 Tap Bluetooth The Bluetooth menu is displayed 4 Start play music via device If your device support AVRCP 1 Tap 2 Tap to start play Missed calls Received calls Dialed calls Phone book Sim phone book Local phone book Or tap WR GLDO QXPEHU GLUHFWO WKHQ WDS to dial Receive call GHIDX...

Page 19: ...the upper left FRUQHU WR GLVSOD PHQX RQ WKH VFUHHQ LI necessary 2 Tap The current Equalizer setting is displayed Adjust Bluetooth settings You can change below Bluetooth settings Bluetooth WR WXUQ RQ RU RII OXHWRRWKµ function Auto connect to turn on or off Auto FRQQHFWµ IXQFWLRQ Auto answer to turn on or off Auto DQVZHUµ IXQFWLRQ Pairing code to set paring code Phone Book Sync to synchronize phone...

Page 20: ... gray 3 Tap or to select an EQ 4 Tap or to adjust below settings Bass bass range 14 to 14 Mid middle range 14 to 14 Treb treble range 14 to 14 LPH ORZ SDVV ÀOWHU UDQJH MPF PLGGOH SDVV ÀOWHU UDQJH HPF KLJK SDVV ÀOWHU UDQJH 5 Tap to restore the above settings into default settings 6 Tap to exit Adjust fader balance You can also adjust the front and rear speaker EDODQFH WKH OHIW DQG ULJKW VSHDNHU EDO...

Page 21: ...after last operation 20s Turn on the screen saver automatically 20 seconds after last operation Dimmer Mode Night Select this mode at night Dusk Select this mode at dusk Normal Set screen dimmer to normal mode Bright Select this mode in bright environment Key color Red Button backlight turns red Blue Button backlight turns blue 9 Adjust settings Display system setup menu 1 Tap to display main menu...

Page 22: ...p On Turn on the beep sound Each time you press a EXWWRQ WKH XQLW beeps Off Turn off the beep sound WallPaper Blue Turn background color to blue Black Turn background color to black Red Turn background color to red F1 Select F1 picture as wall paper Calibration Calibrate the touch screen 4 Tap to exit Set wallpaper You can change the screen background by using one built in picture or your picture ...

Page 23: ...ects to pre paired device automatically Off Need to re connect manually Auto answer On Answer paired phone call automatically 3 Tap to exit Adjust video settings 1 Tap Video 2 Tap an option repeatedly to select Video settings Options Description Aspect ratio Full For widescreen display Normal For normal display Video input Auto The correct format is set automatically Select this option if you are ...

Page 24: ...HQ VZLWFKHV WR WKH VRXUFH WKH volume increases automatically 4 Tap to exit Bluetooth settings Options Description Off Answer phone call manually Pairing code Set code for pairing the unit with other Bluetooth devices 3 Tap to exit Adjust language settings 1 Tap Language 2 Tap an option repeatedly to select Language settings Options Description OSD English Select on screen display language ࡩ ᇓ໗ ᐥᦥɻ...

Page 25: ... FDQ UHVHW LW 1 Press RESET with a ball point pen or similar tool Adjust DVD rating 1 Tap DVD rating 2 Tap an option repeatedly to select DVD rating Options Description Set password Set password to restrict the play of discs The default password is 0000 Rating level Kid safe Acceptable for children G Acceptable for general viewers PG Parental guidance suggested PG 13 Unsuitable for children under ...

Page 26: ...perature range 20 C to 70 C Disc player System DVD CD audio MP3 system Frequency response 20 Hz 20k Hz Signal noise ratio 75dB Total harmonic distortion Less than 1 Channel separation 55dB Video signal format NTSC only Video output 1 0 2V Tip KHQ WKH XQLW LV UHVHW DOO WKH VHWWLQJV UHPDLQ unchanged Replace fuse I WKHUH LV QR SRZHU WKH IXVH PD EH GDPDJHG and need to be replaced 1 Take out the unit f...

Page 27: ...6XSSRUWHG VDPSOLQJ IUHTXHQFLHV N N N Supported Bit rates 32 320 Kbps and variable bit rate Supported video formats DVD Divx Home theater MP4 Xvid Note 7R HQVXUH D EHWWHU SOD EDFN ELW UDWH RI 0ESV is recommended Radio Frequency range FM 87 5 108 0 MHz Frequency range AM MW 522 1620 KHz Usable sensitivity FM 5 uV Usable sensitivity AM MW 50 uV LCD Screen size 6 2 inches 16 9 Display resolution 800 x...

Page 28: ... already connected with another Bluetooth enabled device Disconnect that device or all other connected devices and then try again 12 Troubleshooting Warning Never remove the casing of this apparatus 7R NHHS WKH ZDUUDQW YDOLG QHYHU WU WR UHSDLU the system yourself If you encounter problems when using WKLV DSSDUDWXV FKHFN WKH IROORZLQJ SRLQWV before requesting service If the problem UHPDLQV XQVROYHG...

Page 29: ...scs that have compatible region codes You FDQ ÀQG WKH UHJLRQ FRGH RI RXU XQLW RQ WKH product label Some discs are compatible with more than one region or ALL regions W WMA Windows Media Audio Q DXGLR IRUPDW RZQHG E 0LFURVRIW LV D part of Microsoft Windows Media technology Includes Microsoft Digital Rights Management WRROV LQGRZV 0HGLD 9LGHR HQFRGLQJ WHFKQRORJ DQG LQGRZV 0HGLD XGLR encoding technol...

Page 30: ...CID3292_00_UM_V2 0 2010 Koninklijke Philips Electronics N V All rights reserved Document order number ...

Reviews: