background image

16

EN

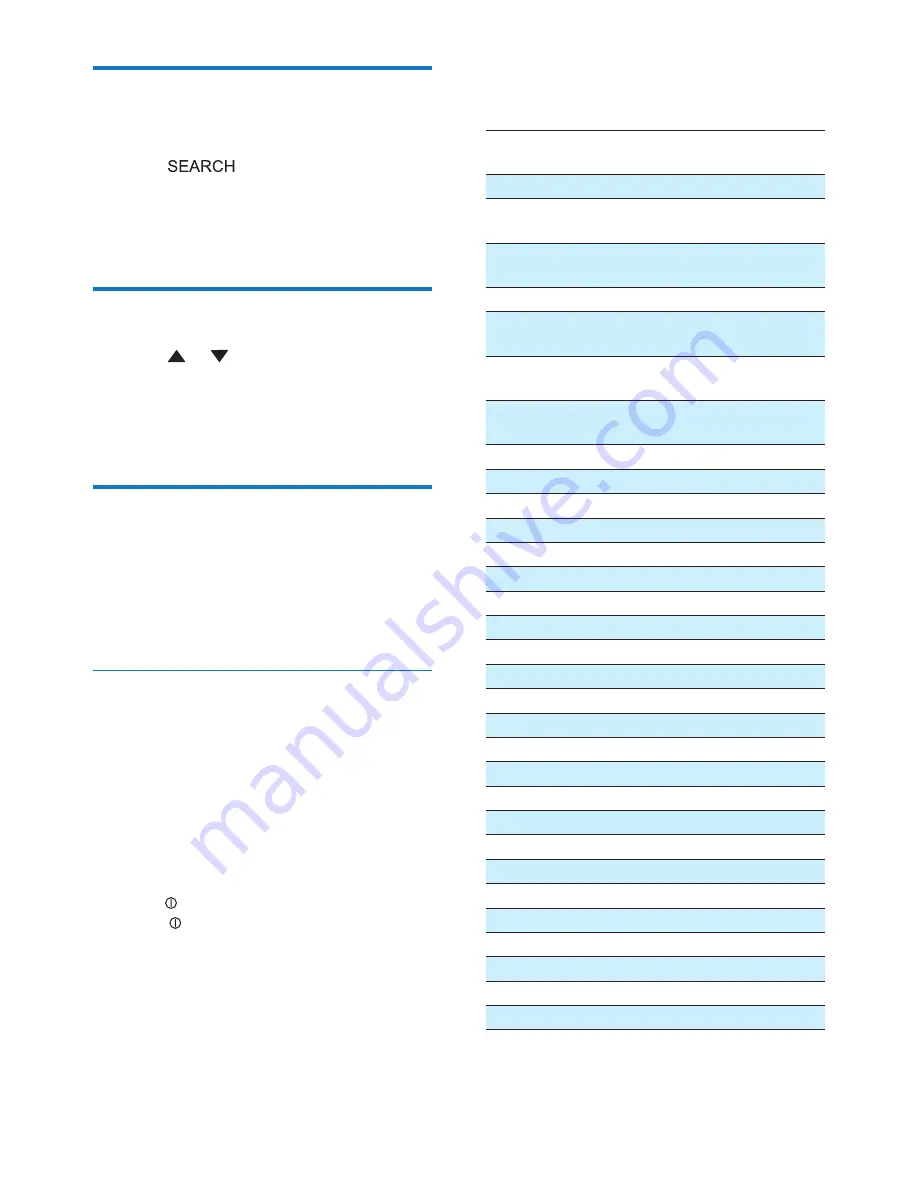
Store stations automatically

You can store up to 6 stations in each band.

Press 

.


»

The six strongest stations of the 

selected band are saved in preset 

channels 1-6 automatically.

Select the preset station

Press   or   to select band.


»

[FM]

 or 

[AM]

 is display.

Press the numeric button (1 to 6) to select 

the preset station.

Play with RDS

The RDS (Radio Data System) function 

operates only in areas with FM stations 

broadcasting RDS signals. If you tune to an RDS 

station, an RDS icon and the station name are 

displayed.

Search for an RDS station by PTY 

information

The PTY (program type) function lets you find 

similar programming by genre, and the radio 

starts searching for stations broadcasting in the 

selected category.

Press and hold 

SEARCH


»

The PTY menu is displayed.

Turn   to select a program type, then 

press   to start searching.

Select a channel.

RDS program types

Item Program 

type

Description

 1

NEWS

News services

 2

AFFAIRS

Politics and current 

affairs

 3

INFO

Special information 

programs

 4

SPORT

Sports

 5

EDUCATE

Education and advanced 

training

 6

DRAMA

Radio plays and 

literature

7

CULTURE

Culture, religion and 

society

8

SCIENCE

Science

9

VARIED

Entertainment programs

10

POP M

Pop music

11

ROCK M

Rock music

12

MOR M

Light music

13

LIGHT M

Light classical music

14

CLASSICS

Classical music

15

OTHER M

Special music programs

16

WEATHER

Weather

17

FINANCE

Finance

18

CHILDREN

Children’s programs

19

SOCIAL

Social Affairs

20

RELIGION

Religion

21

PHONE IN

Phone In

22

TRAVEL

Travel

23

LEISURE

Leisure

24

JAZZ

Jazz Music

25

COUNTRY

Country Music

26

NATION M

National Music

27

OLDIES

Oldies Music

28

FOLK M

Folk Music

29

DOCUMENT

Documentary

30

TES

Alarm Test

31

ALARM

Alarm

Summary of Contents for CED232

Page 1: ...www philips com welcome User manual Always there to help you Register your product and get support at CED232 Question Contact Philips ...

Page 2: ......

Page 3: ...5 Manual tune to a radio station 15 Auto tune to a radio station 15 Store stations manually 15 Store stations automatically 16 Select the preset station 16 Play with RDS 16 7 Adjust sound 17 Adjust volume 17 Mute 17 Dynamic Bass Boost 17 MAX sound 17 Select equalizer settings 17 Select listening zone 18 Other sound settings 18 8 System settings 19 Adjust general settings 19 Select video settings 2...

Page 4: ...ilable commercially or anti static sprays intended for discs Clean the apparatus with soft damp cloth Never use substances such as alcohol chemicals or household cleaners on the apparatus The product remote control may contain a coin button type battery which can be swallowed Keep the battery out of reach of children at all times If swallowed the battery can cause serious injury or death Severe in...

Page 5: ...lection of electrical and electronic products and batteries The correct disposal of these products helps prevent potentially negative consequences on the environment and human health Your product contains batteries which cannot be disposed of with normal household waste Please inform yourself about the local rules on separate collection of batteries The correct disposal of batteries helps prevent ...

Page 6: ...nd use the unit Save it for future reference Introduction With the in car audio system you can enjoy your drive while you listen to FM or AM MW radio Audio from USB drive or external devices Music CDs DVD andVCD video What s in the box a Main unit with a sleeve b Carrying case with front panel included c Trim plate d Remote control e ISO male connector X 2 f Disassembly tool X 2 g Screw X 4 h Rubb...

Page 7: ...ss of the display or turn off the display b MENU Access the system menu c Return to previous menu d Screen b c d e t p r o n m l k j i h f g s q a u v w e Unlock the front panel f USB socket g Remote control sensor h R L 6 Select preset station no 6 Select audio channel i 5 Select preset station no 5 ...

Page 8: ...st volume Confirm selection r Select tuner band Select folder s Tune for radio station Skip search for track t EQ AUDIO Select equalizer EQ setting Access audio setting menu u Eject disc v Disc slot w RESET Restore default settings Overview of the remote control a Skip to the previous or next track chapter or file Navigate through on screen menus b Press to power on the system Press and hold to po...

Page 9: ...it the DVD menu of a DVD disc q Press to display the set clock r DISP Press repeatedly to display available information about the current track s ZONE Select a music listening zone t BAND Press to return to radio mode Press repeatedly to select a tuner band u Tune to a radio station Press to skip to the previous next track Press and hold to rewind a chapter title track or search forward fast v Sta...

Page 10: ...r Note This system is designed for negative ground earth 12V DC operation only Always install this system in the car dashboard Other locations can be dangerous as the rear of the system heats up during use To avoid short circuit before you connect make sure that the ignition is off Make sure that you connect the yellow and red power supply leads after all other leads are connected Make sure that a...

Page 11: ...Connect the ISO male connectors and other wires to the rear panel of the main unit if necessary Sockets or connectors on rear panel External sockets or connectors 1 VIDEO OUT Yellow socket Video input socket for an external display device 2 REAR L White socket Rear left speaker 3 REAR R Red socket Rear right speaker 4 AUDIO IN R Red socket Right audio channel output socket of an external video pla...

Page 12: ...t have an on board drive or navigation computer disconnect the negative terminal of the car battery If the car battery is not disconnected to avoid short circuit make sure that the bare wires do not touch each other 1 Make sure that the car dashboard opening is within these measurements 178mm 50 mm 5mm 2 Remove the mounting sleeve with the supplied disassembly tools 3 Install the sleeve into the d...

Page 13: ...the main unit 2 Press the left end of the front panel inwards until it is securely locked with a click Detach the front panel Note Before you detach the front panel make sure that the system is turned off 1 Press to release the front panel 2 Pull the front panel leftward to release it from the chassis of the main unit 3 Pull the front panel outwards to remove it ...

Page 14: ...l special handling may apply See www dtsc ca gov hazardouswaste perchlorate 1 Pull out the battery tray 2 Insert one CR2025 battery with correct polarity as indicated 3 Insert the battery tray Turn on and turn off Turn On Press the power button Turn Off Press and hold the same power button for 3 seconds Set clock 1 Press MENU 2 Press the navigation buttons to select SETTINGS then press 3 Select GE...

Page 15: ...discs DVD video DVD R DVD RW VCD Audio CD CD with JPEG files CD R CD RW Note Ensure that the disc contains playable content You can play DVD discs with the following region codes Press to open the front panel Russia India 8 Insert the disc into the disc slot with label side facing up Play resumes from the point where it was last stopped 9 To remove the disc press the button When the disc is ejecte...

Page 16: ...cs contain two or more subtitle languages During play press on the remote control repeatedly until the language is selected Select audio language You can select the audio language if the video discs contain two or more audio channels During play press on the remote control repeatedly until the language is selected Intro play This feature plays the first 10 seconds of each audio track Press the but...

Page 17: ...dly ZOOM is displayed 2 Press the navigation buttons to pan across the display 6 Radio Manual tune to a radio station 1 Press 2 Press the navigation buttons to select RADIO then press 3 Press and hold or to select band FM or AM is display 4 Press or to tune to a radio station manually Auto tune to a radio station In RADIO mode press and hold or for 3 seconds Store stations manually You can store u...

Page 18: ... The PTY menu is displayed 2 Turn to select a program type then press to start searching 3 Select a channel RDS program types Item Program type Description 1 NEWS News services 2 AFFAIRS Politics and current affairs 3 INFO Special information programs 4 SPORT Sports 5 EDUCATE Education and advanced training 6 DRAMA Radio plays and literature 7 CULTURE Culture religion and society 8 SCIENCE Science...

Page 19: ...ck of the unit with that on the RDS station 3 Turn to select ON then press to confirm 7 Adjust sound Adjust volume To adjust volume rotate knob on the front panel or press VOLUME on the remote control Mute Press on the front panel To release the speakers from mute status press again Dynamic Bass Boost 1 Press on the car audio system for 3 seconds or press on the remote control DBB ON The Dynamic B...

Page 20: ... displayed 2 Press or to select one of the preset zone settings ALL all speakers are in same volume level LEFT front left speaker is louder than the rest of the speakers RIGHT front right speaker is louder than the rest of the speakers FRONT the front speakers are louder than the rear speakers 3 Press to confirm 4 Press to exit Other sound settings You can adjust the front and rear speaker balance...

Page 21: ...ere are General settings DVD settings Language settings and Radio settings Adjust general settings 1 Press The main menu is displayed 2 Press the navigation buttons to select SETTINGS the press to confirm The settings menu is displayed 3 Press or buttons to select the general setting 4 Press then or to select the sub menu and then press to confirm AV IN ON OFF CAMERA ON OFF ...

Page 22: ... Canada Japan Mexico the Philippines South Korea Taiwan and some other countries PAL Used in the United States Canada Japan Mexico the Philippines South Korea Taiwan and some other countries AUTO The correct format is set automatically Select this option if you are not sure which format should be selected TV TYPE 4 3 PS While playing a full height picture the sides of the picture may be trimmed 4 ...

Page 23: ... Select language settings 1 Press 2 Press the navigation buttons to select SETTING the press to confirm 3 Press or buttons to select the language setting 4 Press and then or to select a language OSD LANGUAGE AUDIO LANG SUBTITLE LANG MENU LANG DivX R VOD DEACTIVATION 5 Press to confirm Adjust turner settings 1 Press 2 Press the navigation buttons to select SETTINGS then press 3 Press to select RADI...

Page 24: ...video device to the car audio system 1 Connect the the device to the car audio system 2 Press The main menu is displayed T 3 Press the navigation buttons to select AV IN 4 Operate the connected the device see the device s instructions manual Reset To reset the car audio system to its default setting 1 Detach the front panel 2 Press by using a ball point pen or similar tool All settings are erased ...

Page 25: ... signal format NTSC PAL AUTO Video output 1 2 0V Tuner Frequency range FM 87 5 108 0 MHz 50kHz per step Frequency range AM MW 520 1710 kHz 9kHz per step Usable sensitivity FM 8 uV Usable sensitivity AM MW 30 uV LCD Screen size 3 inches 16 9 Display resolution 320 x 240 dots Contrast ratio 300 Brightness 250 cd m Compatible USB devices USB flash memory USB 2 0 or USB1 1 USB flash player USB2 0 or U...

Page 26: ...following points before requesting service If the problem remains unsolved go to the Philips web site www philips com support When you contact Philips make sure that your system is nearby and the model number and serial number are available No power Car engine has not been started Start the car engine Connections is incorrect Fuse has been damaged Replace fuse No sound Volume is too low Adjust vol...

Page 27: ...do not match with the DVD Adjust video DVD settings Video connection is improper Check the connections Noise in broadcasts Signals are too weak Select other stations with stronger signals Check the connection of the car antenna Change broadcast from stereo to mono Preset stations lost Battery cable is not connected correctly Connect the battery cable to the terminal that is always live Fuse is bro...

Page 28: ...X Innovations Limited or one of its affiliates further referred to in this document as WOOX Innovations and is the manufacturer of the product WOOX Innovations is the warrantor in relation to the product with which this booklet was packaged Philips and the Philips Shield Emblem are registered trademarks of Koninklijke Philips N V CED232_55_UM_V1 0 ...

Reviews: