background image

CASSETTE RECORDER

17

English

AZ 5130  

page

17

AZ 5155  

page

17

1.

Set the source selector to 

TAPE/OFF

.

2.

Press 

STOP•OPEN 

9 /

to open the cassette holder.

3.

Insert a recorded cassette.

4.

Press 

PLAY

1

and playback will start.

5.

Adjust the sound using the 

VOLUME 

and 

DYNAMIC BASS

BOOST

controls.

6.

For brief interruptions, press 

PAUSE

;

. Press 

PAUSE

;

again to

resume playback.

7.

By pressing 

5

or 

6

,fast winding of the tape is possible in both directions.

8.

To stop playback, press 

STOP•OPEN 

9 /

The keys are automatically released at the end of the tape.

9.

Set the source selector to 

TAPE/OFF

position (with the 

cassette keys are released) to switch off the set.

General information on cassette recording

• Recording is permissible insofar as copyright or other rights 

of third parties are not infringed.

• This deck is not suitable for recording on CHROME (IEC 

II

or METAL (IEC 

IV

) type cassettes. For recording you should 

use NORMAL type cassettes (IEC 

I

) on which the tabs have 

not been broken.

• Check and tighten slack tape before use with a pencil, to 

avoid jamming the deck machanism.

• The recording level is set automatically. Altering the VOLUME

and DYNAMIC BASS BOOST controls will not affect the
recording in progress.

• No recording will take place during the 3 seconds, when the

leader tape passes the recorder heads.

Notes : -

No recording will take place during the 7 seconds in the

beginning of the tape.

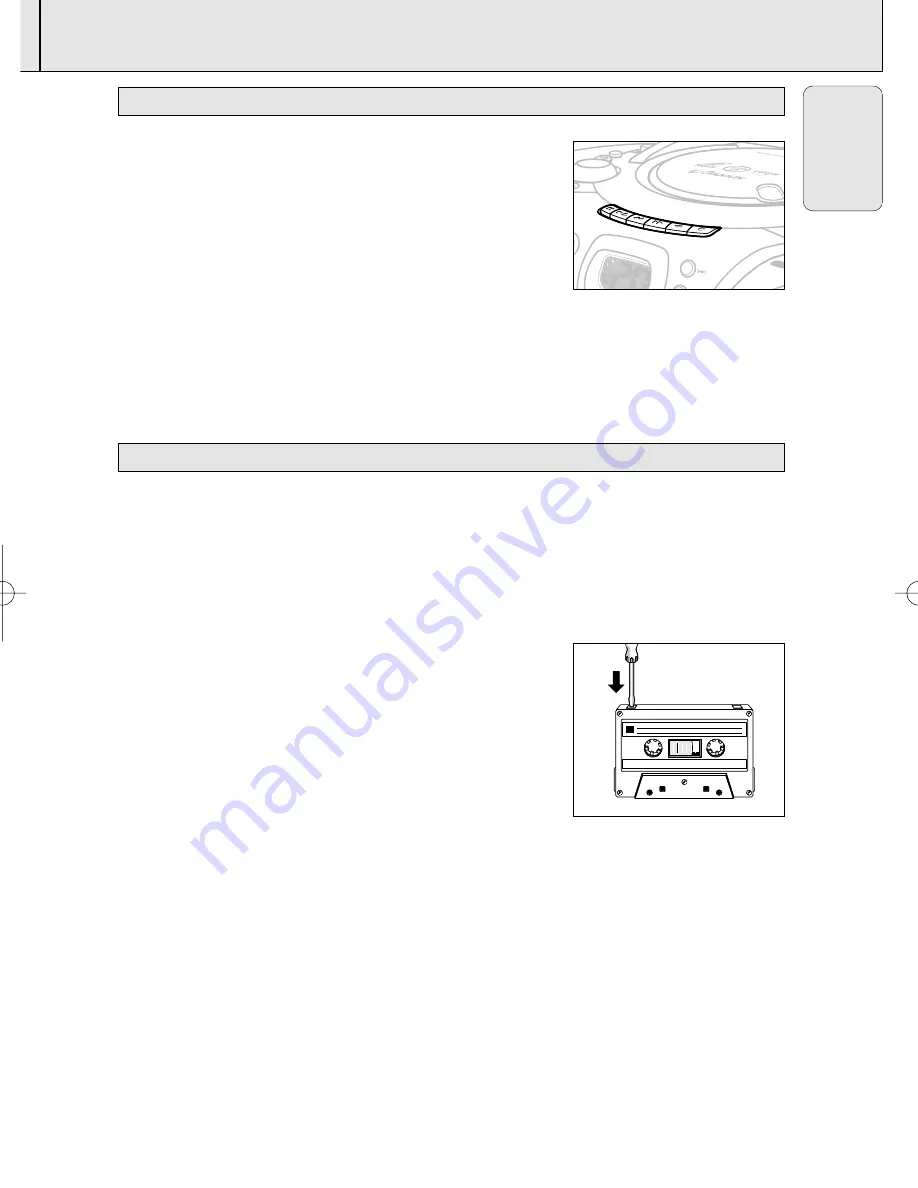
• To prevent the accidental erasure of a recording, keep the cassette side to be safeguarded in

front of you and break out the left tab. Recording on this side is no longer possible.

1

CASSETTE RECORDING

CASSETTE PLAYBACK

SEARCH

E

INCREDIBL

SURRO ND

ULTRA B

NAMIC BASS BO

OST

RECORD

PLAY

SEARC

H

STOP-

OP

EN

PA

US

E

AZ5155/01 eng  7/18/03  8:58 PM  Page 17

Summary of Contents for AZ5155

Page 1: ...AZ5155 AZ5155 VCD MP3 CD Soundmachine ...

Page 2: ...on 9 General Radio 9 CD VCD MP3 CD 10 16 Cassette recorder 17 18 Karaoke 18 Maintenance 19 Troubleshooting 20 MP3 General Information 23 Controls 24 Remote Controls 24 25 Power Supply 26 27 General Operation 27 General radio 27 CD VCD MP3 CD 28 34 Cassette recorder 35 36 Karaoke 36 Maintenance 37 Troubleshooting 38 ...

Page 3: ...UM INCREDIBL SURR UND ULTRA B DYNAMIC BASS ST TUNING PLAY PAUSE STOP CD MODE E RECORD PLAY SEA RCH ST OP OPE N PA USE 108 104 100 96 92 88 FM MH z 1600 130 0 100 0 800 630 530 MW MHz 1 2 3 4 5 6 7 8 9 0 1 MAINS V 2 ...

Page 4: ... by optimum disc playability This is an important parameter for CD players other than CD Audio and especially for the Video CD applications because any loss of data from the disc will at best cause disturbances in the reproduced picture and at worst can cause the player to lose track so that disc playing fails Presenting Super Error Correction To ensure consistently good results when playing Video...

Page 5: ... downloading MP3 files from the Internet ripping songs from your own legal CD s and burning MP3 songs onto a CD R are a delicate process the quality of a MP3 song may vary by these process Subsequently making a MP3 CD may not be entirely perfect As a result of the above imperfection you may experience an occasional skip while listening or an occasional delay in accessing previous next title to MP3...

Page 6: ...e or a track OPEN to open close the CD door RADIO TUNING to tune to radio stations Tuning dial pointer AUDIO VIDEO SOCKET to connect to a TV set Battery door to open the battery compartment Telescopic aerial to improve FM reception AC MAINS Socket for mains lead Voltage selector some version only to adjust to match the local voltage 110 220V before plugging in the set KARAOKE 1 LEVEL MIC KARAOKE 2...

Page 7: ...system R L ST to select channel left channel right stereo sound or to select a language in a bilingual VCD DIGITS 0 9 for CD VCD MP3 CD to select a track number numbers consisting more than 2 figures must be keyed in within 2 seconds PLAY PAUSE 2 to start or interrupt playback SEARCH 5 or 6 for CD VCD MP3 CD to search back or forward ALBUM for MP3 CD only to select previous next album TRACK for MP...

Page 8: ...dicated by the and symbols inside the compartment Remote control Open the battery compartment and insert two batteries type AAA R03 or UM4 preferably alkaline 2 Replace the compartment door making sure the batteries are firmly and correctly in place 3 Remove the batteries if they are exhausted or if they will not be used for a long period The incorrect use of batteries can cause electrolyte leakag...

Page 9: ...eased 1 Set the source selector to FM or MW 2 Adjust the sound using the VOLUME DYNAMIC BASS BOOST and INCREDIBLE SURROUND control buttons 3 Tune to a radio station using the TUNING knob For FM pull out the telescopic aerial To improve FM reception incline and turn the aerial Reduce its length if the FM signal is too strong very close to a transmitter For MW the set is provided with a built in aer...

Page 10: ...VCD 2 Lift to open the CD door OP will be displayed 3 Insert a disc with the label side facing up 4 Close the CD door The total number of tracks of the disc appear on the display no will be displayed if no disc is inserted or error in CD operation For MP3 CD only The total track number XXX and album number AXX will be displayed interchangeably LOADING A DISC DISCS FOR PLAYBACK CD VCD MP3 CD 10 Eng...

Page 11: ... press5 or 6 During searching the volume will be muted For MP3 CD only To select a desired album On the remote control press or until the desired album number appear on the display AXX will be displayed On TV screen the arrow will move forward backward in the ALBUM menu To select a desired track Press or on the set repeatedly or on the remote control press or to select a desired track from the cur...

Page 12: ...ng is automatically cleared as soon as the CD compartment is opened The function of programme setting is disabled in PLAY PAUSE mode Programme cannot be used for VCDs when PBC is switched on Switch off PBC before storing tracks from such a VCD For MP3 CD only 1 In stop mode press PROG on the remote control to enter programme setting PROG will start flashing and P01 will be displayed On TV screen P...

Page 13: ...REPEAT on the remote control or CD MODE on the set until the REPEAT REPEAT ALL icon disappears from the display Notes If the Repeat function is enable and the Stop button is pressed will disable all the repeat play modes Adjusting the TV System Before viewing the Video CD ensure that the set is switched to corresponding PAL or NTSC system of your TV set exception Multi system TV 1 On the remote co...

Page 14: ... programme stored on the VCD Please refer to the information supplied with the disc Pause 1 During playback press 2 to have a still picture on the TV screen The sound will be muted On TV screen PAUSE will be displayed 2 Press 2 again to continue playback Goto 1 Press GOTO on the remote control On TV screen GOTO will be displayed 2 Press digits 0 9 on the remote control to key in the disc time whic...

Page 15: ...sc view function On TV screen up to 9 pictures will be displayed If a menu consists of more than one page press or to view the previous next page The first several seconds of each track will be played To exit review mode press digits 0 9 to play the desired track or 2 to play the current selected track 2 In playback mode press VIEW on the remote control to go to track view function press or to sel...

Page 16: ...first will be displayed TV screen MIX CD DA will be displayed 2 Press MIX SEL on the remote control repeatedly to select other disc modes MP3 CD MP3 is displayed TV screen MP3 menu is displayed Notes For protected CDs MIX CD DA is displayed on your TV screen even if the disc does not have other format The MIX SEL normal functions are not available for protected CDs PLAYING A MIXED MODE DISC ...

Page 17: ...ties are not infringed This deck is not suitable for recording on CHROME IEC II or METAL IEC IV type cassettes For recording you should use NORMAL type cassettes IEC I on which the tabs have not been broken Check and tighten slack tape before use with a pencil to avoid jamming the deck machanism The recording level is set automatically Altering the VOLUME and DYNAMIC BASS BOOST controls will not a...

Page 18: ...e set to select a passage 2 Put the CD player in PAUSE position at the selected passage Recording will start from this exact point when you press RECORD 0 Connect microphones not supplied to the system allowing you to sing along with the music source 1 Connect microphones to the jacks Before connecting the microphone set the microphone level with KARAOKE 1 KARAOKE 2 volume knobs to the lower level...

Page 19: ...he moisture evaporates Use only Digital Audio CDs To take a CD out of its box press the centre spindle while lifting the CD Always pick up the CD by the edge and replace the CD back in its box after use to avoid scratching and dust To clean the CD wipe in a straight line from the centre towards the edge using a soft lint free cloth Do not use cleaning agents as they may damage the disc Never write...

Page 20: ...es not react when buttons Slide the source sector to TAPE OFF Remove and pressed set does not work no display on reconnect the AC power plug for 30 seconds and LCD switch on the system again Sound cannot be heard or is of poor Adjust the volume quality Make sure the MP3 CD was recorded within 32 320 kbps 128kbps preferably with sampling frequencies at 8 48 kHz 44 1kHz preferably The remote control...

Page 21: ...21 English ...

Page 22: ...tralia This warranty does not cover a Mileage or travelling time pickup or delivery installations and cost of insurance b Mileage or travel outside the normal service area covered by selected Authorised Service Centre c Service costs arising from failure to correctly adjust the controls of the product or to observe the instructions or inspections that reveal that the product is in normal working o...

Page 23: ...ing instructions or unauthorised modification to the product or repair by an unauthorised technician 4 Reasonable evidence in the form of a sales docket must be supplied to indicate that the product was purchased no more than 12 months prior to the date of your claim 5 In the event of a failure Philips shall be under no liability for any injury or any loss or damage caused to property or products ...

Page 24: ...41 ...

Page 25: ...English Meet Philips at the Internet http www philips com PDCC JW 03519 W CLASS 1 LASER PRODUCT AZ 5155 ...

Reviews: