background image

F

EATURE

M

ENU

C

ONTROLS

(

CONTINUED

)

1

2

3

4

5

6

7

8

9

0

SLEEP

MENU

S U R F

M U T E

ST

ATUS

PO

WER

CH

CH

VOL

+

VOL

-

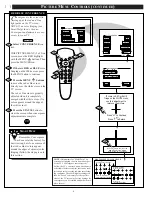
MAIN MENU

PICTURE

FEATURES

SOUND

HELP

EXIT

EXIT

1 OF 3

PICTURE

SOURCE

MORE...

CLOSED

CAPTIONS

FEATURE MENU

CHANNEL

MEMORY

CABLE 

TUNING

EXIT

2 OF 3

MORE...

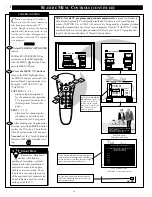
HALF HOUR

REMINDER

FEATURE MENU

CHANNEL

DISPLAY

SLEEP
TIMER

7 : 30 AM

PLEASE ENTER THE

 HOUR TO TURN ON

EXIT

SET CLOCK

HELP

EXIT

ON

OFF 

5

1

4

2

1

2

1ST TIME SETUP

   SET CLOCK &

    ALARM TIMER

SET CLOCK & ALARM TIMER

SET ALARM TIMER

SET ALARM TIMER

SET ALARM TIME

SET ALARM TIME

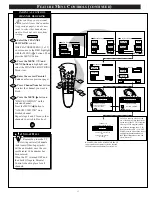
J

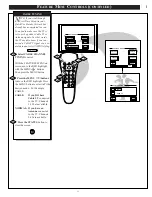
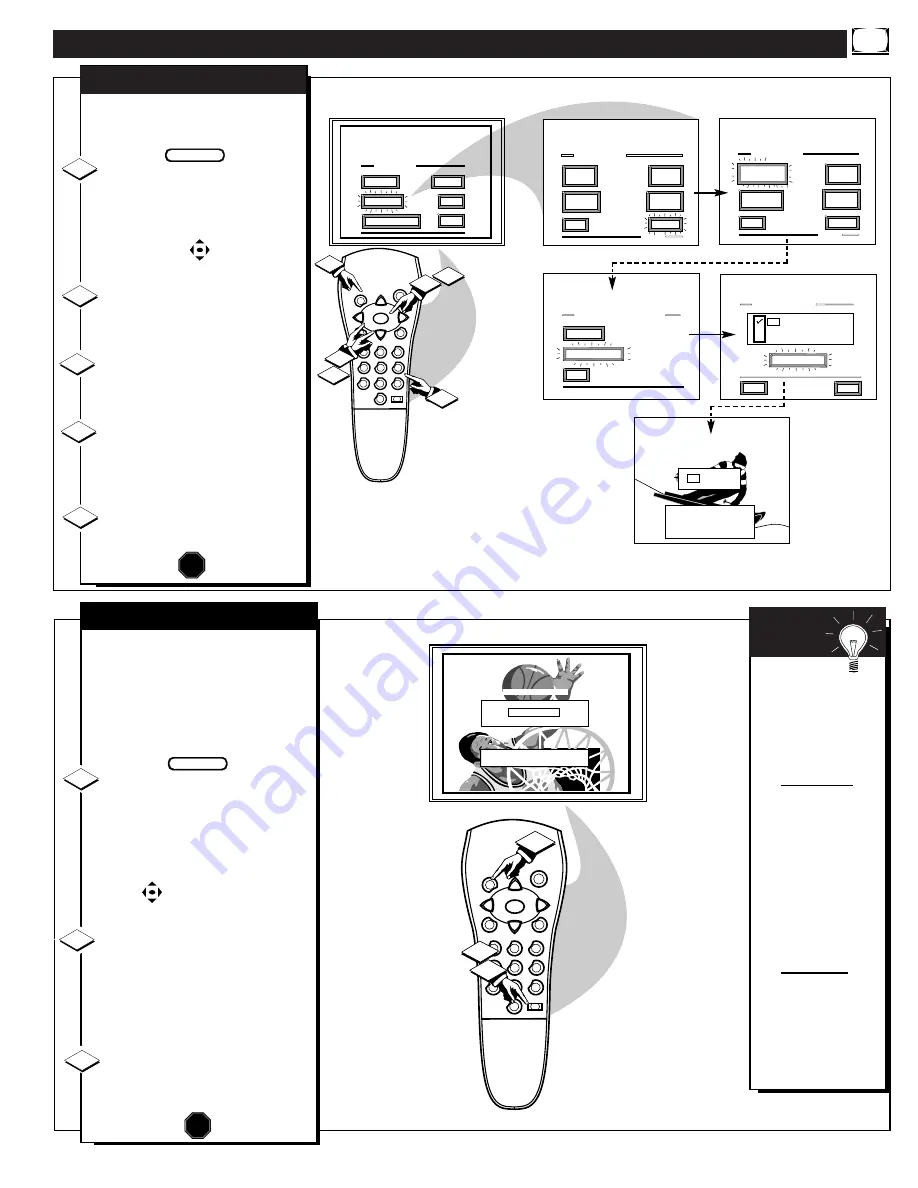
ust like an alarm clock you can
set the TV to turn itself on at the

same time everyday.

Select SET ALARM TIMER

control.

With FEATURES MENU (2 of 3)
on screen, move the RED highlight
with the MENU        buttons. Then
press the MENU button.

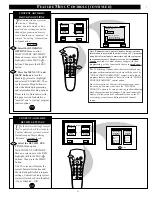
Press the MENU 

▲▼ 

and

MENU buttons to highlight and
select "ON" (

U

).

Press the MENU 

▲▼ 

and

then the MENU buttons to select
"SET ALARM TIME".

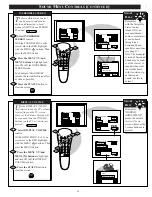
Press the remote's number

buttons to set the "TURN ON"
time for the TV. (Press MENU 

▼ 

for AM or PM.)

Press the STATUS button to

set the "ALARM TIME" and clear
the screen.

SET ALARM TIMER

STOP

1

2

3

BEGIN

4

5

1

2

3

4

5

6

7

8

9

0

SLEEP

MENU

S U R F

M U T E

ST

ATUS

PO

WER

CH

CH

VOL

+

VOL

-

3

2

1

1 : 15 

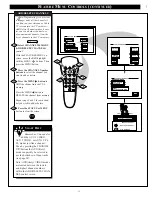
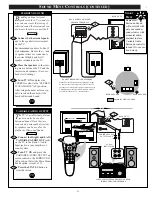
Press SLEEP to CHANGE

SET SLEEP TIMER

H

ave you ever fallen asleep in
front of the TV only to have it

wake you up at two in the morning
with a test pattern screeching in
your ears?  Well, your TV can save
you all that trouble by automatical-
ly turning itself off.

Press the SLEEP button on the

remote control.

Note: you can also select the
SLEEP control with the TV’s on-
screen FEATURES MENU (2 of 3).
Move the RED highlight with the
MENU        buttons. Then press the
MENU button.

Press the SLEEP button repeat-

edly to pick the amount of time (15
minutes to 2 hours ahead) before
the TV will turn itself off. 

The (+), (-) buttons can also be used
to set the amount of time.

Press the STATUS or MENU

button to clear the screen after you
have set the time for the TV to turn
off.

1

2

3

STOP

Remember,
to see how many
minutes are left
before the TV shuts
itself off, reselect
the SLEEP TIMER
control screen.

To stop a SLEEP
TIMER setting,
reset the timer back
to OFF. (Turning
the TV off and on,
or pressing a button
during the last
minute of a timer
setting, will also
cancel a setting.) 

A few seconds
before the TV is to
shut off a message
will come on the
screen telling you

GOOD NIGHT.

S

MART

H

ELP

BEGIN

SLEEP TIMER

15

Summary of Contents for 9P5511C199

Page 1: ...Instructions for use 9P5511C1 9P5514C1 Projection Television ...

Page 2: ...nit which may cause an electrical shock For the safety of everyone in your household please do not remove the product covering sThe exclamation point calls attention to features for which you should read the enclosed lit erature closely to prevent operating and maintenance problems WARNING TO PREVENT FIRE OR SHOCK HAZARD DO NOT EXPOSE THIS EQUIPMENT TO RAIN OR MOISTURE CAUTION To prevent electric ...

Page 3: ...Power supply cords should be routed so that they are not likely to be walked on or pinched by items placed upon or against them paying particular attention to cords and plugs convenience receptacles and the point where they exit from the appliance 12 Cleaning The appliance should be cleaned only as recommended by the manufacturer 13 Power Lines An outdoor antenna should be located away from power ...

Page 4: ...KERS VIDEO OUT AUDIO OUT R L L R FIXED VAR ANT A CABLE 75 V UHF VHF Y INPUTS PB PR S VIDEO VIDEO AUDIO AUX 1 AUX 2 R L VIDEO OUT AUDIO OUT L R FIXED VAR ANT A CABLE 75 V UHF VHF INPUTS VIDEO AUDIO AUX 1 AUX 2 R L Acombination outdoor or indoor antenna receives normal broadcast channels 2 13 VHF and 14 69 UHF Your con nection to such an antenna is easy since there is only one antenna plug 75Ω ohm o...

Page 5: ...es to complete your regis tration card The serial number for the TV is on the back of the set Refer to the back of this manual for instructions on the cleaning and care of the TV 12 1 2 3 4 5 6 7 8 9 10 11 5 End of Life disposal Your new projection television and its packaging contain materials that can be recycled and reused Specialized companies can recycle your product to increase the amount of...

Page 6: ...button Press the or buttons to adjust the selected control Press the STATUS button to clear the screen 1 2 3 SMART HELP Remember When the bar scale is centered control set tings are at normal mid range lev els BRIGHTNESS Press or until dark parts of the picture show good detail PICTURE Press or until whitest parts of the picture are as bright as you prefer COLOR Press or to add or eliminate color ...

Page 7: ...ENHANCED mode Press the STATUS button to clear the screen CLEARVIEW STOP 1 2 3 BEGIN 7 1 2 3 4 5 6 7 8 9 0 SLEEP MENU S U RF M U T E STATUS POWER CH CH VOL VOL MAIN MENU PICTURE FEATURES SOUND HELP EXIT PICTURE MENU EXIT 2 OF 2 MORE PICTURE MENU SHARP PICTURE CLEARVIEW EXIT 1 OF 2 COLOR TINT MORE BRIGHT FLESH CORRECTION CONVERGENCE FLESH CORRECTION HELP EXIT ON OFF 3 1 1 2 2 1ST TIME SETUP Use the...

Page 8: ...he MENU buttons to move the red or blue cross directly over the white cross on the TV screen The red or blue cross is properly adjusted when it is completely merged with the white cross No color appears around the edge of the white cross Press the STATUS button to clear the screen when convergence adjustments are complete 1 2 3 STOP SMART HELP Remember Convergence has been set at the factory for b...

Page 9: ...MENU on screen move the RED highlight with the MENU buttons Then press the MENU button Press the MENU buttons to move the RED highlight Press the MENU button to turn the desired PICTURE SOURCE control ON U ANTENNA for a picture signal coming from the ANTENNA plug on the TV AUX 1 VIDEO for a picture sig nal coming from the AUX 1 Video Input jack on the rear of the TV AUX 1 Y PB PR for picture sig n...

Page 10: ...formation for CC programs After making your Caption mode selection press the STATUS button to clear the TV screen The selected Closed Caption mode will be active To cancel set the Closed Captioned feature to OFF when finished view ing 1 2 STOP FEATURE MENU CONTROLS CONTINUED NOTE Not all TV programs and product commercials are made for broadcast with Closed Caption CC information included Neither ...

Page 11: ... pick up either Cable TV or Antenna signals In other words the TV needs to know if you con nected a Cable TV signal or a nor mal antenna to its ANTENNA plug Select CABLE CHANNEL TUNING control With the FEATURES MENU on screen move the RED highlight with the MENU buttons Then press the MENU button Press the MENU buttons to move the RED highlight Press the MENU button to select U the desired mode Fo...

Page 12: ...n the CHANNEL but tons are pressed Select CHANNEL MEMORY START AUTO PROGRAM MING control With the FEATURES MENU on screen move the RED highlight with the MENU buttons Then press the MENU button Press the MENU button to turn AUTO PROGRAMMING ON The TV shows which channel num bers are SAVED U as they are added into memory Auto programming CHANNEL MEMORY is finished shows when the TV is through addin...

Page 13: ...ct CHANNEL MEMORY ADD DELETE CHANNELS control With the FEATURES MENU on screen move the RED highlight with the MENU buttons Then press the MENU button Press the CHANNEL Number buttons to select the channel you want to add or delete Press the MENU button to ADD the channel into the TV s memory Press the MENU button to DELETE the channel from memory Repeat steps 2 and 3 for each chan nel you wish to...

Page 14: ...S button to set the clock in operation and clear the screen STOP 1 2 3 BEGIN FEATURE MENU CONTROLS CONTINUED 14 Remember be sure to press 0 first and then the hour number for single digit entries TV Clock settings may be lost when the TV is unplugged or AC power to the set is interrupted SMART HELP 1 2 3 4 5 6 7 8 9 0 SLEEP MENU S U RF M U T E STATUS POWER CH CH VOL VOL MAIN MENU PICTURE FEATURES ...

Page 15: ...N 4 5 1 2 3 4 5 6 7 8 9 0 SLEEP MENU S U RF M U T E STATUS POWER CH CH VOL VOL 3 2 1 1 15 Press SLEEP to CHANGE SET SLEEP TIMER Have you ever fallen asleep in front of the TV only to have it wake you up at two in the morning with a test pattern screeching in your ears Well your TV can save you all that trouble by automatical ly turning itself off Press the SLEEP button on the remote control Note y...

Page 16: ... the MENU buttons Then press the MENU button Press the MENU and MENU buttons to highlight and select the SETUP CODE item Press 0 7 1 1 on the remote XXXX shows on the ACCESS CODE SETUP screen as you press the number buttons INCORRECT ACCESS CODE TRY AGAIN will also show on the screen Press 0 7 1 1 on the remote again Next Enter Your New Access Code shows on the screen Enter a new four digit number...

Page 17: ...ol With FEATURES MENU 3 of 3 on screen move the RED highlight with the MENU buttons Then press the MENU button Press the MENU and MENU buttons to highlight and select the CHANNEL BLOCKING Menu item Enter the correct Parental Code number see previous page Press Channel Number buttons to select the channel you want to block Press the MENU button to BLOCK VIEWING on the selected channel Press the MEN...

Page 18: ...lanations on the different Rating system levels and their uses Select the CONTENT ADVI SORY Menu option With PARENTAL CONTROL Menu on screen move the RED highlight with the MENU but tons Then press the MENU button A Parental Guideline Movie Rating status screen will appear with a review of currently BLOCKED Content Advisory categories Press the MENU button to select the ENTER ACCESS CODE Menu item...

Page 19: ...ituations PG Parental Guidance This programming contains material that parents may find unsuitable for younger children It may contain one or more of the following Moderate violence some sexual situations infrequent coarse language or some suggestive dialogue PG 13 This programming contains material that parents may find unsuitable for children under the age of 13 It contains one or more of the fo...

Page 20: ...ly blocked as well TV Y Appropriate for all children Designed for a very young audience including children ages 2 6 This type of programming is not expected to frighten younger children TV Y7 Appropriate for children seven and older It may be more appropriate for children who have acquired the development skills needed to distinguish between make believe and reality This programming may include mi...

Page 21: ...ing access for channel programs and movies even when they are unrated or contain no rating information as broadcasted Select the BLOCKING OPTIONS Menu control With CONTENT ADVISORY Menu on screen move the RED highlight with the MENU buttons Then press the MENU button Press the MENU and MENU buttons to turn the Blocking System On highlight and select U ENABLED Then use the remote Menu buttons to se...

Page 22: ...OL MAIN MENU PICTURE FEATURES SOUND HELP EXIT EXIT 1 OF 3 PICTURE SOURCE MORE CLOSED CAPTIONS FEATURE MENU CHANNEL MEMORY CABLE TUNING EXIT 2 OF 3 MORE HALF HOUR REMINDER FEATURE MENU CHANNEL DISPLAY SLEEP TIMER LANGUAGE SELECTION HELP EXIT ENGLISH ESPAÑOL FRANCAIS 3 1 2 1 2 EXIT 3 OF 3 FEATURE MENU LANGUAGE SELECTION MORE MORE PARENTAL CONTROL 1ST TIME SETUP SET CLOCK ALARM TIMER Note If you went...

Page 23: ... 5 6 7 8 9 0 SLEEP MENU S U RF M U T E STATUS POWER CH CH VOL VOL MAIN MENU PICTURE FEATURES SOUND HELP EXIT SOUND MENU BASS BOOST EXIT 1 OF 3 BASS TREBLE MORE BALANCE HELP EXIT NEXT MIN MAX BASS 3 1 2 1 1ST TIME SETUP INCREDIBLE STEREO Your TV also has individual sound adjustment controls The BASS low frequency TREBLE high frequency and Speaker BALANCE may all be used to adjust the sound playback...

Page 24: ...w s a n d t o d a y s a n d f o r n e w s a n d SECOND AUDIO PROGRAM HELP EXIT NEXT NORMAL SOUND SECOND PROGRAM SOUND SECOND AUDIO PROGRAM SOUND MENU EXIT 2 OF 3 TV SPEAKERS MORE DISPLAY VOLUME STEREO SOUND MENU BASS BOOST EXIT 1 OF 3 BASS TREBLE MORE BALANCE INCREDIBLE STEREO SECOND PROGRAM SOUND CAN ONLY BE SELECTED U WHEN SAP INFORMATION IS PRESENT ON CURRENT CHANNEL 1 2 3 SOUND MENU CONTROL CO...

Page 25: ...JUSTMENT 3 1 1 2 2 1ST TIME SETUP SOUND MENU BASS BOOST EXIT 1 OF 3 BASS TREBLE MORE BALANCE INCREDIBLE STEREO SOUND MENU SECOND AUDIO PROGRAM EXIT 2 OF 3 TV SPEAKERS MORE DISPLAY VOLUME STEREO Use the DISPLAY VOLUME control to see the TV s volume level settings on the TV screen Once set the Volume Display will be seen each time the VOLUME buttons on the TV or remote are pressed Select DISPLAY VOL...

Page 26: ... RED highlight with the MENU buttons Then press the MENU button Press the MENU and MENU buttons to highlight and turn OFF U the TV SPEAKERS control You should now only hear TV sound coming from the audio sys tem speakers Press the STATUS button to clear the screen STOP 1 2 3 4 5 BACK OF TV AUDIO SYSTEM AUDIO IN RED WHITE SOUND MENU CONTROLS CONTINUED BEGIN VARIABLE AUDIO OUTPUT JACKS SMART HELP Re...

Page 27: ...se effect which requires a lower volume level than the TV s front speakers 2 PRIMARY VIEWING AREA TV REAR SPEAKER REAR SPEAKER BEGIN VARIABLE AUDIO OUTPUT The TV s Variable Audio Output jacks can also be used for Surround Sound Once they are connected an external hi fi system its speakers can be used for the playback of Surround Sound Connect the R ight and L eft VARIABLE AUDIO OUT jacks on the TV...

Page 28: ...1 AUDIO IN jacks on the TV Select the AUX 1 VIDEO PICTURE SOURCE SELECT control on the TV With the FEATURES MENU on screen move the RED highlight with the MENU buttons Then press the MENU button Press the MENU and MENU buttons to highlight and select U the AUX 1 VIDEO mode Turn the VCR ON and press PLAY to view the tape on the TV AUX 1 VIDEO INPUTS 1 2 3 4 STOP BACK OF TV VIDEO IN YELLOW AUDIO IN ...

Page 29: ...e FEATURES MENU on screen move the RED highlight with the MENU buttons Then press the MENU button The AUX 1 S VIDEO picture source option appears only when a S VIDEO cable has been connected to the TV s AUX 1 IN puts Turn the VCR ON and place it in the S VIDEO or S VHS play back mode Insert S VHS cassette tape and playback in a normal man ner AUX1 S VIDEO INPUTS STOP 1 2 3 4 S VHS VCR AUDIO OUT RE...

Page 30: ...X 1 AUDIO IN jacks on the TV Select the AUX 1 Y PB PR PICTURE SOURCE control on the TV With the FEATURES MENU on screen move the RED highlight with the MENU buttons Then press the MENU button Press the MENU and MENU buttons to highlight and select U the AUX 1 Y PB PR mode Turn the DVD player ON and press PLAY to view the source material playback on the TV COMPONENT VIDEO INPUTS 1 2 3 4 STOP COMPON...

Page 31: ...EO OUT jack from the TV to the VIDEO IN jack on the VCR Connect the AUDIO OUT jacks R ight and L eft from the TV to the AUDIO IN jacks on the VCR Select the ANTENNA PIC TURE SOURCE control on the TV With the FEATURES MENU on screen move the RED highlight with the MENU buttons Then press the MENU button Select the channel on the TV that you want to record Turn the VCR ON Put a cas sette tape in the...

Page 32: ...U The on screen HELP menu offers both Operating Tips and a list of Glossary definitions for different features on your TV These items are given to provide you with more information and details on a select group of feature operations Select HELP on the TV s Main Menu Press the remote s Menu buttons to move UP DOWN and from SIDE TO SIDE within the list of on screen features Press MENU to select the ...

Page 33: ... could leave an image per manently on the picture tube When not in use turn the video source OFF Regularly alternate the use of such video sources with normal TV viewing 33 Check antenna connections on the rear of the TV Are they properly secured to the antenna plug on the TV Check the CABLE TUNING control for correct position Check PICTURE SOURCE control for correct position ANTENNA AUX 1 AUX2 VI...

Page 34: ...g The procedure of adding or deleting channel num bers into the TV s memory circuits In this way the TV remem bers only the locally available or desired channel numbers and skips over any unwanted channel numbers PTV Projection Television Rear and or Front projection design systems are available Remote Sensor Window A window or opening found on the TV control panel through which infrared remote co...

Page 35: ... Time Set Up Q U 2 Glossary TV Terms 34 Help Menu 33 Q U 2 4 Inputs Audio and Video 28 30 Language Control 22 Q U 2 Menu Q U 2 4 Minus Plus Buttons Q U 3 4 Parental Control 16 21 Power Light Indicator Q U 3 Precautions Safety 2 3 32 Q U 1 Programming Channels 12 Q U 2 Remote Control Q U 2 3 4 Requesting Service 32 36 37 RF Coaxial Cable Q U 1 Reminder Time and Channel 14 Safety Precautions 2 3 32 ...

Page 36: ...RENEWED 90 DAY LIMITED WARRANTY ...

Reviews: