


7
Use of the menus
Picture 2 menu
Zoom
Select
Zoom On
to activate the zoom function.You may also activate the
zoom function with the
ZOOM ON/OFF
button on the remote control.
If no zoom is active, press the cursor left/right, up/down to select which part
of the screen will be zoomed.
Zoom factor
Select
Zoom factor
and press the cursor left/right to adjust the zoom factor
and to change the magnification of the picture.
If zoom is not active changing the magnification factor will have no effect on
the displayed picture.
Format
(only available in 4:3 VGA mode and SD video mode)
Select
Format
to summon a list of
available
display formats.
Press the cursor up/down to select another display format: 4:3,
Movie Expand 16:9 or Wide screen.
Note: Movie Expand 16:9 is not available in VGA mode.
Shift
(only available in VGA mode on VGA 1 or VGA 2 and in one of the HD
modes. See Connect Peripheral equipment, p. 9.)
This control allows you, when necessary, to move the picture in a horizontal
or vertical way.
&
Use the cursor left/right, up/down to adjust.
é
Press the
OK
button when done.
Clock frequency
(only available in VGA mode on VGA 1 or VGA 2. See Connect
Peripheral equipment, p. 9.)
This control allows you, when necessary, to adjust the values of the clock
frequency so that especially text can be displayed with an optimal overall
sharpness.
Use the cursor left/right to adjust.
Phase
(only available in VGA mode on VGA 1 or VGA 2.
See Connect Peripheral equipment, p. 9.)
This control allows you, when necessary, to adjust the pixel phase of the
picture to avoid picture interference.
Use the cursor left/right to adjust.
Auto align
(only available in VGA mode on VGA1 or VGA2 and in one of the HD
modes. See Connect Peripheral Equipment, p. 9.)
This control allows you to automatically adjust the shift, the clock frequency
and the phase in VGA mode and the shift in HD modes.
Press
OK
to execute.
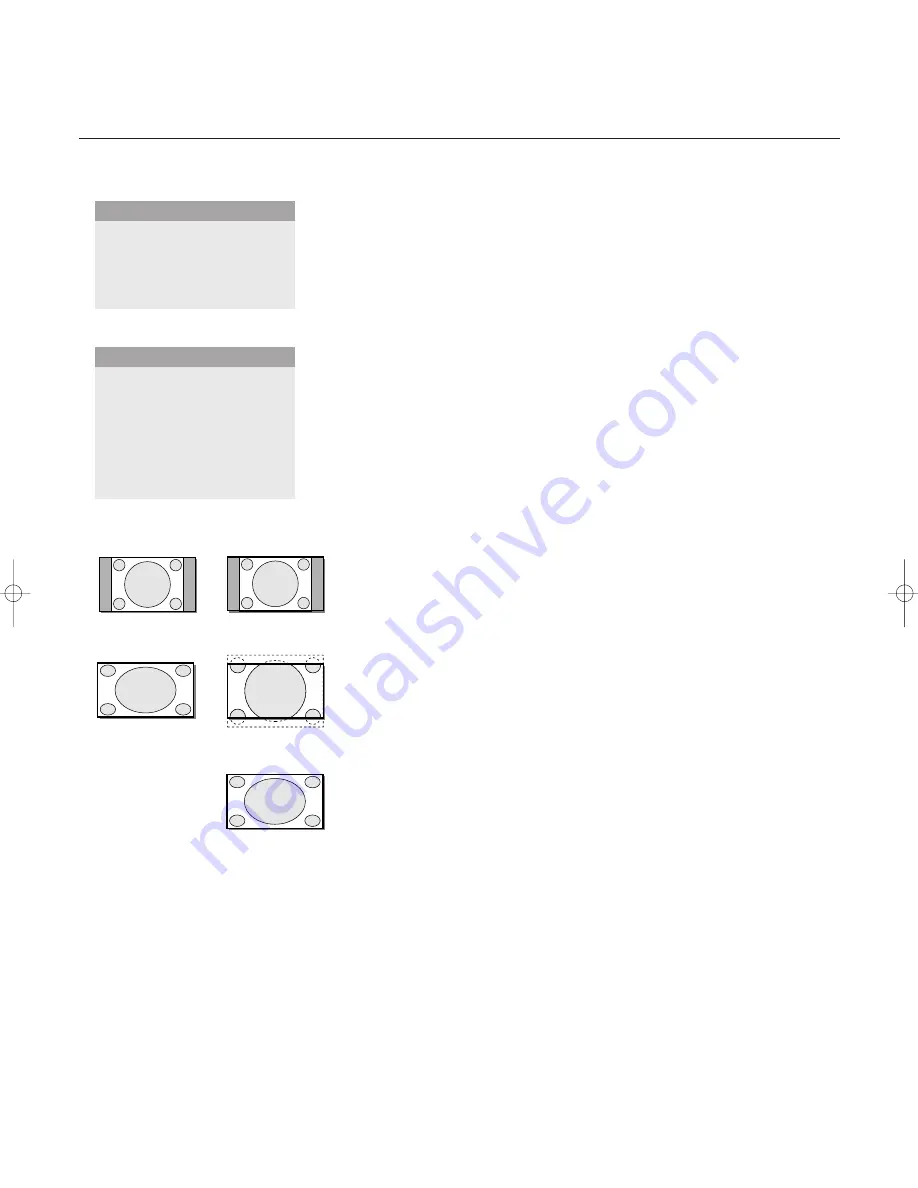
4:3
Wide screen
4:3
Movie expand 16:9
Wide screen
SD video-mode
4:3 VGA-mode
Format
q
4:3
Movie expand 16:9
Wide screen
Zoom
Z
Zoom factor
Â
Pict.
a
(Format)
q
4:3
Wide screen
Zoom
Z
Zoom factor
Â
(Shift)
‹
(Clock frequency)
S
(Phase)
fi
(Auto align)
X
Pict.
a
SD video-mode
VGA-mode + HD video mode
2
2
1016.1 en 02-07-2002 09:46 Pagina 7


