9
EN
Guided installation
Note
•
As part of the Guided Install, there is PC application to support the
installation. Guided Install for PC is an application that can be downloaded at
www.philips.com/hospitality or contact Philips agent representative, this tool is
subject to availability.
In the 1st time (Virgin) installation, the OSD will instruct you
step by step to do the TV installation setting.
1
Guided Install – Initial Wizard.
2
Guided Install – PPV System selection
.
•
If PPV System is selected as
[Yes]
. The Screen menu will
request for selection of Communication Type which includes
[SmartPort SPI]
(select
[No]
,
[SPI-5V]
,
[SPI-3V3]
) and
[Serial
Express]
.
3
Guided Install – Standalone Pro : Idiom selection.
(Skipped if PPV system is selected as
[Yes]
.)
4
Guided Install –
[Install TV Channels]
.
5
Guided Install –
[Install TV Settings]
: Select this option,
you can start to Install TV setting Power ON Setting.
Keyboard and RC Lock Setting, CEC Communication.
6
Guided Install – Using Premi Secure.
7
Please select your Auto Update
[Channel]
and
[Time]
.
8
Guided Install – Using Guide.
•
Press
[Yes]
will enable the selection of
[Guide category]
.
9
Guided Install - Guest TV Settings: Select this option, you
can set Guest TV Settings such as Closed Caption, Switch
On Program, Switch On Volume.
10
Guided Install - Guest Welcome Settings: Select this
option, you can set Guest Welcome Settings such as
Welcome Message and Welcome Logo.
11
Guided Install - Configure Advance setting such as Multi
RC, Energy Saving (
[EcoPower]
,
[ESP]
), Standby Mode
(
[Standard]
or
[Fast]
).
12
When above settings are done, press
OK
to confirm the
“Guided Install Finished” is OK.
Channel setting setup
This section describes how to change the channel settings.
1
Press
MENU
on the setup remote control to display the
setup menu.
2
Press
ÎïÍÆ
to select
[Channel Map Setup]
.
•
[Current Channel Setup]
options :
[Channel]
,
[Input]
,
[Channel Logo]
,
[Digital]
,
[RF Channel Number]
,
[MPEG
Program Number]
,
[Rings]
,
[Guide]
,
[Label]
,
[Mute]
.
3
Go to
[Guide]
by pressing
ÎïÍÆ
. Select the categories
of
[High Definition]
,
[Sport]
,
[News]
,
[Kids]
,
[Movies]
,
[Network]
,
[Adult/Hospital]
,
[Lifestyle]
,
[Other/
Education]
by pressing
OK
on the remote control on the
box in menu.
Configuration menu
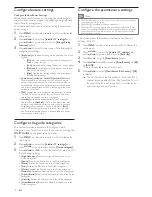
This section describes how to change the TV general
performance settings. Switch On settings and Control settings.
1
Press
MENU
on the setup remote control to display the
setup menu.
2
Press
ÎïÍÆ
to select
[Installer TV settings]
.
3
Press
ÎïÍÆ
to select one of the followings to configure
the settings:
•
[Language]
•
[Picture]
: Sets the Picture Mode or Personalized settings via different
controls.
•
[Audio]
: Sets the Split Audio or Personalized settings via different
controls.
•
[Security]
: Sets the level of security by configuring the settings
such as
[Security]
,
[Keyboard Lock]
,
[Remote Control Lock]
and
[PremiSecure]
.
•
[Control]:
Customizes the control and performance settings such as
[Digit Timeout]
,
[3-Digit entry]
,
[Step tuning]
and
[HDMI-CEC]
.
•
[Energy Saving Features]
: Sets different Power Saving modes such as
[EcoPower]
,
[Auto Sense]
,
[ESP]
, and
[Standby mode]
.
•
[Customizable UI]
: Sets the level of customization of TV Graphical User
Interface.
•
[Programmable UI]
: Enables the TV’s Graphical User Interface to be
programmed via Flash or Browser.
•
[Power On]
: Sets the different Switch on Setting when AC main power
is applied.
•
[Network Installation TCP/IP]
: Enables the configuration of different
control parameters of the TCP/IP medium such as IP address and DNS
server.
•
[Guide Category]
: Enables/disables the display of the Guide Category
icons on the Guide screen.
•
[Clock Setup]
: Enter the TV channel number that will provide the date
and clock information.
•
[Help Text]
: Enables/disables the help text for menu options.
•
[Factory Default]
: Set to factory default Out-Of-Box setting.
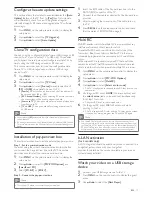
Configure the switch on settings
1
Press
MENU
on the setup remote control to display the
setup menu.
2
Press
ÎïÍÆ
to select the
[Guest TV settings]
and go
one level down to
[Switch On/OSD]
option.
3
Press
ÎïÍÆ
to select one of the followings to configure
the settings:
•
[Hotel Logo]
: Sets the Hotel Logo during turn on.
•
[Welcome Picture]
: Sets the Hotel Welcome Image.
•
[Welcome Message]
: Sets Welcome Message.
•
[Switch On Program]
: Sets a channel that is displayed when TV is
turned on.
•
[Switch On Volume]
: Specifies the volume at which the TV is
turned on.
•
[Channel Display]
: Sets the display of channel number, channel label
and channel logo on the screen.


