English
29
A/V 1
IN
AUDIO
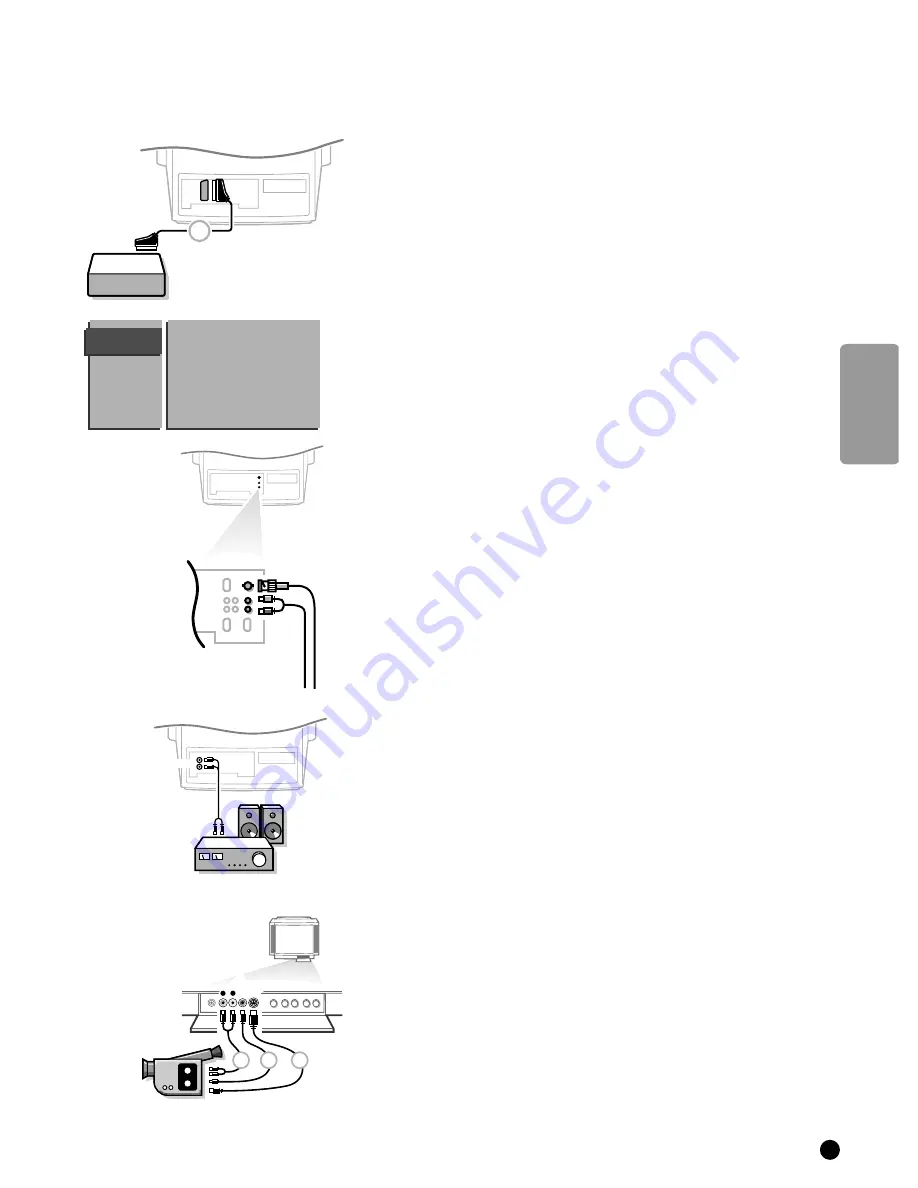
TV and a CD-i/Photo CD
4
Connect eurocable
1
as shown opposite.
4
Press
MENU
on the remote control.
5
The
MAIN MENU
appears on the screen.
4
Keep the key
W
pressed and select
INSTALLATION
.
5
INSTALLATION
lights up.
4
Press
OK
.
5
The
INSTALLATION
menu appears.
4
Select
TV-Configuration
with the keys
W
or
V
and press
OK
.
5
The
TV-CONFIG.
menu appears.
4
Select
CD-i/Photo CD
with the keys
W
or
V
.
5
CD-i/Photo CD
lights up.
4
Press the keys
C
or
B
to select
Present
.
5
This offers you optimum picture quality for your CD-i or Photo CD.
BNC CVBS input
4
Connect your A/V peripheral to the
A/V 1 IN
socket.
4
Connect the audio cables to the audio
R
(right) and
L
(left) inputs below the
A/V 1 IN
connector.
Audio equipment
You can listen to your TV sound via your audio equipment.
4
Connect the audio cables to the audio input of your audio equipment and to
AUDIO L
and
R
at the back of your TV.
4
Make your audio output selection (constant-variable) in the TV Configuration
menu. See p. 12.
Camera and camcorder
4
Connect your camera or camcorder at the front side of your TV.
<
Press the
X
key under the door of the remote control repeatedly to select
the sound coming from one or both loudspeakers of your TV.
4
Connect the equipment to
VIDEO
2
and
AUDIO L
1
for mono equipment.
4
Also connect
AUDIO R
1
for stereo equipment.
S-VHS quality with a S-VHS camcorder is obtained by connecting the S-VHS
cables with the
S-VHS
input
3
and
AUDIO
inputs
1
.
TV CONFIG.
Audio Output
A/V 3 Output
CD-i/Photo CD
Picture tilt
Information Line
Computer
Power Management
Picture Mute
A/V 4
1
AUDIO
L
R
S•VHS
VIDEO
AUDIO
L
R
1
2
3
3104 305 4568.1.gb 01-06-1999 09:31 Pagina 29


