background image


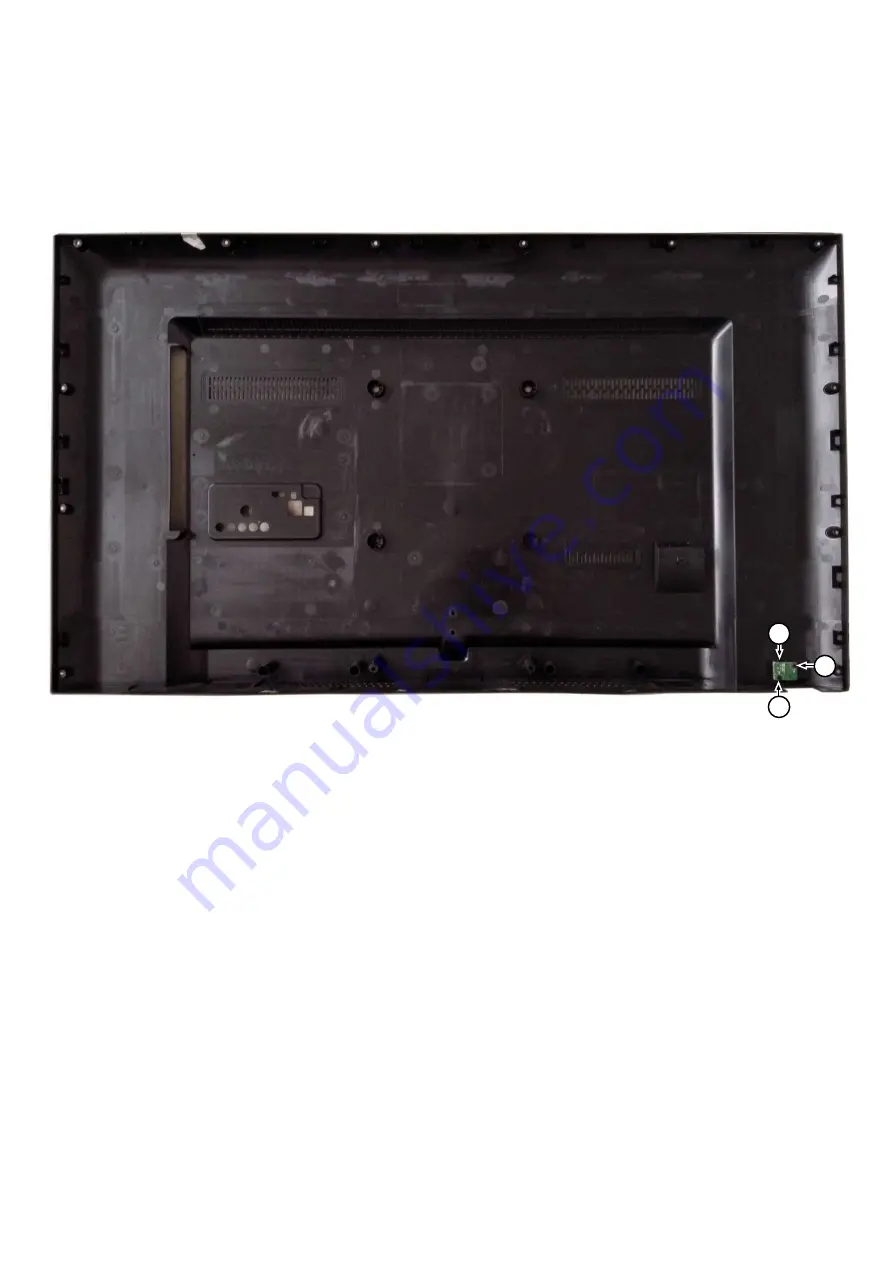
3.2.3 Keyboard Control Unit 

1. 

Release the connector [1] from the SSB Board.   

Caution: 

be careful, the Keyboard is catch on the Back cover, please be careful to avoid damage the fragile connectors!         

2. 

Remove all the fixation screws from the keyboard control panel [2] and take it out from the Back cover 

When defective, replace the whole unit. 


3.2.4    Small Signal Board (SSB) 

Caution:

 it is mandatory to remount all different screws at their original position during re-assembly. Failure to do so may result in damaging the 

SSB. 

1.  Release the clips from the LVDS connector that connect with the SSB[1]. 

Caution:

 be careful, as these are very fragile connectors!   

2.  Unplug all other connectors [2] . 

3.  Remove all the fixation screws from the SSB [3]. 

4.  The SSB can now be shifted from side connector cover, then lifted and taken out of the I/O bracket.   


Summary of Contents for 32PHT5102/56

Page 1: ... N V or their respective owners TP Vision Netherlands B V reserves the right to change products at any time without being obliged to adjust earlier supplies accordingly PHILIPS and the PHILIPS Shield Emblem are used under license from Koninklijke Philips Electronics N V Chassis name Platform Model name TPM17 1A LA MT5800 32PHT5102 98 32PHT5102 79 32PHT5102 56 32PHT5102S 67 32PHT5102S 98 43PFT5102 ...

Page 2: ...accordingly PHILIPS and the PHILIPS Shield Emblem are used under license from Koninklijke Philips Electronics N V 1 Product information 3 2 Connections overview 5 3 Mechanical Instructions 6 Cable dressing 32 5102 series 6 Cable dressing 43 5102 series 6 Assembly Panel Removal 7 4 Service Modes 11 5 Software upgrading Error Code and Panel Code 15 6 Circuit Descriptions 20 7 IC Data Sheet 28 8 Circ...

Page 3: ...Height 429 6 mm Depth 63 6 mm Weight 4 92 kg with TV stand Width 732 5 mm Height 492 mm Depth 179 2 mm Weight 5 05 kg 43PFT5102 without TV stand Width 968 2 mm Height 562 4 mm Depth 63 6mm Weight 8 45 kg with TV stand Width 968 2 mm Height 624 8 mm Depth 193 9 mm Weight 8 58 kg Connectivity TV Side HDMI 1 in MHL USB 1 USB 2 Headphones Stereo mini jack 3 5mm TV Rear CVBS Y Pb Pr CVBS Y Pb Pr Audio ...

Page 4: ...75 ohm coaxial IEC75 Tuner bands Hyperband S Channel UHF VHF DVB DVB T2 DVB C cable QAM Analogue video playback SECAM PAL Digital video playback MPEG2 SD HD ISO IEC13818 2 MPEG4 SD HD ISO IEC 14496 10 Digital audio playback ISO IEC 13818 3 Power Mains power AC 110 240V 10 Ambient temperature 5 C to 35 C Power saving features Eco mode Picture mute for radio Auto switch off timer Eco settings menu T...

Page 5: ...2 Connections Overview 715G8198M NETWORK Digtal Audio Out USB HDMI TUNER HDMI SERVICE CONNECTOR YPBPR Digtal Audio Out USB HDMI TUNER HDMI SCALER DDR DDR ...

Page 6: ...D BOARD 1054 J A SSB 1053 B WIFI MODULE Wifi01 W MAIN POWER SUPPLY 1054 A IR LED BOARD 1054 J LOUDSPEAKER 1184 WIFI MODULE Wifi01 W ECN701 ECN605 ECN164 ECN167 ECN408 ECN605 ECN605 KEY BOARD CONTRO L IR LED BOARD 1054 J E ECN701 ECN164 ECN408 ECN167 KEY BOARD CONTRO L E ECN167 TO KEY ECN167 TO IR ECN605 CN401 CN408 CN167 CN605 CN164 CN9101 CN8601 CN701 CN408 CN167 CN605 CN164 CN9101 CN8603 LOUDSPE...

Page 7: ...gile connectors 2 Remove all the fixation screws 1 and connector 2 from the IR board control unit When defective replace the whole unit 3 2 2 Rear Cover Warning Disconnect the mains internal cable MB to IR board before removing the rear cover 1 Remove fixation screws 2 and 3 that secure the back cover 2 Gently lift the rear cover from the TV Make sure that wires and cables are not damaged while li...

Page 8: ...lace the whole unit 3 2 4 Small Signal Board SSB Caution it is mandatory to remount all different screws at their original position during re assembly Failure to do so may result in damaging the SSB 1 Release the clips from the LVDS connector that connect with the SSB 1 Caution be careful as these are very fragile connectors 2 Unplug all other connectors 2 3 Remove all the fixation screws from the...

Page 9: ...m the PSU 3 The PSU can be taken out of the set now 3 2 7 Speakers 1 Gently release the tapes that secure the speaker cables 2 Unplug the speaker connector from the SSB 3 Take the speakers out When defective replace the both units 3 2 8 WIFI module 1 Unplug the connector 1 from the SSB 2 Remove fixation screw 2 that secure the WIFI module 3 Pull down 3 and take WIFI module out of FRAME COVER PCB W...

Page 10: ...cribed earlier 4 Remove the stand bracket as described earlier 5 Remove the IR LED as described earlier 6 Remove the fixations screws that fix the metal clamps to the front bezel Take out those clamps 7 Remove all other metal parts not belonging to the panel 8 Lift the LCD Panel from the bezel When defective replace the whole unit 3 3 ...

Page 11: ...mote control RC is used with some renamed buttons This has an impact on the activation of the Service modes For instance the old MENU button is now called HOME or is indicated by a house icon 4 2 Service Alignment Mode SAM Purpose To modify the NVM To display clear the error code buffer To perform alignments Specifications Operation hours counter maximum five digits displayed Software version erro...

Page 12: ... to Exit SAM Use one of the following methods Switch the set to STANDBY by pressing the mains button on the remote control transmitter or the television set Via a standard RC transmitter key in 00 sequence Note When the TV is switched off by a power interrupt while in SAM the TV will show up in normal operation mode as soon as the power is supplied again The error buffer will not be cleared SAM mo...

Page 13: ...ll centre can instruct the customer by telephone to enter CSM in order to identify the status of the set This helps the call centre to diagnose problems and failures in the TV set before making a service call The CSM is a read only mode therefore modifications are not possible in this mode Specifications Ignore Service unfriendly modes Line number for every line to make CSM language independent Se...

Page 14: ...el on the RC transmitter can be navigated through the menus How to Exit CSM To exit CSM use one of the following methods Press the MENU HOME button on the remote control transmitter Press the POWER button on the remote control transmitter Press the POWER button on the television set ...

Page 15: ... the TV The TV will detect the USB memory s tick automatically Then a window jumps out as below 6 When the TV software is updated the TV will turn on again automatically Remove your USB flash drive 7 We can enter in CSM or Factory mode to check the current software version 5 1 2 The following update is for upg file Step 1 Ready for F W Upgrade 1 Rename the file to autorun upg 2 Prepare a USB memor...

Page 16: ...rade 1 Press Quick settings then Choose Update Software in the Settings menu 2 Choose Local Updates then press OK 3 Select the file that you downloaded and press OK 4 Choose Update then choose Start on following step ...

Page 17: ...the error buffer The error code buffer contains all errors detected since the last time the buffer was erased The buffer is written from left to right When an error occurs that is not yet in the error code buffer it is displayed at the left side and all other errors shift one position to the right An error will be added to the buffer if this error differs from any error in the buffer The last foun...

Page 18: ...des are available and point to problems on the SSB They are triggered by LED blinking when CSM is activated Only the following layer 2 errors are defined 5 2 4 How to Clear the Error Buffer The error code buffer is cleared in the following cases By using the CLEAR command in the SAM menu By using the CLEAR command in the Factory mode By using the following key sequence on the remote control transm...

Page 19: ...M 214 32PHT5102 98 TPT315B5 1A058 L S28A 218 32PHT5102 79 TPT315B5 1A058 L S24C XM 214 32PHT5102 79 TPT315B5 1A058 L S28A 218 32PHT5102 56 TPT315B5 1A058 L S24C XM 214 32PHT5102 56 TPT315B5 1A058 L S28A 218 43PFT5102 98 TPT430H3 DUYSHA G S1BC XM 215 43PFT5102 98 TPT430H3 DUYSHA G S1CAA 219 43PFT5102 79 TPT430H3 DUYSHA G S1BC XM 215 43PFT5102 79 TPT430H3 DUYSHA G S1CAA 219 43PFT5102 56 TPT430H3 DUY...

Page 20: ...LER MT5800WUEJ BGA 597 DEMODULATOR Si2168 C50 GMR QFN 48 EEPROM AT24C128C SSHM B 128K SOIC 8 EEPROM M24128 BRMN6TP 128k SOP 8 NAND FLASH KLM4G1FEPD B031 4GB FBGA 153 AUDIO AD87588 LG48NAY 20W E LQFP 48 DRAM K4B4G1646E BCMA 4Gb FBGA 96 EMMC 2 13 1 060DF87D TUNER EU ST42CS 2 E 6 1 2 Block diagram RJ45 IR SPI RGB Flash ISTB TB TS LINE IN DTV DEMOD SPEAKER AMP Main Chip CVBS HDMI1 JTAG UM1 YPbPr1 Tune...

Page 21: ... control signals are PS ON Lamp on off DIM PWM not for PSDL In this manual no detailed information is available because of design protection issues 12 output on mode 12V_audio audio AMP power Output to the display in case of IPB High voltage to the LCD panel PSL and PSLS LED driver outputs PSDL high frequent AC current 6 2 2 Diversity The diversity in power supply units is mainly determined by the...

Page 22: ...ent voltage for the Stand by Power system 3V3SB voltage for IR Key board WIFI 12V_PANEL_VCC input from the power supply for the panel common active mode 12V input from the power supply for LNB supply DVDD3V3 1 8V voltage for EMMC when TV on 1 5V_DDRV A_VREFCA_1 A_VREFCA_2 voltage for DDR 3V3_TUNER supply voltage for tuner 5V_USB input intermediate supply voltage for USB Power 12V_AUDIO for the AUD...

Page 23: ...6 3 2 Power layout SSB Power SSB Top View FB702 5V_SW FB712 5_SW U712 3V3SB U705 AVDD3V3 FB603 PVDD L703 Vcck U702 Tuner 3 3V D704 LNB Power ...

Page 24: ...Power SSB Bottom View U707 1 8V L702 DDRV ...

Page 25: ...R MT5800WUEJ BGA 597 Processor Below find a block diagram of the front end application for DVB C part 6 4 2 DTB T2 part The Front End for DVT part consist of the following key components TUNER EU ST42CS 2 E SCALER MT5800WUEJ BGA 597 Processor DEMODULATOR Si2168 C50 GMR QFN 48 Below find a block diagram of the front end application for DTV part MT5800 MT5800 Si2168 ...

Page 26: ...nnel ARC for HDMI2 TMDS output control HPD control CEC control 6 6 Video and Audio Processing MT5800WUEJ The MT5800WUEJ is the main audio and video processor or System on Chip for this platform It has the following features 1 Worldwide multi standard analog TV demodulator 2 Powerful quad core CPU 3 3D graphic support OpenGL ES 2 0 4 A transport de multiplexer 5 A muti standard video decoder 6 Rich...

Page 27: ...2 4 H 264 HEVC H 265 MVC VP8 VP9 video decoder standards and JPEG The MT5800WUEJ also supports MediaTek MDDiTM de interlace solution which can reach very smooth picture quality for motions A 3D comb filter added to the TV decoder recovers great details for still pictures The special color processing technology provides a natural deep colors and true studio quality video Moreover the MT5800WUEJ fam...

Page 28: ...7 IC Data Sheets 7 1 MT5800WUEJ IC U401 ...

Page 29: ...7 2 KLM4G1FEPD B031 IC U402 7 3 M24128 BRMN6TP IC U405 ...

Page 30: ...7 4 AD87588 IC U601 ...

Page 31: ...7 5 ST42CS 2 E TU101 Tuner ...

Page 32: ...3 15 C9110 0 1uF 50V D9105 PR1007G R9127 3 3M 1 4W L9101 3UH R9109 10R 1 8W 5 18V FB9901 127R 1 2 C9119 0 1uF 50V R9107 82K OHM 1 C9908 NC BD9901 NC KBJ608G FUC 2 1 3 4 L9902 NC 30mH 1 2 4 3 C9121 470uF 25V R9116 22 OHM 1 4W C9124 1NF RV9901 680V R9126 9 31K 1 1 8W C9109 470uF 25V D9102 FME 220B 1 2 3 C9112 0 1uF 50V For Q9101 R9146 0 OHM 5 1 8W U9103 TL431G AE2 R NC Q9102 2N3904 C9116 330UF 35V D...

Page 33: ...5 0 1uF 50V C8611 0 47UF 50V R8656 1 5R 1 C8609 0 1uF 50V 12V R8608 4K7 1 8W 1 Q8602 2N7002K C8604 0 47UF 50V C8621 NC 0 1uF 50V Vcc2 Vcc2 ON OFF D8603 IN4148W RHG D8604 IN4148W RHG R8605 1K 1 8W R8602 NC R8616 0 OHM 5 1 8W R8617 62K 1 8W 1 C8612 220uF 50V C8616 NC 100UF 63V DIM C8606 1NF Add ON OFF Function R8611 NC R8612 100K U8601 PF7708BS LED 1 VCC 2 CS OVP 3 OUT 4 GND 5 DIM 6 GM 7 FB 8 R8601 ...

Page 34: ...8W FB9906 127R NC 1 2 R9153 10K OHM 5 1 8W Q9103 2N7002K C9112 470uF 25V NC R9149 100K 1 8W 1 R9105 10R 1 8W 5 DIM R9106 33R 1 8W 5 t NR9900 1 5R 1 2 C8612 1NF 50V L9903 0 25mH 1 2 4 3 12V R9148 10K OHM 5 1 8W R9816 100KOHM 5 1 8W C8611 100N 50V NC D8601 TSF20U100C 1 2 3 C9902 220NF 305V L9801 300uH 1 3 5 4 C9152 1uF NC C9133 100N 50V ZD9106 BZT52 B13G 1 2 Q9109 2N7002K R9154 10K OHM 5 1 8W 0 3V Q...

Page 35: ...f High Cost down by 11 27 Cost down by 11 27 C7076 1NF 50V C7077 1NF 50V PS_ON OFF BRIGHT ADJUST Modify by 11 26 BRIGHT_ADJ BL_DIMMING PWM for BRIGHT_ADJ Max 0V Min 3V3 C7078 1NF 50V 12V 5V_SW to 3V3_TUNER AZ1117D 33 C7072 1NF 50V OPWRSB Normal High Stand_by Low Add for ESD_2016 0307 Modify by 11 26 FB_PWR_EN cost down by 11 30 U712 G9091 330T11U VIN 1 GND 2 EN 3 NC 4 VOUT 5 STB_PWR Synchronous bu...

Page 36: ...FF Normal High Stand_By Low R756 NC 100K 1 16W 5 R703 NC 100K 1 16W 5 L704 10uH C751 10UF 25V R7027 10K 1 16W 5 C703 100NF 25V C757 10UF 16V C707 10UF 25V R760 2 2 OHM 1 10W C705 10UF 25V C752 100NF 25V C710 100NF 25V R7029 10K 1 16W 5 R721 NC 100K 1 16W 5 R7053 100K 1 16W 5 C706 10UF 25V R757 13 3K 1 L731 4 7uH C704 10UF 16V R720 10K 1 16W 5 TP702 TP R706 2 2K 1 4W R702 NC 100K 1 16W 5 R7050 22K ...

Page 37: ...2_E PACLE_E PAALE_E EMMC_CLK_E U401 6 MT5800WUEJ OSDA0 AE26 OSCL0 AH26 XTALI B28 XTALO B27 AVDD33_REG_STB J22 VCC3IO_EMMC J1 AVDD33_RGB_STB H24 AVSS33_RGB K21 AVDD33_PLL_STB J23 AVDD10_LDO U25 AVDD10_ELDO Y26 U0TX T25 U0RX T24 POWE J2 POOE N7 POCE1 M7 POCE0 L7 PDD7 P3 PDD6 N1 PDD5 N2 PDD4 N4 PDD3 M3 PDD2 L1 PDD1 N6 PDD0 P6 PARB N5 PACLE L3 PAALE K3 EMMC_CLK P4 OPWRSB R26 ORESET L25 OIRI L26 FSRC_W...

Page 38: ...N 50V C640 220N 50V C6056 NC 220UF 16V C6016 100NF 16V R6036 10K 1 16W 5 C6039 1uF 10V R6060 0R05 1 16W R6038 30K OHM CN602 NC CONN 1 2 3 4 5 U601 AD87588 LG48NAY SDATA1 1 MS 2 PLL 3 CFG0 4 CFG1 5 CLK_OUT 6 DGND 7 DVDD 8 SDATA0 9 LRCIN 10 BCLK 11 MCLK 12 RINN 13 OUTR 14 VSS 15 EN 16 PVSS 17 CN 18 CP 19 PVDD 20 PGND 21 UVP 22 OUTL 23 LINN 24 SDA 25 SCL 26 SA0 27 SA1 28 DEF 29 DGND 30 DVDD 31 PD 32 ...

Page 39: ...ZSNP5 6B 1 2 C1007 1UF 16V R1017 0R05 1 16W R1004 30Kohm 1 16W 5 ZD123 NC UDZSNP5 6B 1 2 R1008 0R05 1 16W C1014 10N 50V C1011 10NF 50V OSCL1 R1013 51OHM 1 16W 5 R1001 0R05 1 16W C1015 10PF 50V C1008 10NF 50V C1010 10PF 50V TP98 TP C1004 47NF 16V R1002 100R 1 16W 5 R1012 100R 1 16W 5 R1018 100R 1 16W 5 TU_FAT_IN2 R1006 100R 1 16W 5 TU_FAT_IN2 C1017 47PF 50V R1015 51OHM 1 16W 5 C1003 100NF 16V C1006...

Page 40: ...0V TP101 TP C1020 NC 47NF 16V C1029 NC 10PF 50V R1032 NC 0R05 1 16W C1030 NC 10NF 50V R1038 NC 30Kohm 1 16W 5 R1026 10K 1 16W 5 C1033 NC 1uF 10V TP100 TP ZD108 NC EGA10603V05A1 B 1 2 R1035 0R05 1 16W NC SCART 21P CN151 1 2 3 4 5 6 7 8 9 10 11 12 13 14 15 16 17 18 19 20 21 R1031 NC 75 OHM 5 1 16W R1025 NC 100R 1 16W 5 R1033 NC 75 OHM 5 1 16W ZD109 NC EGA10603V05A1 B 1 2 R1023 NC 51K 1 16W 5 ZD107 N...

Page 41: ...16W 5 R1050 NC 100R 1 16W 5 ZD119 NC UDZSNP5 6B 1 2 C1044 NC 1uF 10V ZD112 NC UDZSNP5 6B 1 2 ZD115 NC UDZSNP5 6B 1 2 R1046 NC 100R 1 16W 5 C1040 NC 10PF 50V R1041 NC 75 OHM 5 1 16W ZD113 NC UDZSNP5 6B 1 2 R1044 NC 75 OHM 5 1 16W C1039 NC 10N 50V ZD118 NC UDZSNP5 6B 1 2 R1048 NC 10K 1 16W 5 R1052 NC 2Kohm 1 16W 1 C1046 NC 1uF 10V C1036 NC 10N 50V ZD117 NC UDZSNP5 6B 1 2 ZD110 NC UDZSNP5 6B 1 2 CN10...

Page 42: ... AO4N AG21 AO5P AF20 AO5N AE20 R1060 0R05 1 16W R260 NC 0R05 1 16W R1065 0R05 1 16W AVDD1V2 AVDD3V3 AVDD3V3 AVDD3V3 LVDS_PWR_EN 4 PANEL_VCC BL_DIMMING 3 13 BL_DIMMING LVDSTX_AECKN LVDSTX_AE2N LVDSTX_AE2P LVDSTX_AE3N LVDSTX_AE3P LVDSTX_AECKP LVDSTX_AE4N LVDSTX_AE4P LVDS_SEL BIT_SEL LVDS LVDSTX_AOCKN LVDSTX_AO2N LVDSTX_AO2P LVDSTX_AO0N LVDSTX_AO0P LVDSTX_AO1P LVDSTX_AO1N LVDSTX_AOCKP LVDSTX_AO4N LVD...

Page 43: ...SS P1 VSS M9 VSS M1 VSS J8 VSS J2 VSS G8 VSS E1 VSS A9 VSSQ G9 VSSQ G1 VSSQ F9 VSSQ E8 VSSQ E2 VSSQ D8 VSSQ D1 VSSQ B9 VSSQ B1 A13 T3 A12 N7 A11 R7 A10 L7 A9 R3 A8 T8 A7 R2 A6 R8 A5 P2 A4 P8 A3 N2 A2 P3 A1 P7 A0 N3 BA0 M2 BA1 N8 BA2 M3 CK J7 CK K7 CKE K9 CS L2 RAS J3 CAS K3 WE L3 ODT K1 RST T2 DML E7 DMU D3 A14 T7 VDD R9 VDD R1 VDD N9 VDD N1 VDD K8 VDD K2 VDD G7 VDD D9 VDD B2 VDDQ H9 VDDQ H2 VDDQ ...

Page 44: ...ATA0 CI_D4 CI_D3 CI_D2 CI_D1 CI_MDO0 CI_D7 CI_D6 CI_D5 CI_MDO2 CI_MDO1 CI_MDO7 CI_MDO6 CI_MDO5 CI_MDO4 CI_MDO3 R1103 47R 1 16W 5 C1058 10UF 10V R1099 22R 1 16W 5 R1084 10K 1 16W 5 R1120 47R 1 16W 5 R1118 47R 1 16W 5 R1117 47R 1 16W 5 R1251 22R 1 16W 5 R1100 47R 1 16W 5 C1061 10PF 50V R1101 47R 1 16W 5 U102 APL3511CBI TRG VOUT 1 GND 2 OCB 3 EN 4 VIN 5 C1057 100NF 16V R1087 NC 10K 1 16W 5 R1092 22R ...

Page 45: ...SCL0 5 6 OSDA0 5 6 3V3SB CI_MDO6 12 CI_A7 12 CI_A1 12 CI_A12 12 CI_A2 12 CI_MDO4 12 CI_A9 12 CI_D6 12 CI_MDO1 12 CI_MDO0 12 CI_D3 12 CI_A0 12 CI_A10 12 CI_D1 12 CI_A5 12 CI_MDO7 12 CI_MDO3 12 CI_D4 12 CI_A8 12 CI_MDO5 12 CI_D0 12 CI_D5 12 CI_A11 12 CI_A4 12 CI_MDO2 12 CI_A3 12 CI_A13 12 CI_RST 12 CI_A14 12 CI_D7 12 CI_A6 12 CI_D2 12 CI_PWR_EN TSCLK 12 TSVALID 12 TSSYNC 12 PVR_TSCLK 12 PVR_TSSYNC 1...

Page 46: ... 8 NC 9 NC 10 R5018 47K 1 16W 5 R503 5 1R 1 16W PCB Position 4453 4553 R5044 NC 47K 1 16W 5 Add for EMI_2016 0307 R5006 47K 1 16W 5 Q509 NC MMBT3904 3 2 1 RP505 NC 5R1 1 2 3 4 8 7 6 5 CN501 HDMI 19P SHLD0 20 SHLD1 21 TMDSD2 1 DSHLD0 2 TMDSD2 3 TMDSD1 4 DSHLD1 5 TMDSD1 6 TMDSD0 7 DSHLD2 8 TMDSD0 9 TMDSC 10 CSHLD0 11 TMDSC 12 CEC 13 NC 14 SCL 15 SDA 16 DDC_GND 17 VCC5 18 HPD 19 SHLD2 22 SHLD3 23 RX_...

Page 47: ... TH1 12 TH2 13 TH3 14 TH4 15 LNB A 1 NC 2 TU3 3V 3 NC 4 QP Output 5 IP Output 6 NC 7 AGC 8 X OUT 9 SDA 10 SCL 11 R1154 4K7 1 16W 5 C1251 100NF 16V C1095 100N 16V C1066 100N 16V R1153 100R 1 16W 5 C1071 NC 10PF 50V R1170 2K7 C1077 47NF 16V C1097 100N 16V DEMOD_TS0 R1174 NC 51R X101 16MHz 1 2 4 3 C1075 10NF 50V C1073 10PF 50V C1106 100N 16V C1068 22PF 50V R103 22R 1 16W 5 R1175 51R R1169 NC 22K 1 16...

Page 48: ...UF 10V Q108 AO3401A R1196 NC 0R05 1 16W R1241 NC 0R05 1 16W R1353 0R05 1 16W C1121 100UF 16V R1213 10K 1 10W 5 C1125 10NF 50V C101 NC 10UF 25V C1124 0 1uF 25V R1352 0R05 1 16W R1207 NC 10K 1 10W 5 C1122 10UF 10V CN164 CONN 2 4 6 8 1 3 5 7 C102 NC 10UF 25V R1069 4 7K1 16W R1223 120K 1 R1193 10K 1 10W 5 CN162 NC CONN 3 4 1 2 R1205 0R05 1 16W R1198 2 2R 1 R1210 NC 10K 1 16W 5 C1123 100N 16V Q107 AO34...

Page 49: ...0R 3A 1 2 C6052 NC 10NF 50V R1232 NC 0R05 1 16W R1224 NC 100R 1 16W 5 R1230 NC 10K 1 16W 5 C1153 NC 100NF 16V R6051 NC 200R 1 16W 5 R1229 NC 510K 1 R6053 NC 510R 1 16W 5 C1148 NC 22N 50V C1303 100NF 16V R1233 NC 0R05 1 16W 3V3SB 3V3SB 3V3SB 12V_AL DVDD3V3 3V3SB DVDD3V3 AMBI POW ER 5V_SW LED_PWM0 5 13 LED_PWM1 5 13 AMBI POW ER AMBI SPI CLK 13 KEY_PAD0 13 AL1_ADAC 6 AR1_ADAC 6 ZD129 AZ5123 01H 1 2 O...

Page 50: ...VSS R13 DVSS T13 DVSS U13 DVSS V13 DVSS W13 DVSS AB13 DVSS AC13 DVSS AD13 DVSS AF13 DVSS G14 DVSS J14 DVSS K14 DVSS L14 DVSS M14 DVSS N14 DVSS P14 DVSS R14 DVSS T14 DVSS U14 DVSS V14 DVSS W14 DVSS AD14 DVSS AE14 DVSS J15 DVSS K15 DVSS L15 DVSS M15 DVSS N15 DVSS P15 DVSS R15 DVSS T15 DVSS U15 DVSS V15 DVSS J16 DVSS K16 DVSS L16 DVSS M16 DVSS K10 DVSS L10 DVSS AB16 DVSS R11 DVSS P11 DVSS N16 DVSS W1...

Page 51: ... 0R05 1 16W Light Sensor R222 NC 10K 1 16W 5 Digital Light Sensor C222 NC 1uF 10V R221 NC 10K 1 16W 5 LS_SCL LS_SDA R223 NC 0R05 1 16W JSA 1130 R223 R224 JSA 1130 NC NC 0R 0R I2C addr 0x45 0x44 C221 NC 100N 16V LS_SDA LS_SCL DVD3V3 C202 1uF 10V Close to U201 Close to U201 IR Receiver 3V3SB R202 1K 1 16W 5 LED_R Q201 BC847BW LED_R R201 100R 1 16W 5 ZD201 MLVG0402 1 2 U201 TSOP75436TR GND 1 VCC 2 Vo...

Page 52: ...8 5 E 715G7088 Keyboard control panel 8 5 1 Key ...

Page 53: ...Pos NO Description Remark 0030 BEZEL 0040 REAR COVER 0064 PCB_FRAME 050R STAND BASE R 050L STAND BASE L 1050 PANEL 1176 Remote Control No Display 1053 MIAN BOARD 1054 POWER BOARD 1056 IR BOARD 1057 KEY BOARD WIFI01 WIFI BOARD 1184 SPEAKER ...

Page 54: ...9 2 5102 series 43 ...

Reviews: