background image

English

   - 4 -

Satellite installation

If you select 

Satellite

 option from the 

Search Type


screen,  you  can  set  a  satellite  and  watch  satellite 

channels.  When  you  select  Satellite  installation, 

Antenna Type

 menu will be displayed.

There are three types of antenna selection. You can 

select 

Antenna type

 as 

Direct

Unicable

 or 

DiSEqC


switch by using “ ” or “ ” buttons.

Direct

:  If  you  have  a  single  receiver  and  a  direct 

satellite dish, select this antenna type. After selecting 

Direct

, another menu screen will be displayed. Select 

an  available  satellite  by  using  cursor  left  or  cursor 

right,  after  your  selection  you  have  2  possibilities 

to continue installation, a full or a quick installation: 

1.

  Press the green button and select “

NO

” followed 

by “

OK

” to perform a full scan and search for all 

available services on the selected satellite.

2.

  Press the green button and select “

YES

” followed 

by  “

OK

”  to  load  a  predefined  channel  list    and 

confirm  with  (very  quick  installation,  all  main 

services per country installed).

Unicable

:  If  you  have  multiple  receivers  and  an 

unicable system, select this antenna type. Press 

OK

 to 

continue. Configure settings by following instructions 

on the screen. For full or quick installation follow the 

instructions under “Direct”.

DiSEqC switch

: If you have multiple satellite dishes 

and a 

DiSEqC switch

, select this antenna type. After 

selecting DiSEqC switch, another menu screen will 

be  displayed. You  can  set  four 

DiSEqC

  options  (if 

available). Press 

GREEN

 button to scan all satellites 

or press 

YELLOW

 button to scan only the highlighted 

satellite. To save and exit press 

OK

 button.

Play media files from a USB drive

You can play photo, music, and movie files stored on 

a USB disk by connecting it to your TV. Connect 

a  USB  disk  to  one  of  the  USB  inputs  located 
on  the  side  of  the TV.  Pressing the “

” button 

while in the Media Browser mode will access the 

Picture, Sound and Settings menu options. Pressing the 

” button again will exit from this screen.


You can 

set your Media Browser preferences by using the 

Settings Menu.

IMPORTANT!

 Back up your files before making 

any connections to the TV. The manufacturer will 

not  be  responsible  for  any  file  damage  or  data 

loss. Certain types of USB devices, for example, 

MP3  players  or  USB  hard  disk  drives/memory 

sticks may not be compatible with this TV. 

Recording a program

Please format your USB flash drive / device before 

first use. To do this; press OK while Format Disk is 

highlighted on screen and enter your pin number. The 

factory default pin number is “0000”. 
• To  record  a  program,  connect  a  USB  flash  drive 

while your TV is turned off. Recording function will 

be available once your TV is switched back on.

• The connected USB flash drives / devices must have 

at least 1 gigabytes (1gb) of free space and USB 2.0 

compatibility. An error message will be displayed if 

these conditions are not met.

• By  default,  recorded  programs  are  stored  on  the 

connected USB flash drive / device. You may store 

these programs on a computer as well, although you 

can play them only on your TV.

• The TV supports FAT32 and NTFS disk formatting 

but


recording  will  not  be  available  with  NTFS 

formatted disks. 

Timeshift recording 

Press PAUSE while watching a broadcast to activate 

timeshifting mode.
• In timeshifting mode, the program is paused and 

simultaneously recorded to the connected USB disk.

•  Press   (PLAY) button again to resume the paused 

program from where you stopped. Press the STOP 

button to stop timeshift recording and return to the 

live broadcast.

Note: Time shift cannot be used while in radio mode. 

Media browser menu

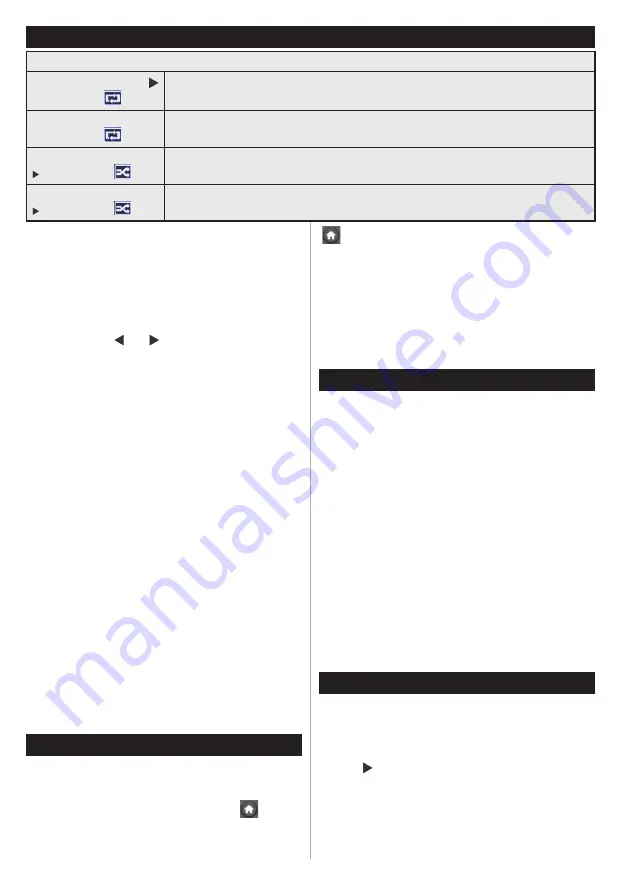
Loop/Shuffle Mode Operation

Start  playback  with 


and activate  

TV plays next file and loop the list.

Start playback with OK 
and activate  

File will be played in a loop (repeat).

Start playback with OK/

 and activate  

File will be played in a shuffle.

Start playback with OK/

 and activate  

File playback will continue randomly and random playback will continue.

Summary of Contents for 32PFL3008K/12

Page 1: ...Register your product and get support at www philips com welcome ...

Page 2: ...Electronic program guide EPG 5 Program options 6 Update your TV 6 Troubleshooting 6 Specifications 7 Important Read and understand all information in the accompanying Safety booklet before you install and use your TV If damage is caused by failure to follow these instructions the warranty does not apply Disposal of old Equipment and Batteries Please do not disposed this TV or battery as general ho...

Page 3: ...Return Index page in TXT mode Swap 23 Mono Stereo Dual I II Current Language in DVB channels 24 Okay Confi rm Hold in TXT mode Channel List 25 Info Reveal in TXT mode 26 Menu on off Exit in Media Browser mode 27 Picture zoom 28 Rapid advance in Media Browser mode 29 Pause in Media Browser mode Time shift recording Use your TV Remote control NOTE The Remote Control range is approximately 7m 23ft Te...

Page 4: ...nitymedia select YES in following screen and press OK In case your Cable network supplier does not support a Network ID based installation please select NO press OK and follow the instruction on the screen You can also select frequency ranges from this screen Enter the frequency range manually by using the numeric button Note Searching duration will change depending on the selected search step Not...

Page 5: ...ccess the Picture Sound and Settings menu options Pressing the button again will exit from this screen You can set your Media Browser preferences by using the Settings Menu IMPORTANT Back up your files before making any connections to the TV The manufacturer will not be responsible for any file damage or data loss Certain types of USB devices for example MP3 players or USB hard disk drives memory ...

Page 6: ...depending on the content Color Sets the color value Backlight Controls the brightness of the backlight Noise reduction Reduces the noise level in the image Sound options Volume Adjusts volume level Equalizer Changes the equalizer mode Balance Adjusts whether the sound is coming mainly from the right or left speakers Headphone Sets headphone volume Sound mode Sets the preferred sound mode AVL Sets ...

Page 7: ... will not turn on Make sure the power cord is plugged in securely to wall outlet The batteries in the remote control may be exhausted Press the Power button on the TV Poor picture Have you selected the correct TV system Low signal level can cause picture distortion Please check antenna access Check if you have entered the correct channel frequency if you have done manual tuning The picture quality...

Page 8: ... Hz 3 1024x768 60 Hz 4 1280x768 60 Hz 5 1360x768 60 Hz 6 720x400 60 Hz 7 800x600 56 Hz 8 800x600 60 Hz 9 1024x768 60 Hz 10 1024x768 66 Hz 11 1280x768 60 Hz 12 1360x768 60 Hz 13 1280x1024 60 Hz 14 1280x960 60 Hz 15 1280x1024 60 Hz 16 1400x1050 60 Hz 17 1600x1200 60 Hz 18 1920x1080 60 Hz Specifications PC input typical display modes The following table is an illustration of some of the typical video...

Page 9: ...LPCM ADPCM H 264 1080Px2 25fps 1080P 50fps Other 1080P 30fps 50Mbit sec avi MPEG1 2 4 Xvid H 264 VC1 WMV3 Sorenson H 263 Motion JPEG MPEG1 2 Layer 1 2 3 AAC HEAAC AC3 EAC3 LPCM ADPCM WMA H 264 1080Px2 25fps 1080P 50fps Other 1080P 30fps 50Mbit sec flv H 264 Sorenson H 263 MPEG1 2 Layer 3 AAC HEAAC LPCM ADPCM H 264 1080Px2 25fps 1080P 50fps Other 1080P 30fps 50Mbit sec 3gp 3g2 MPEG4 H 264 1920x1080...

Page 10: ...Specifications are subject to change without notice Philips and the Philips shield emblem are registered trademarks of Koninklijke Philips Electronics N V and are used under license from Koninklijke Philips Electronics N V 2012 TPVision Netherlands B V All rights reserved www philips com ...

Reviews: