background image

Switching


on

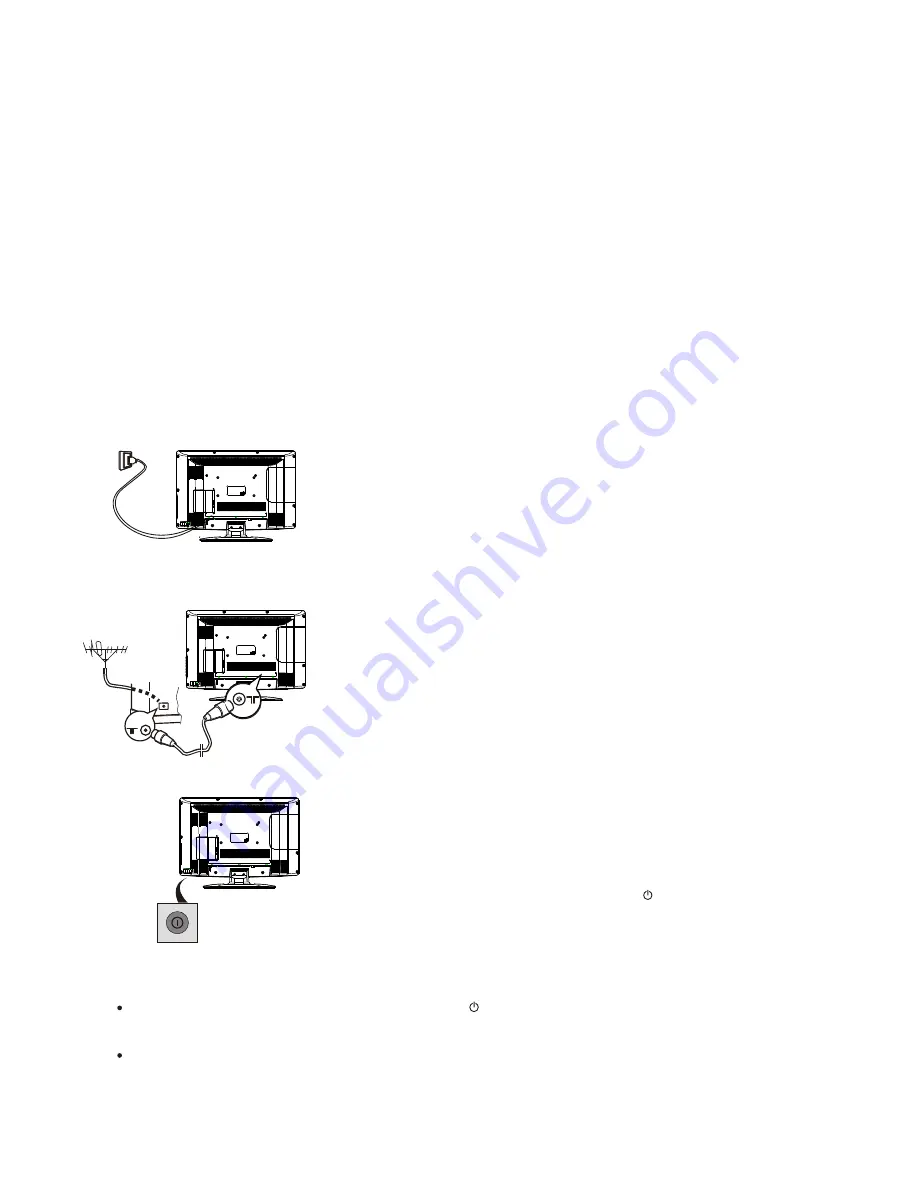
Follow the instructions on this page on how to switch on your TV set and the remote 
control before going on to following pages describing how to use the channel set-up 
procedure.

1. Insert two AAA batteries in the remote control.

    Precautions on using batteries:
    - Only use the battery types specified.
    - Make sure you use the correct polarity.
    - Do not mix new and used batteries.
    - Do not use rechargeable batteries.
    - Do not expose batteries to excessive heat such as sunshine, fire or 


throw them in a fire, recharge them or try to open them, as 

the like, 


them to leak or explode.

this could cause 

    - Remove the batteries from the remote control if you are not using it 


period of time.

for a long 

3. Connect the outside aerial or cable network to the ANTENNA IN socket 

    at the back of the TV set.

    The aerial socket (75 OHM - VHF / UHF / cable) can be used for 
    

an external aerial or other equipment fitted with a modulator 

connecting 


satellite receiver, etc.). We recommend that you do not 

(video recorder, 


(video recorder, satellite receiver, etc.) to your 

connect other equipment 


complicate the set-up procedure with 

TV set to begin with, so as not to 


them when you have finished 

the additional steps involved. Connect 

4. Switch the TV on by pressing the power button.


The


location


and


name


of


the


power


button


on


the


TV


may


vary


according


to


TV


model, at back side or bottom side of the back cabinets.

    If the TV set is in standby mode, press the     button on the remote 
    control or the CH+/-  buttons on the TV set to turn on the TV. 

Note


2. Connect the power cable to a mains socket. (If the power cable is not 


to the television, please first connect the power cable to the 

connected 

    Your TV set should only be connected to an AC supply. It must not be 

    connected to a DC supply. If the plug is detached from the cable, do 
    not, under any circumstances, connect it to a mains socket, as there is 

    Note: The figures are for representation only. The location of the power 


the back of the television might differ depending on the model.

socket at 

Switching


off

press the power button

To put the TV set into standby mode, press the     button on the remote control. The TV set remains 
powered up, but with low energy consumption.

To switch off the TV set, 

.

8  EN


5    


Use your TV

television.)

a risk of electric shock.

setting up the channels.

Summary of Contents for 22PFL4506/V7

Page 1: ...22PFL4506 V7 26PFL4306 V7 EN User manual ...

Page 2: ...Contents EN 1 1 Notice 2 2 Important 3 5 4 Remote Control Functions 7 3 Your TV 5 Use your TV 8 6 FAQ 12 7 Other Information 13 8 Product 14 information ...

Page 3: ... the display within common industry standards and is not a malfunction Warranty No components are user serviceable Do not open or remove covers to the inside of the product Repairs may only be done by Philips Service Centres and official repair shops Failure to do so shall void any warranty stated or implied Any operation expressly prohibited in this manual any adjustments or assembly procedures n...

Page 4: ... the voltage is different Never place the TV or any objects on the power cord To disconnect the TV power cord easily from the power outlet ensure that you have full access to the power cord at all times 2 Important Read and understand all instructions before you use your TV If damage is caused by failure to follow instructions the warranty does not apply Safety Risk of electric shock or fire Never...

Page 5: ... care Avoid stationary images as much as possible Stationary images are images that remain on screen for extended periods of time Examples include on screen menus black bars and time displays If you must use stationary images reduce screen contrast and brightness to avoid screen damage Unplug the TV before cleaning Clean the TV and frame with a soft damp cloth Never use substances such as alcohol ...

Page 6: ...main MENU 3 CH CH In TV mode press CH or CH to change the channel up and down In MENU mode press CH or CH to select items In standby mode press CH or CH to turn on the TV 4 VOL VOL Adjust sound level In MENU mode press VOL or VOL to adjust the item that you selected 5 STANDBY Press this button to turn the TV ON from STANDBY mode Press it again to turn the set back to STANDBY 6 USB 3 Your TV Side c...

Page 7: ...H to select items In standby mode press CH or CH to turn on the TV 4 VOL VOL Adjust sound level In MENU mode press VOL or VOL to adjust the item that you selected 5 STANDBY Press this button to turn the TV ON from STANDBY mode Press it again to turn the set back to STANDBY 6 USB 7 VIDEO INPUT 8 AUDIO INPUT L 9 AUDIO INPUT R SOURCE MENU CH CH VOL VOL STANDBY R L VIDEO VIDEO L R AV2 USB USB USB USB ...

Page 8: ...rrent channel and the last viewed INFO Displays the status information MUTE CH Scans up or down through the current channel list Increases or decreases volume numeric buttons Enters channel numbers SCENEA Deletes the selected file in the playlist TV USB FREEZE EXIT SCENEA 0 9 Turns OFF the sound Press again to restore the volume Most of your television s functions are available via the menus that ...

Page 9: ...ct other equipment complicate the set up procedure with TV set to begin with so as not to them when you have finished the additional steps involved Connect 4 Switch the TV on by pressing the power button The location and name of the power button on the TV may vary according to TV model at back side or bottom side of the back cabinets If the TV set is in standby mode press the button on the remote ...

Page 10: ...adjust H V Position Clock and so on Picture Sound Features Installation Color Temp Noise Reduction 1 MAIN GUIDE MENU 3 SOUND MENU You can adjust the sound effect here such as Treble Bass Balance etc Press to move and press to adjust NOTE AVL Auto Volume leveller When this parameters is on then volume level gets automatically adjusted this feature acts as automatic volume leveler which lower the so...

Page 11: ...t Please make sure that the USB device have plugged in the slot There are four type media item can be selected such as Picture music Video and text Select the type media item by pressing press OK button to enter the disk selection menu NOTE Within 15 minutes there is no signal the TV will auto sleep Picture Sound Features OSD Duration Blue Screen Auto Adjust H Position V Postion Clock Phase Featur...

Page 12: ...a functions like Play Pause FF FR Next Previous Stop etc Text mode menu bar Press to select the function icon press OK button to confirm the function Press or EXIT button to exit the control bar NOTE You can adjust the audio track subtitle or program in the Info menu while Playing the video file Choose the Info icon and press OK to display the Info MENU In the movie mode when you use FR FF functio...

Page 13: ...when the power supply is not sufficient or not camera If encounter problems during stable you may at all In this case operating or can not operate the device and please restart the device or unplug supply is plug it again and ensure that its power 4 The system supports standard USB 1 1and USB devices such as standard U disks Mp3 players 2 0 hard disks etc mobile 5 For obtaining better audio and vi...

Page 14: ...EN 13 7 Other Information ...

Page 15: ...ideo formats Resolution refresh rate 480i 60Hz 480p 60Hz 576i 50Hz 576p 50Hz 720p 50Hz 60Hz 1080i Hz Hz 50 60 1080p 50Hz 60Hz Note Multimedia names must not exceed 128 characters Tuner Reception Transmission Antenna input 75ohm coaxial IEC75 TV system PAL Video playback PAL NTSC Remote control Batteries 2 x AAA Power Mains power AC 110 240V 50 60Hz Standby power W 1 Ambient temperature to 40 degre...

Page 16: ...bles and connectors be sure to leave a clearance of at least 2 2 inches or 5 5cm from the back of the TV TV screen size inches Required pitch mm Required mounting bolts Product specification Design and specifications are subject to change without notice 22PFL4506 V7 Without TV stand Dimension WxDxH 530 x 97 x 352 mm Weight 4 7kg 4 x M4 100 X 100 100 X 200 4 x M4 22PFL4506 V7 26PFL4306 V7 EN 15 ...

Page 17: ...22PFL4506 V7 26PFL4306 V7 MADE IN PRC ...

Page 18: ......

Page 19: ......

Reviews: