9
3. USB monitor operation
3. USB monitor operation
3.1 Introduction
USB monitor allows you to share the images
between your laptop and the monitor by
simply connecting USB cable to your laptop. No
extra power cord or video cables are required,
resulting in a simple, single cable, ultra low
power connection between your laptop and
monitor.
3.2 DisplayLink Graphics Software
Installation
In order to use your USB monitor as a
secondary display, DisplayLink Graphic software
is required to be installed in your Windows
system. Moreover, the software allows you to
easily control your preference when viewing
images. The driver is compatible with Microsoft
Windows systems including Microsoft Windows
7, Vista and XP. Please note that this display will
not work in DOS.
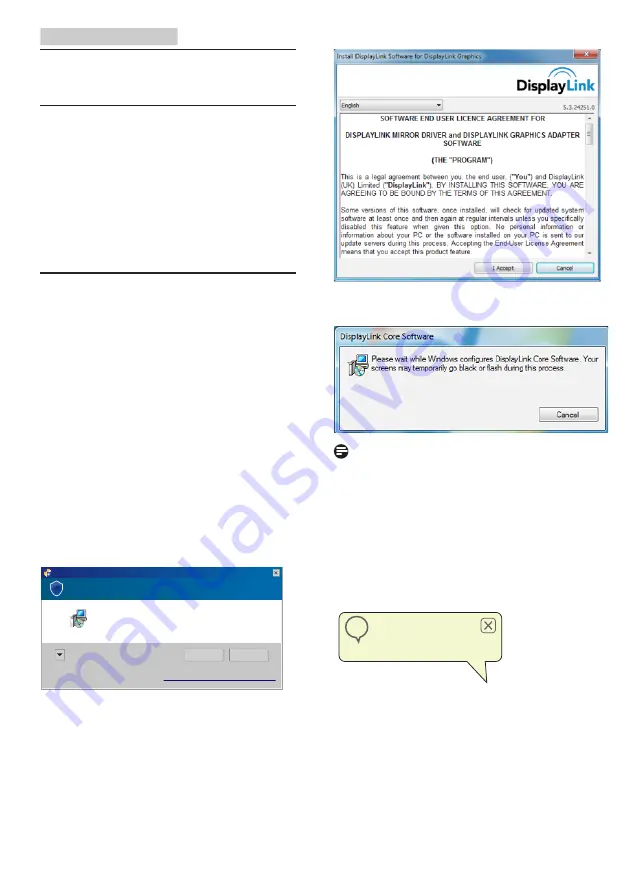
The installation procedure:
1. Double click Setup.exe file in CD disk
enclosed, then the User Account Control
window pops-out. (if enabled in the OS)
Do you want to allow the following program to make changes to this
computer?
Removable media on this computer
DisplayLink Core Software
DISPLAYLINK
Change when these notifications appear
Yes
No
?
Show details
Program name:
User Account Control
Verified publisher:
File origin:
2 Click Yes , then DisplayLink software end
user license agreement window opens.
3 Click I Accept, then software start to
install
Note
The screen may flash or go black during the
installation. The installation box above will
disappear but no message will be shown at the
end of the installation.
4 After the software is installed completely,
connect your USB monitor to your laptop
with USB cable and then below "Found
new device" will be shown on the taskbar.
Found new device
DisplayLink Display Adapter (0395)
i
5 When the device is found, then DisplayLink
Graphics will automatically install.
6 After the installation has completed, your
laptop will require to reboot the system in
order to start to use the USB monitor.
7. You will be able to see pictures on the
USB monitor after Windows completes
bootup process.


