background image

9

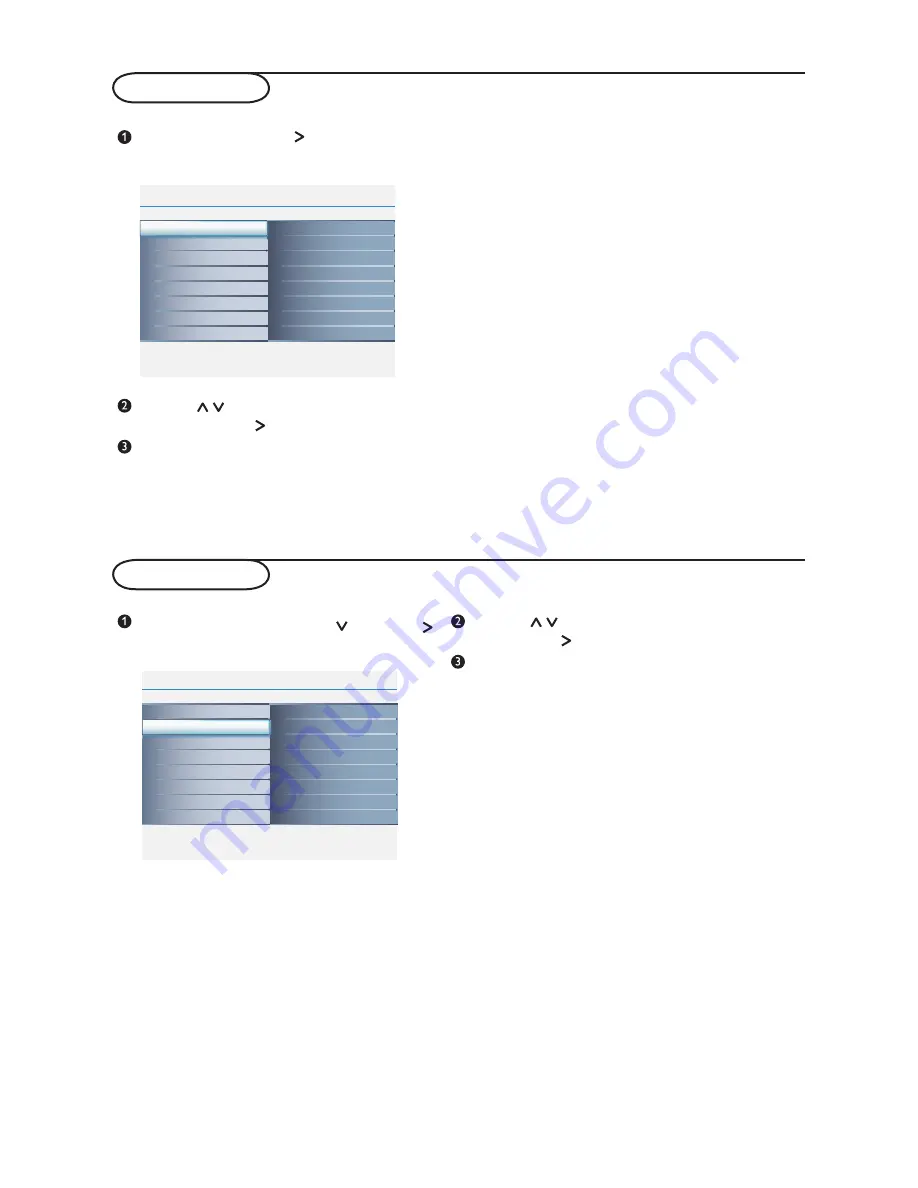
Picture settings

Info

Main Control

Picture

4

8

Sound

Features

Install

Contrast

Brightness

Color

Sharpness

Tint

Color temp

Picture format

Smart picture

Picture

Info

Main Control

Sound

4

4

Features

Install

Settings

Incredible surround

AVL

Smart sound

Picture

Sound

Info

Main Control

Features

4

4

Install

NR

Auto lock

Source list

Timer

Picture

Sound

Features

Press the 

MENU

 then  . The 

Picture

 menu 

is displayed.

Use the     keys to select or adjust a setting 
and validate with  . 
To quit the menus, press 

MENU

.

Sound settings

Info

Main Control

Picture

4

8

Sound

Features

Install

Contrast

Brightness

Color

Sharpness

Tint

Color temp

Picture format

Smart picture

Picture

Info

Main Control

Sound

4

4

Features

Install

Settings

Incredible surround

AVL

Smart sound

Picture

Sound

Info

Main Control

Features

4

4

Install

NR

Auto lock

Source list

Timer

Picture

Sound

Features

Press 

MENU

, select 

Sound

 ( ) and press  . 

The 

Sound

 menu is displayed:

Use the     keys to select or adjust a setting and 
validate with  . 
To quit the menus, press 

MENU

.

Description of the settings:

• 

Smart picture:

 there are fi ve modes of Smart 

picture including 

Personal

Rich

Nature

Soft

, or 

Multimedia

.

• 

Brightness:

 this changes picture brilliance.

• 

Contrast: 

this changes the difference between 

  the light and dark tones.

• 

Color: 

this changes the intensity of the color.

• 

Sharpness:

 this changes the picture defi nition.

• 

Tint: 

this changes the picture color to mix or 

  hue.
• 

Color temp:

 this changes the color 

  rendering: 

Cool

 (bluer), 

Normal

 (balanced), or  


Warm

 (redder).

• 

Picture format: 

Adjust to change the screen 

  format to match the type of program you are 

  watching. Please refer to p.11 for detail.

Description of the settings:

• 

Smart sound:

 you can press the Smart sound 

  button on the remote control repeatedly to select 
  

Personal

Speech

Music,


Movie

 and 


Multimedia

.

  Personal

 mode can be set by your preference.

• 

Setting: 

this allows you to adjust Treble, Bass, and 

  Balance of the sound.

• 

Incredible surround: 

adds greater depth and 

  dimension to TV sound. Select from 

On

 or 

Off

.

• 

AVL:

 this is used to limit increase in sound, 

  especially on program change or advertising slots.

Summary of Contents for 15PFL4122

Page 1: ...Register your product and get support at www philips com welcome EN USER MANUAL 15PFL4122 19PFL4322 20PFL4122 ...

Page 2: ... I 6 8 0 0 2 3 0 4 8 y l a t I 0 08 min l a c o l 4 4 6 5 1 6 6 6 0 4 g r u b m e x u L Netherlands 0900 8407 0 10 min l a c o l 1 1 1 8 0 7 2 2 y a w r o N l a c o l 4 0 5 1 9 4 3 2 2 0 d n a l o P l a c o l 2 4 4 1 9 5 3 1 2 l a g u t r o P e e r f 7 3 5 4 0 0 0 0 8 0 a i k a v o l S 4 8 7 8 8 8 2 0 9 n i a p S 0 10 min l a c o l 0 0 1 9 2 9 7 5 8 0 n e d e w S l a c o l 4 4 5 0 0 8 4 4 8 0 d n ...

Page 3: ...pose of exhausted batteries according to local regulations Product information The model and serial number can be found at the rear of the TV and on the packaging Standby power consumption is less than 1W The power consumption of the set is given on the type plate at the rear of the TV For more product specifications see the product leafl et on www philips com support Note specifi cations and informa...

Page 4: ...A Austria B Belgium CH Switzerland D Germany DK Denmark E Spain F France FL Finland GB England GR Greece I Italy IRL Ireland L Luxembourg N Norway Abbreviation Country NL Netherlands P Portugal S Sweden CZ Czech Republic H Hungary HR Croatia PL Poland RO Romania RUS Russia SK Slovakia SLO Slovenia TR Turkey Others ...

Page 5: ...ved moulded 13 AMP plug Should it become necessary to replace the mains fuse this must be replaced with a fuse of the same value as indicated on the plug 1 Remove fuse cover and fuse 2 Replace the fuse The replacement fuse must comply with BS 1362 and have the ASTA approval mark If the fuse is lost contact your retailer in order to verify the correct type 3 Refit the fuse cover If for any reason th...

Page 6: ...them after retrieving any materials that can be used again ask your dealer for further details Important safety information Installation Presentation of the LCD Television The keys on the TV set Remote control keys Installing your television set Quick installation Manual store Channels setting Other settings in the Install menu Operation Picture settings Sound settings Features settings Screen For...

Page 7: ...y Philips plays an active role in the development of international EMF and safety standards enabling Philips to anticipate further developments in stan dardisation for early integration in its products Important General Electric Magnetic and Electromagnetic Fields EMF Care of the screen Do not install the TV in a confined space such as a book case or a similar unit To prevent any unsafe situations ...

Page 8: ...to select programmes Rear of set TV 75 EXT PC IN VGA and Audio HDMI MAINS DC IN for 15PFL4122 only Side of set Earphone AV 1 Video In S Video Audio L R input CV1 AV 2 ComponentVideo YPbPr CompositeVideo Video In Audio L R input EXT HDMI HDMI MENU PROGRAM POWER VOLUME 15PFL4122 19PFL4322 20PFL4122 PC IN VGA AUDIO IN PC IN VGA AUDIO IN EXT EXT HDMI HDMI MENU PROGRAM POWER VOLUME 15PFL4122 19PFL4322 ...

Page 9: ...et the LCD TV to turn itself off within a certain time Smart Sound button Press repeatedly to select among the settings Personal Speech Music Movies Multimedia Cursor These 4 keys are used to move around the menus Menu To call up or exit the TV menus A CH To access the previous viewed programme VOL To adjust the sound level Mute To mute or restore the sound Information button Press to see the curr...

Page 10: ...ress to enlarge context to two times larger Smart Picture button Press repeatedly to select either Personal Rich Nature Soft or Multimedia of picture setting OK button Press OK button to access Program list or confirm your selection Incredible Surround button Adds greater depth and dimension to TV sound Select from On or Off P Press to adjust the channel up or down Press to roll the teletext page u...

Page 11: ...llation chapter If the TV remains in standby mode red indicator press the P key on the remote control The indicator will flash when you use the remote control MENU PROGRAM POWER VOLUME 15PFL4122 19PFL4322 20PFL4122 ATS AutomaticTuning System feature If the transmitter or cable network sends the automatic sort signal the programmes are numbered correctly In this case the installation is complete If ...

Page 12: ...rrectly p 8 This menu is used to store the programmes one at a time Press the MENU key With the cursor select the Install menu then Manual store Info Install Main Control Auto store 6 Auto store Manual store Channel setting Factory reset Language Country Start Info Install Main Control Manual store 6 Auto store Channel setting Factory reset Language Country Manual store Prog No Finetune Store Syst...

Page 13: ... Install Auto Store to start automatic search for all programmes available in your region If the trans mitter or cable network sends the automatic sort signal the programmes will be numbered correctly If this is not the case you need to use the Channel setting menu to renumber the programmes Some transmitters or cable networks broadcast their own sort parameters region language etc In this case in...

Page 14: ...o select or adjust a setting and validate with To quit the menus press MENU Description of the settings Smart picture there are five modes of Smart picture including Personal Rich Nature Soft or Multimedia Brightness this changes picture brilliance Contrast this changes the difference between the light and dark tones Color this changes the intensity of the color Sharpness this changes the picture d...

Page 15: ...the TV channels by your choice Change code to change your access code Clear all to unlock all locked channels and programming Remember that 0000 is the default pin code If your access code has been changed by someone other than you a child for example or you have forgotten the code you can always get in by inputting 0711 master pin code Source list It includes below video input source TV CV1 AV 1 ...

Page 16: ...per Zoom Movie expand 14 9 Movie expand 16 9 and 16 9 subtitle makes the picture fill the screen as much as possible It is recommended to press the cursor up down key to adjust the picture position on the screen Super zoom removes the black bars on the sides of 4 3 programs with minimal distortion When in the Expand 4 3 Compress 16 9 HD 4 3 Movie expand 14 9 Movie expand 16 9 or Super zoom picture ...

Page 17: ...0 V 800 x 600 V V 1024 x 768 V V 1280 x 720 V 1280 x 768 V 1360 x 768 V 1440 x 900 V Color temp this changes the color rendering Cool bluer Normal balanced or Warm redder Brightness to adjust the brightness Contrast to adjust the contrast Auto adjust to adjust the best image position and phase clock settings automatically Manual adjust to manually fine tune the image as it appears on the screen Sma...

Page 18: ... Set Top box Game Camera 1 4 3 1 2 HDMI PC IN VGA AUDIO IN EXT HDMI PC IN VGA AUDIO IN EXT DVD recoder DVD Player Satellite Set Top box VCR recorder HDMI PC IN VGA AUDIO IN EXT DVD Player Satellite Set Top box Game Camera DVD Player Satellite Set Top box Game Camera 1 4 3 1 2 HDMI PC IN VGA AUDIO IN EXT HDMI PC IN VGA AUDIO IN EXT DVD recoder DVD Player Satellite Set Top box VCR recorder HDMI PC I...

Page 19: ...me Camera 4 1 HD receiver HDMI PC IN VGA AUDIO IN EXT DVD Player Satellite Set Top box HDMI Fn LCD CRT Analogue PC VGA VGA HDMI PC IN VGA AUDIO IN EXT HDMI input compliance with 480i p 576i p 720p 1080i p signal handling capability For laptop user please press Fn CRT LCD buttons to switch the screen to TV ...

Page 20: ... the set receives no signal for 30 mins it automatically goes into standby mode To save power your set is fitted with components that give it a very low power consumption when in standby mode less than 1 W Cleaning the set Only use a clean soft and lint free cloth to clean the screen and the casing of your set Do not use alcohol based or solvent based products Still no results Disconnect the mains ...

Reviews: