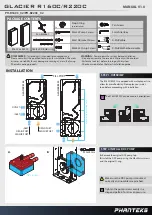
GLACIER R160C/R220C
MANUAL V1.0
STEP 3. INSTALL LED-STRIP AND BRACKET
STEP 5. MOUNT ON FAN
STEP 6. POWER ON
Daisy chain Phanteks D-RGB products
D-RGB Motherboard Cable
MOTHERBOARD
D - R G B H E A D E R
M4x10mm
For optimal performance please check the following:
- Make sure the pump never runs dry.
- Close any unused ports with Stop Fittings.
- Always perform a leak test before turning on the system.
1. Choose the desired mounting alignment on your reservoir.
2. Place the LED-strip on the bracket with the LED’s facing the reservoir.
3. Use two M4x10 Bracket screws to secure the bracket to the reservoir.
4.
Optional:
use two M4x6mm screws to secure the LED-strip.
The bracket can be mounted directly to a 120 or 140mm fan with the four
included Fan Screws.
- Make sure all connectors and fittings are tightened.
- Connect the pump to a power source.
- Fill the reservoir and let the pump run until all air is released.
2x
1
2
3
4
5
M4x6mm
2x
M4x10mm
Connect D-RGB LED-strip to D-RGB motherboard and Phanteks products:
STEP 4. CONNECT D-RGB LIGHTING
Connect D-RGB cable:
4x
Let the pump run for multiple hours. Tilting the system
can help to release air bubbles.
Thanks to the 42mm pitch mounting holes you can install the
reservoir on many pump brackets such as the “Universal
Pump Bracket” from Phanteks. It is included with many Phanteks
cases and available separately.
Adjust the vertical position of the bracket to find the perfect
position in your system. Both the bracket and the reservoir has
multiple mounting holes to move the position up and down.


