

STEP 4.
CONNECTING THE RGB LED
Make sure to connect the RGB LED cable from the waterblock to the GPU PCB
RGB Header. (see illustration)
STEP 5.
PLACING THE BLOCK ON TO THE GRAPHICS CARD
STEP 6.
INSTALLATION OF FITTINGS AND TUBING
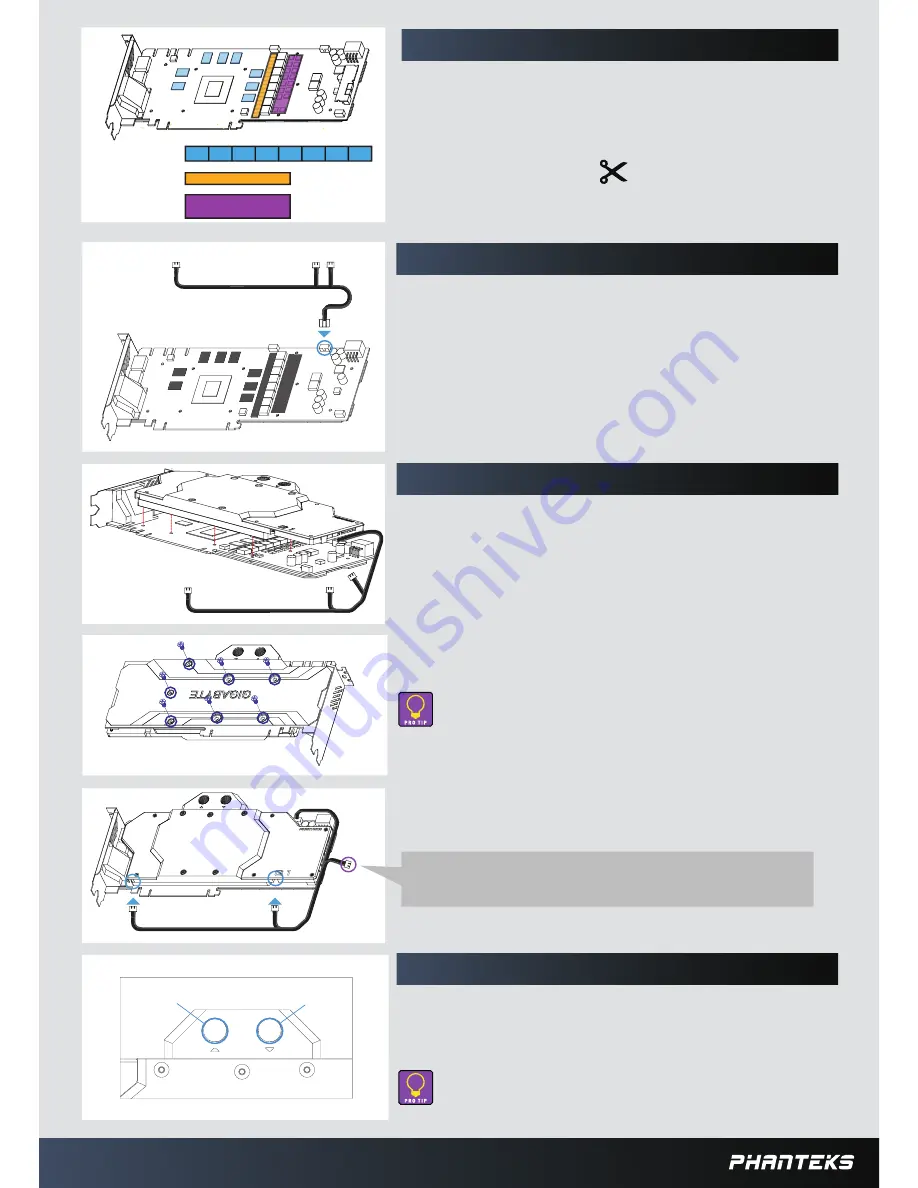
STEP 3.
PLACING THERMAL PADS ON PCB
Place thermal pads on the circuit board as shown on the picture below. Refer to
numbering in previous picture when applying thermal pads of di
ff
erent sizes or
thickness. Phanteks made sure to provide customers with more than adequate
quantity of thermal pads to complete this step.
FOR THERMAL PAD
2
&
3
, ADJUST AND CUT LENGTH
ACCORDING TO GPU VDD VRM CHIPS/MOSFET CHIPS.
f
for V
or memory IC
dd VRM
2
1
1
1
1
1
1
1
1
3
for Vdd MOSFET
Position 1: 16 x 13 x 0.75mm
Position 2: 10 x 90 x 0.75mm
Position 3: 20 x 90 x 1.25mm
Optional Upgrade
Sync the lighting with a Phanteks case / RGB Motherboard using the Phanteks upgrade kit
(not included).
Carefull y position the water block onto the graphics card. During this process
please make sure you align mounting holes on the PCB with holes on the
water block.
Once the water block is in place, plug in the remaining RGB LED cable
connector to the water block as shown in the illustration.
Screw in the two G1/4 threaded male
fi
ttings, attach the liquid cooling tubes
and connect the water block(s) into the cooling circuit. Phanteks recommends
Phanteks
fi
ttings with the Phanteks Glacier Series water blocks.
DO NOT FORGET TO PLUG THE REMAINING TWO OPENING.
FOR BEST PERFORMANCE, WE RECOMMEND TO MATCH THE INLET/OUTLET
using
CONFIGURATION OF THE WATERBLOCK.
OUT
IN
DO NOT USE TOO MUCH FORCE BY PRESSING THE BLOCK DOWN TO THE PCB. CHIP DIES
ARE
MAKE SURE TO LAY THE GPU WITH WATER BLOCK FLAT DOWN WITHOUT RESTING ON
THE PCI.
PRONE TO CRACKING.
Use the included
7x
M2.5x5 screws and washers (shown in blue) to
tighten the block to the GPU core.