
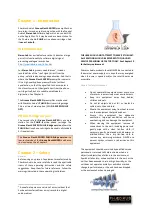


Chapter 10 - Battery and
battery replacement
The internal battery in the
Groove Sleuth MICRO
is an
8.7V NiMH (nickel-metal hydride) E-block type battery. It
may be replaced with a battery of a similar type and
specification. The position of the battery in the unit is
illustrated in the blue block in the illustration opposite.
NiMH batteries are not tolerant to being overcharged
which can reduce their life. The
Groove Sleuth MICRO
preamplifier uses an intelligent NiMH charger circuit such
that the external PSU provides an initial fast charge but
applies charging current reductions as the charge
progresses. This scheme continues until the battery is
fully charged. This method of charging is known as the
differential charge
method and ensures the best life from
the internal battery.
However, no battery has an infinite life. NiMH types can
be expected to give about 3 years’ service. So, a battery
replacement will probably be necessary in the service
lifetime of the
Groove Sleuth MICRO
preamplifier unit.
Battery replacement
In the following description, the
rear
of the
Groove
Sleuth MICRO
unit is taken to be the panel with the four
RCA phono connectors.
Remove all signal and power connections to the unit and
undo the four panel screws at each corner of both panels
of the unit. When these are removed, the whole
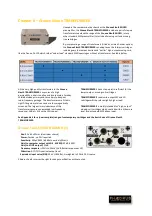
assembly may be withdrawn rearwards from the case.
Feed the front panel carefully through the enclosure as
the PCB is withdrawn. Note the internal runner on which
the assembly is mounted.
It’s second from
the bottom
(see illustration).
The battery is held in place by the PCB and the wall of the
enclosure. It will free itself as the assembly is withdrawn
from the enclosure. The battery is connected by a
terminal clip connector. Remove this and replace the
battery with a new NiMH type (8.7V 200mA/H capacity).
Be sure to fit the connector to the battery in the correct
sense. Do not experiment to do this,
the circuitry is not
protected against the battery being connected in the
wrong polarity
.
Once the battery has been changed, the assembly and
new battery may be slid back into the housing on the
same set of internal runners in the case. Fit the front
panel first
but don’t tighten the
screws
so that the panel’s
posit
ion can “float” a little.
Be careful not to force the assembly so that the rear of
the PCB sits flush with the back of the housing. If there is
some resistance of this kind, it is almost certainly because
one or both LEDs or the switch is fouling the front panel.
If the assembly is slid into the correct slot, gentle wiggling
should help the LEDs find the correct register with the
holes in the faceplate.
Refit the four screws in the rear panel and tighten the
screws retaining the front panel and rewire the unit.
Appendices
Appendix 1 - Model Codes
The model/order codes for
Groove Sleuth MICRO
preamplifier are:
GS-MICRO
- Groove Sleuth MICRO preamplifier
GS-MICRO-PHLUX OPT
–
Time of order option for PHLUX-II support*
GS-MICRO-PHLUX-Bridge
- PHLUX Bridge version of Groove Sleuth MICRO (no line-level output)
GS-TRANSFORMER 1
- Moving-coil step-up transformer (Input range 200µV to 50
0µV, 100Ω load)
GS-TRANSFORMER 2
- Moving-coil step-up transformer (Input range 400µV to
1mV, 500Ω
load)
GS-TRANSFORMER 3
- Moving-coil step-up transformer (
Input range 800µV to 2mV, 1.5kΩ load
)
* Only free of charge at time of order. No retro-fit. Contact [email protected] for more details.


