background image

6:4

10

11

12

Stitch Cr

eator

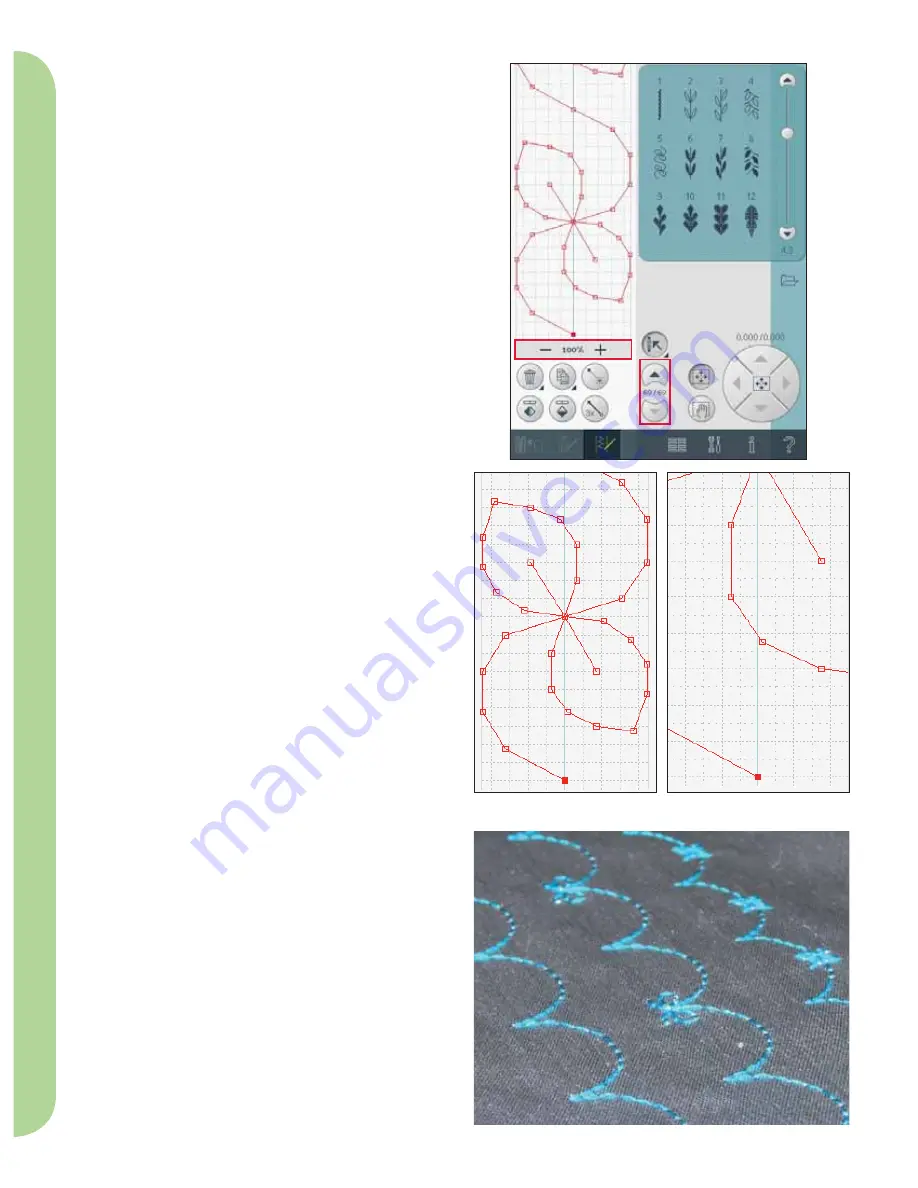
 Zoom (10)

When using the zoom icons, the focus will be on 

the marked stitch point.
The distance between the grid lines equals 1mm on 

the fabric. If you zoom in on the stitch 

fi

 eld, thinner 

grid lines will appear. The distance between these 

lines equals 0.5mm. If zooming out, only the edge 

lines of the stitch 

fi

 eld will be visible.

Select stitches/stitch points

To select a stitch point, just touch it on screen 

with your stylus. If selecting more than one stitch 

point, the stitches in between will automatically be 

selected as well.
To mark the previous or next stitch point in your 

stitch, use the arrows (12). 
Between the arrows is information about the stitch 

or combination shown. The 

fi

 rst number is the 

marked stitch point. The second number is the total 

number of stitch points.

  Multi-select (11)

Long touch the multi-select icon to select all stitch 

points at the same time.
To select the stitch points next to the marked stitch 

point, touch the multi-select icon and then touch 

the arrows (12) to select the next stitch point. 
Use the up arrow to select stitch points before the 

marked stitch point and the down arrow to select 

the stitch points after the marked stitch point. 

Note: If selecting stitch points using the up arrow, you 

can deselect them by touching the down arrow.


Summary of Contents for STITCH CREATOR

Page 1: ...Stitch Creator ...

Page 2: ...ch selection area 2 Scroll bar Scroll throuch stitch categories 3 Stitch field 4 Delete 5 Duplicate 6 New stitch point 7 Mirroring side to side 8 Mirroring end to end 9 Triple stitch 10 Zoom 11 Multi select 12 Arrows 13 Touch function move 14 Touch function pan 15 Wheel 16 Stitch point needle position 17 Feeding length 18 Save options a Save to personal menu b Save to file Stitch Creator overview ...

Page 3: ...elect the stitch point and use the duplicate icon to create a copy If several stitch points are selected all stitch points will be duplicated and inserted after the marked stitch point Use the long touch function to get a pop up where you can enter the exact number of duplicates you want to insert Insert a new stitch point 6 Touch this icon to insert one single stitch point The two stitch points w...

Page 4: ...s well To mark the previous or next stitch point in your stitch use the arrows 12 Between the arrows is information about the stitch or combination shown The first number is the marked stitch point The second number is the total number of stitch points Multi select 11 Long touch the multi select icon to select all stitch points at the same time To select the stitch points next to the marked stitch...

Page 5: ... the arrows in the wheel 15 Pan 14 You can either pan using your stylus on the screen or touch the arrows in the wheel 15 Note You can not pan outside the sewing area i e when scale is 100 or less you can not pan sideways Position of the marked stitch point The number to the left above the wheel 16 shows the actual needle position from the center line for the marked stitch point The number to the ...

Page 6: ...ill be loaded to sewing mode If embroidery mode is active your stitch will be loaded to embroidery edit as a design If a sequence or stitch is selected and you re open Stitch Creator from embroidery mode the stitch will remain unchanged If no stitch is selected Stitch Creator will be empty ready to create something new Every time Stitch Creator is closed the stitch will be loaded to embroidery edi...

Reviews: