10
3. Align the holes in the sandpaper
with the holes in the backing
pad in order to allow the dust
extraction system to function
properly.
4. Press the new sandpaper into
position.
INSTALLING THE DETAIL
SANDER ATTACHMENT
(See Fig. 3)
This attachment is used for fine
detail sanding.
1. Remove the sandpaper from the
sanding base.
2. Remove the inner hex screw
from detail attachment with the
hex key.
3. Fit the detail attachment onto the sanding base.
4. Replace and tighten the inner hex screw.
OPERATION
TURNING THE SANDER ON AND
OFF
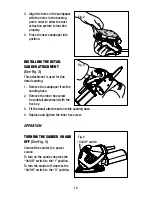
(See Fig. 4)
Connect the sander to a power
source.
To turn on the sander, depress the
“On/Off” switch to the “I” position.
To turn the sander off, depress the
“On/Off” switch to the “O” position.
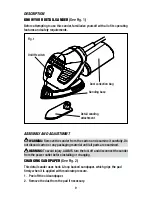
Fig. 2
Fig. 3
Fig. 4
“On/Off” switch
Summary of Contents for 241-0964
Page 16: ...16...


