4
5
Peltor’s
ACK05
NiMH accumulator is included with the product. Charge only with the included
FR05
charger.
In a non-explosive environment, other accumulator batteries or 1.5-volt AA alkaline batteries can be
used.
Install the batteries under the battery cover. Make sure that the + and – poles of the batteries are in the
correct position (see the figure in the cover).
WARNING!
If you use rechargeable batteries, charge them only according to the charger manual.
Dry-cell batteries can explode if recharged.
Never charge batteries or accumulators in an explosive environment!
ASSEMBLY
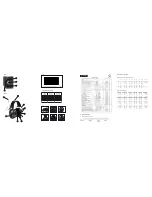
Headband (Fig. J)
Slide out the cups and place the headset over your ears so that the ear cushions fit snugly.
Adjust the height of the cups to a snug, comfortable fit by sliding the cup up or down while pressing
the headband down.
The headband should lie across the top of the head.
Helmet attachment (Fig. K)
(K:1) Snap the helmet attachment into the slot on the helmet.
Note:
The cups can be set in three positions: Working position (K:2), ventilation position (K:3) and
parked position (K:4). When in use, the cups must be placed in working position. Press the headband
wires inwards until you hear a click on both sides. Ensure that the shell and the headband wires in
working mode do not press against the lining or edge of the helmet so that noise leakage can occur.
100% use of a working hearing protector is the only sure protection from hearing loss.
If you spend time in environments with more than 82 dB A-weighted noise, you need to protect your
hearing, or the hearing receptors deep in your ears may be irreparably damaged. If you remove the
protectors for even a tiny portion of the time you spend in noisy situations, you are in the danger zone.
A comfortable hearing protector designed for the specific noise level in which it is used is the best
guarantee that you will wear the hearing protector 100% of the time, thereby ensuring protection from
permanent hearing loss. For the best protection, brush aside hair around the ears so the ear cushions fit
snugly against the head. Spectacle frames should be as thin as possible and fit close to the head.
WARNING! The external input does not have an automatic volume limit.
You must limit the volume on the external equipment manually. (D:2)
MAINTENANCE
Clean the outside of the headset regularly with soap and warm water.
Note: Do not immerse in fluids.
After long hours of use, or other situations in which the Lite-Com Pro is exposed to moisture inside,
the hygiene kit should removed so the hearing protector can dry before the next use. Do not store the
headset in temperatures exc55°C, for example on a dashboard or windowsill. The headset
(especially the ear cushions) can wear out over time. Inspect them often and regularly to ensure that
there are no cracks or sound leakage. Certain chemical substances may be harmful to this product.
Contact Peltor for more information. When the battery low warning sounds, it is time to replace the
batteries. The unit switches off automatically after a few minutes. Never replace or install batteries with
the unit switched on. Before switching on, make sure that the batteries are inserted correctly.
Always wear, adjust, clean and maintain the headset according to these instructions.
If these
recommendations are not followed, attenuation and other functions can be impaired.
(D) INPUT SIGNAL/OPERATING TIME
Warning
: The volume of the earphones in this hearing protector can lead to a daily exposure that
exceeds the permitted levels. The audio signal must therefore be adapted to the operating time. To
prevent harmful levels, the input signal should not exceed 22 mV. At a higher input voltage, the operating
.
.
.
Summary of Contents for MT53H7B470-50 Lite-Com Pro
Page 165: ...163 ...
Page 166: ...164 ...


