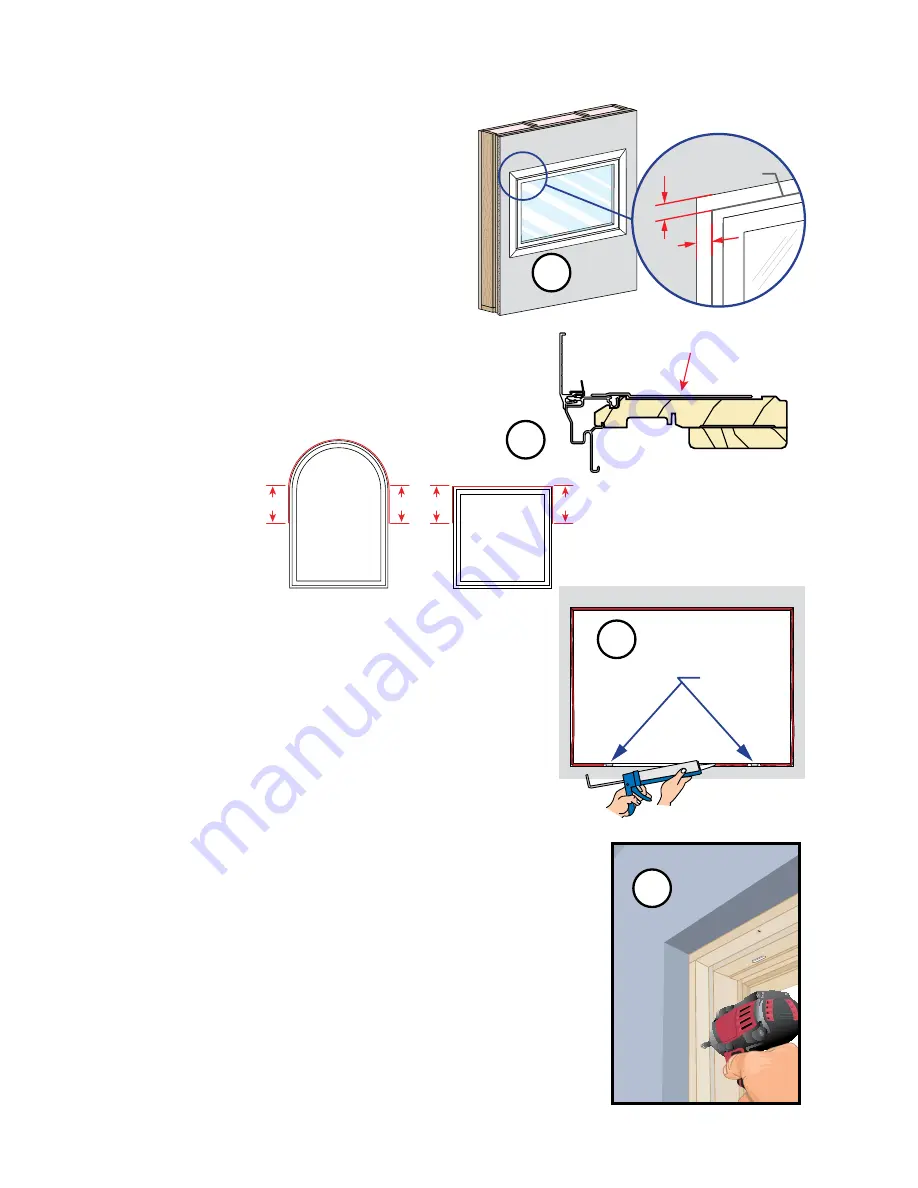
Window
Frame
3/4"
Min.
A.
Test fit the window
in the opening from
the exterior. Insert shims around the
window temporarily while you verify that
the window will fit into the opening and
the window flanges will overlap the stucco
or existing aluminum window frame by a
minimum of 3/4" on all (4) sides.
Note: Fix any problems with the opening
before proceeding. If required, the
exterior flush flange may be trimmed to
fit inside exterior surround trim. Lay the
window down on a flat surface. Use an
electric shears, circular saw or table saw to
cut the flange.
B.
Apply Pella SmartFlash tape across the
head of the window
extending 6" down
each jamb. Place the tape starting on the
aluminum cladding and extending onto
the wood frame.
Exterior
Weep holes
TWO OR MORE PERSONS WILL BE REQUIRED FOR
THE FOLLOWING STEPS.
C.
Place a 3/8" diameter (min.) line of sealant around
outside edge of the existing window frame where
the frame meets the stucco.
It is important to leave
a 2" gap in the sealant line at each of the weep holes
of the existing aluminum window frame.
E.
Place a shim
aligned with the top pre-drilled hole in
one jamb of the window frame. Trim all shims so they are
recessed back 1/4" - 1/2" from the interior face of the
window frame. Partially insert one 3-1/4" finish wood screw.
Repeat on the other jamb.
F.
Continue placing shims at each pre-drilled hole
as needed
to plumb and square the window. Check
the window for square by making sure the diagonal
measurement from corner to corner of the replacement
window is within 1/8" in both directions. Insert a 3-1/4" finish
wood screw into each pre-drilled hole in the frame. Finish
inserting the top screw in each jamb.
Note: DO NOT shim above the window. DO NOT over shim.
MAKE SURE THE FLANGE REMAINS PRESSED FIRMLY AGAINST THE WALL SURFACE
WHILE PLACING SHIMS AND FRAME SCREWS
3E
3C
3A
D
Insert the window from the exterior
of the building
and center the window in the prepared opening.
6"
6"
6"
6"
Pella SmartFlash Tape
3B
3
SETTING AND FASTENING THE WINDOW


