Page 16
Installation of Restraint, Continued
E
F
D
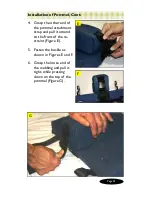
10. While lifting up on the
pull strap release lever
(located underneath
the cover as shown in
Figure D), pull the
lower anchor snap
hook out as far as it
will go.
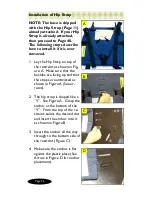
11. Repeat Step 10 with
the other lower an-
chor snap hook.
12. Attach each lower an-
chor snap hook to it’s
corresponding vehicle
lower anchor (Figures
E and F).
13. Tighten each lower
anchor by pulling each
strap on the front of
the restraint until the
restraint is tight against
the vehicle seat back
(Figure G).
14. If it was necessary to
use the tether eten-
sion assembly, then
completely tighten the
tether extension as-
sembly (Page 19 - Fig-
ure E).
Page 37
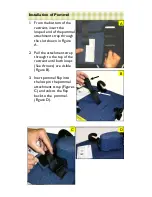
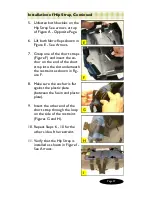
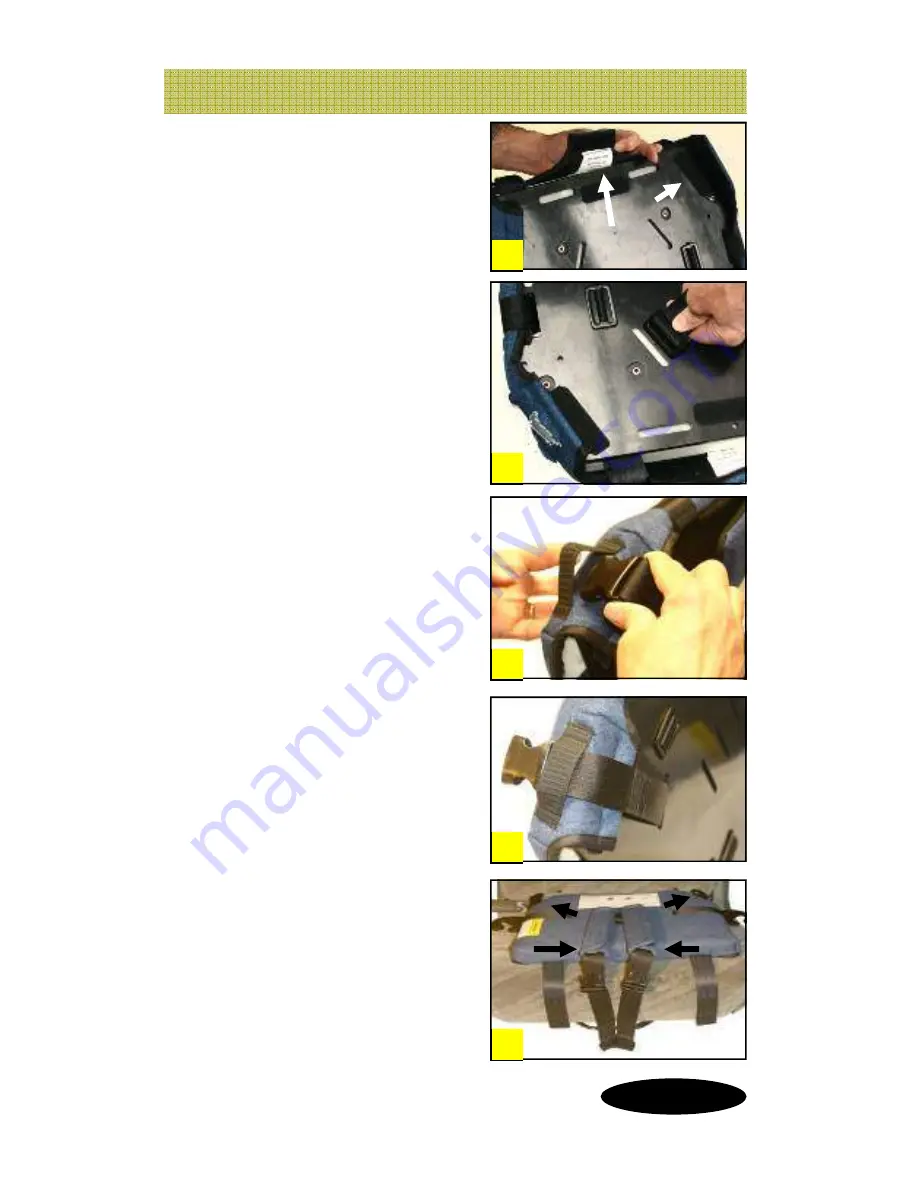
5. Unfasten both buckles on the
Hip Strap See arrows at top
of Figure A - Opposite Page.
6. Lift both fabric flaps shown in
Figure E - See Arrows.
7. Grasp one of the short straps
(Figure F) and insert the an-
chor on the end of the short
strap into the slot underneath
the restraint as shown in Fig-
ure F.
8. Make sure the anchor is flat
against the plastic plate
(between the foam and plastic
plate).
9. Insert the other end of the
short strap through the loop
on the side of the restraint
(Figures G and H).
10. Repeat Steps 6 - 10 for the
other side of the restraint.
11. Verify that the Hip Strap is
installed as shown in Figure I -
See Arrows.
Installation of Hip Strap, Continued
E
F
G
H
I

