


Loudspeaker System Specifications
17
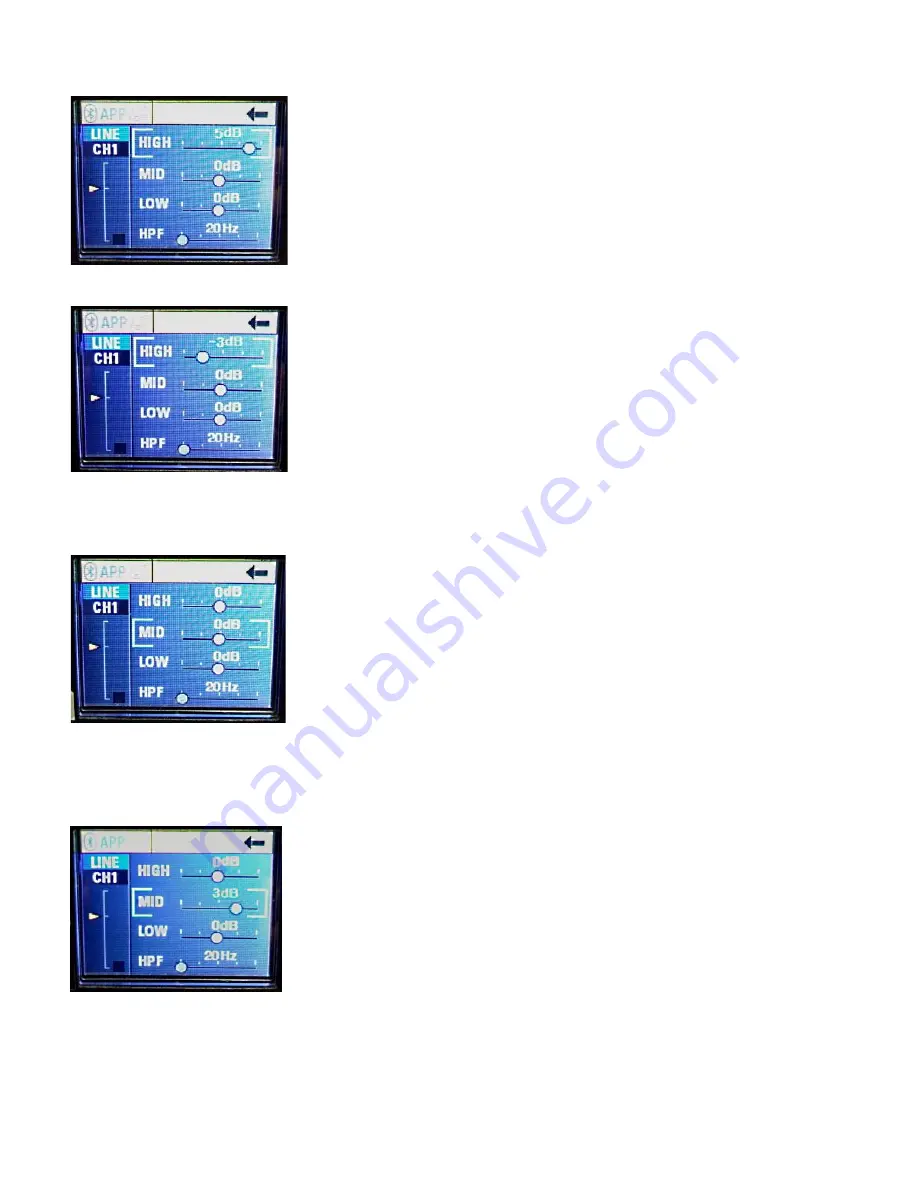
Fig. 6
CH1 High band EQ, +5 dB
Fig. 7
CH1 High band EQ, -3 dB
From Fig. 5, turn the "Push for DSP" knob two notches CW, and the Mid EQ
band is selected.
Fig. 8
CH1 Mid band EQ
Push in the knob to activate the EQ slider. Now turning the knob CW increases
the Mid boost at 600 Hz by up to 6 dB, turning it all the way CCW cuts the Mid
frequencies by up to 6 dB, in 1 dB increments. See Fig. 9 and Fig. 10
Fig. 9
CH1 Mid band EQ, +3 dB


