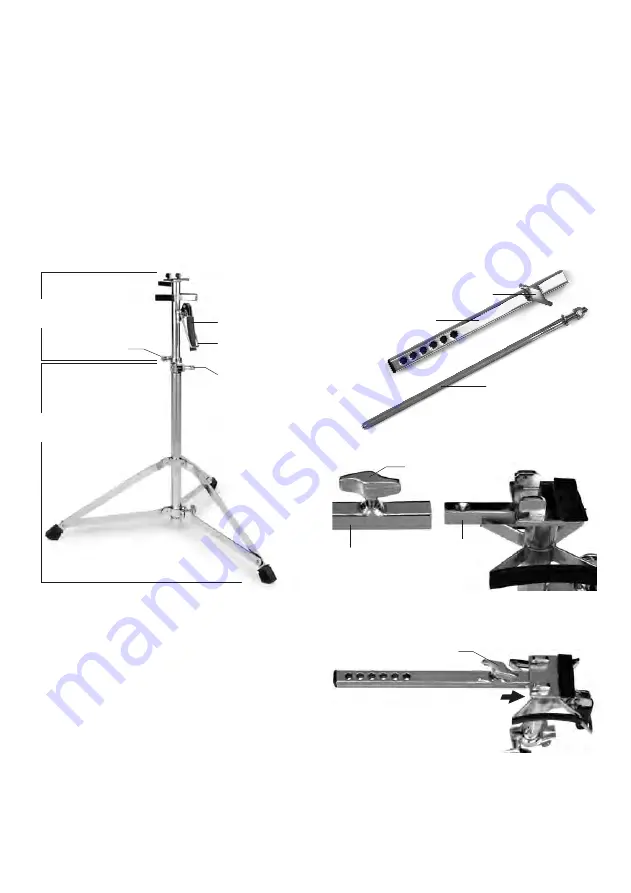
Fig.2 /
図2
Fig.2-A /
図2-A
Fig.2-B /
図2-B
Fig.1 /
図1
Upper Tube Assembly
上部パイプ
Handle /
ハンドル
Hasp /
レバー
Wing-Nut (A)
ウイングナット
(A)
Wing-Nut
ウイングナット
Tripod base
脚部
Wing-Bolt /
ウイングボルト
Mount
マウント
Square Receptacle
レシーバー
Wing-Bolt /
ウイングボルト
Wing-Bolt
ウイングボルト
Mount /
マウント
Accessory Post
アクセサリーポスト
Step 1.
Stand Assembly
スタンドの組み立て
Extend the legs of the Tripod Base and place it on a flat
surface. Insert the Upper Tube Assembly into the Tripod
Base and tighten Wing-Nut (A). Set the Hasp and
Handle to the off position as shown in (Fig.1).
脚部のウイングボルトをゆるめ三脚を開き、ウイングボルト
をしっかりと締めて脚部を固定します。 上部パイプを脚部の
パイプジョイントに差し込み、お好みの高さに調整できまし
たらパイプジョイントのウイングナット (A) をしっかりと締
めて固定します。 次に、レバーとハンドルをオフの位置図 1
の位置にセットします。
Step 2.
Stand Assembly
スタンドの組み立て
Locate the Accessory Post and Mount (FIG.2). Attach
the Mount with the Wing-Bolt facing upward to the
square receptacle of the Upper Tube Assembly
(Fig.2-A). Ensure it is fully inserted onto the receptacle
until it “stops” and tighten the Wing-Bolt to secure
(Fig.2-B).
アクセサリーポストとマウントを取り付けます(図 2)。
ウイングボルトを上向きにしてマウントをアッパーチューブ
アッセンブリーのレシーバーに取り付けます(図 2-A)。
完全にレシーバーに挿入されていることを確認し、ウイング
ボルトを締めて固定します(図 2-B)。


