Manual
5
4
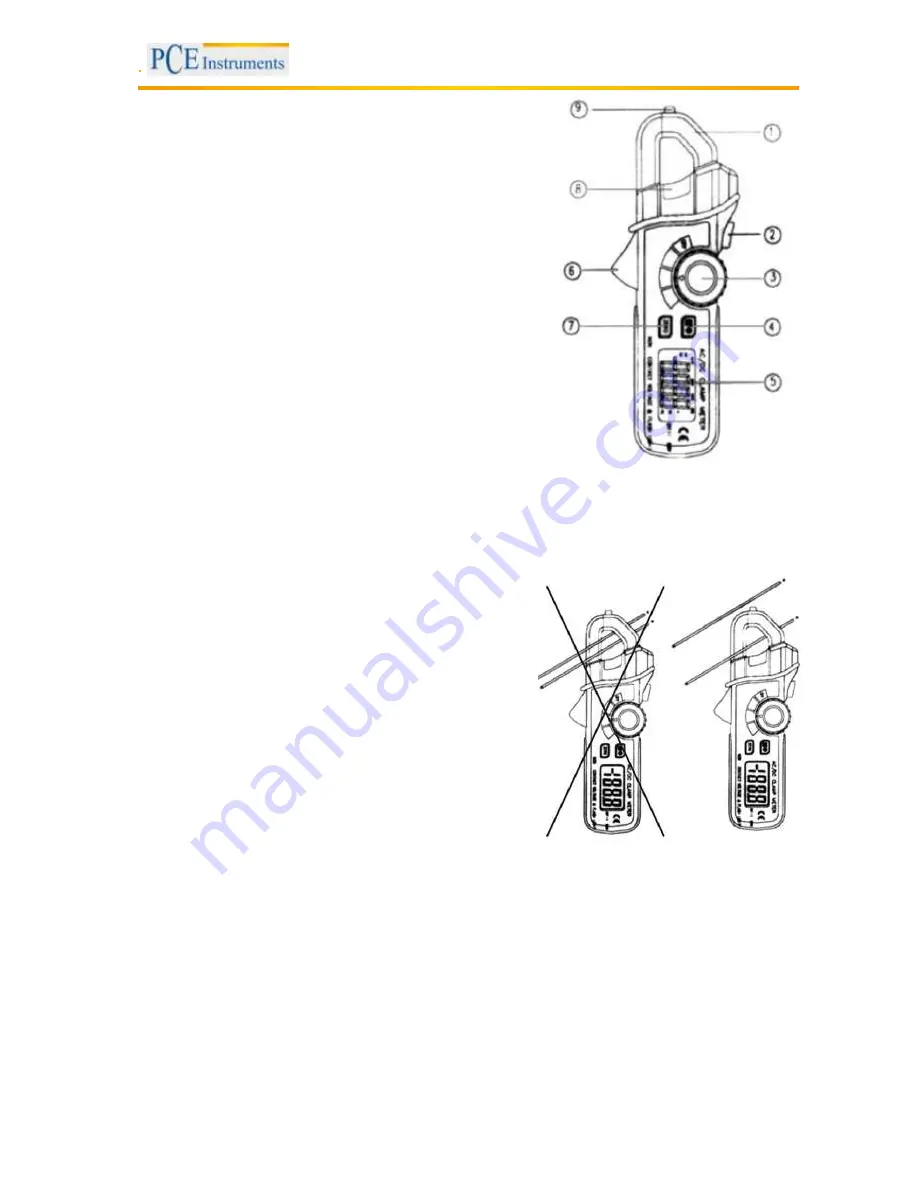
System description
1. Clamp mechanism
2. Light button
3. Rotary control switch
4. Peak/Max/Min button and zeroing of DC currents
5. LCD-Display
6. Clamp opening button
7. Hold button and display backlight
8. Non-contact voltage testing signal lamp
9. Non-contact voltage testing sensor surface
4.1
Battery replacement
To replace the batteries, lay the device face down on a soft surface. Next, open the cover of the battery
compartment on the back of the device. Remove the old batteries and replace them with new ones. After
that, close the battery compartment.
Note: Only use 1.5 V AAA batteries.
5
Measuring
Note: To avoid electric shocks, be very careful when measuring
current-carrying conductors.
Note: When using the clamp of the device, make sure there
is only one conductor at a time inside the clamp mechanism.
5.1
AC current measurement
1. Move the rotary control switch (3) to
the “200 A AC” position.
2. Open the current clamp by using the opening button (6) and put the conductor to be measured
inside the clamp mechanism.
Note: Make sure there is only one conductor at a time inside the clamp mechanism.
3. You can now see the reading on the display


