


© PCE Instruments
3
6
Operation instructions
Press the button to start the device.
The display will now show “Calibrate?” Place the device, with
the measurement window into the calibration slot, in the case of the device and press the button
again to confirm the calibration process. The device now calibrates automatically. Once
calibrated, the display shows “calibrate ok” and then “ready”. The device is now in the working
condition and is ready for use.
(If you choose the skip the calibration process, simply wait ~20 sec. until the display shows
“ready”.)
Now place the device with the measurement window onto the surface you wish to measure and
press the button to begin. With a “beep” the device displays the gloss value of the measured
surface.
The device will shut down automatically after ~50 sec. of not being used.
7
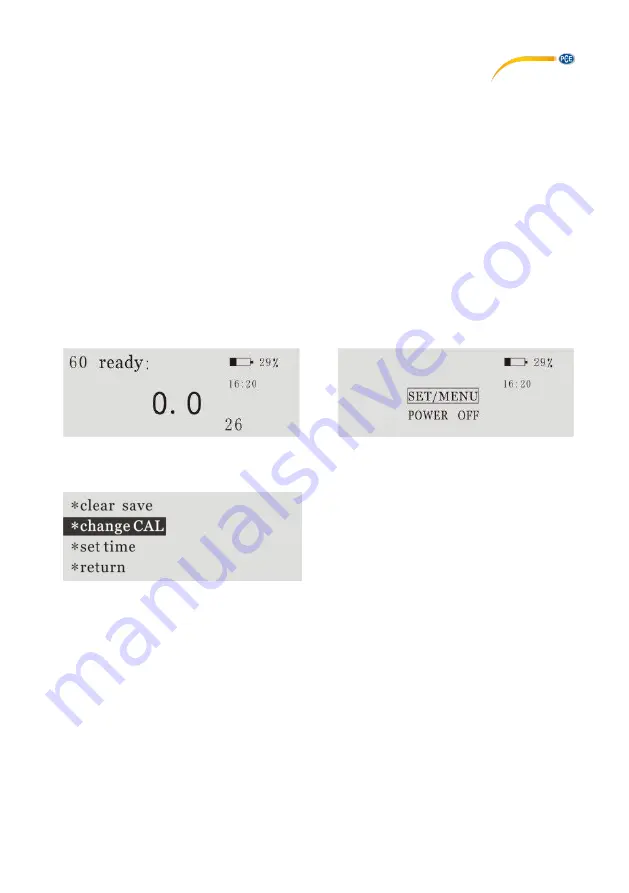
Menu instructions
When the device is ready for use, press and hold the button until the display changes and
“SET/MENU” is highlighted. Release the button to enter the next screen. The display change
looks as follows:
The cursor now cycles (top to bottom) the options of the next menu. Press the button when the
desired option is highlighted in order to select:
8
Modifying the calibration value
If you wish to replace the standard plate (black quartz crystal plate), you must then change the
calibration value. In order to do this, you must p
ress the button when “change CAL” is highlighted
inside the “SET/MENU” screen (refer to picture above). The display now shows “change CAL?”
Press the button again to confirm and begin the process (if no new value is needed, do not press
the button, after ~20 sec. the device will return to the screen displaying “ready”). The device now
begins to count
up
from 80. Press the button at the desired value to confirm it. The device will
now return to the working condition and display “ready”.


