


P/N: 4809654 v5.0
©2010 Paxton Automotive
All Rights Reserved, Intl. Copr. Secured
47
Fig. 8M-c
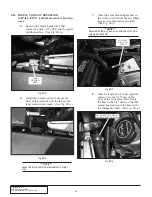
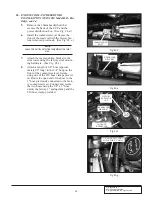
3.
Trial fit the bumper frequently as not to cut off
too much. You are now ready to reinstall the
front bumper assembly, including the foam inner
bumper. Reconect the fog lights and side mark-
ers.
4.
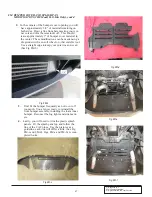
Lastly, you will need to trim the plastic splash
panels. Fit the splash panel up and follow the
line of the CAC pipes. Use the pictures as a
guideline, each one will differ a little. (See Fig
8M-c and 8M-d). Figs. 8M-e and 8M-f are com-
pleted looks.
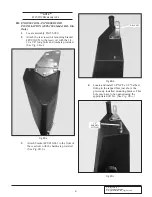
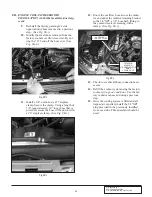
2.
In the corners of the bumper cover opening you will
have approximately 3/4" of material remaining on
both sides. Draw a line from here meeting your cor-
ner cuts and trim the remainder off. This should
leave approximately 3" of bumper cover material in
the center. These modifications can be made using a
die grinder with a cut-off wheel or other suitable tool.
Use a straight edge to keep your cuts true and even.
(See Fig 8M-b).
Fig. 8M-b
Fig. 8M-d
Fig. 8M-f
Fig. 8M-e
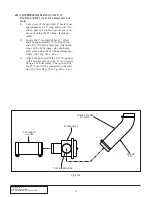
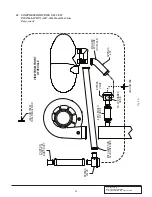
8M. BUMPER CovER AND SPLASH PAN
MoDiFiCATioN (2010 Model H.o. kits only), cont'd
3/4"