background image

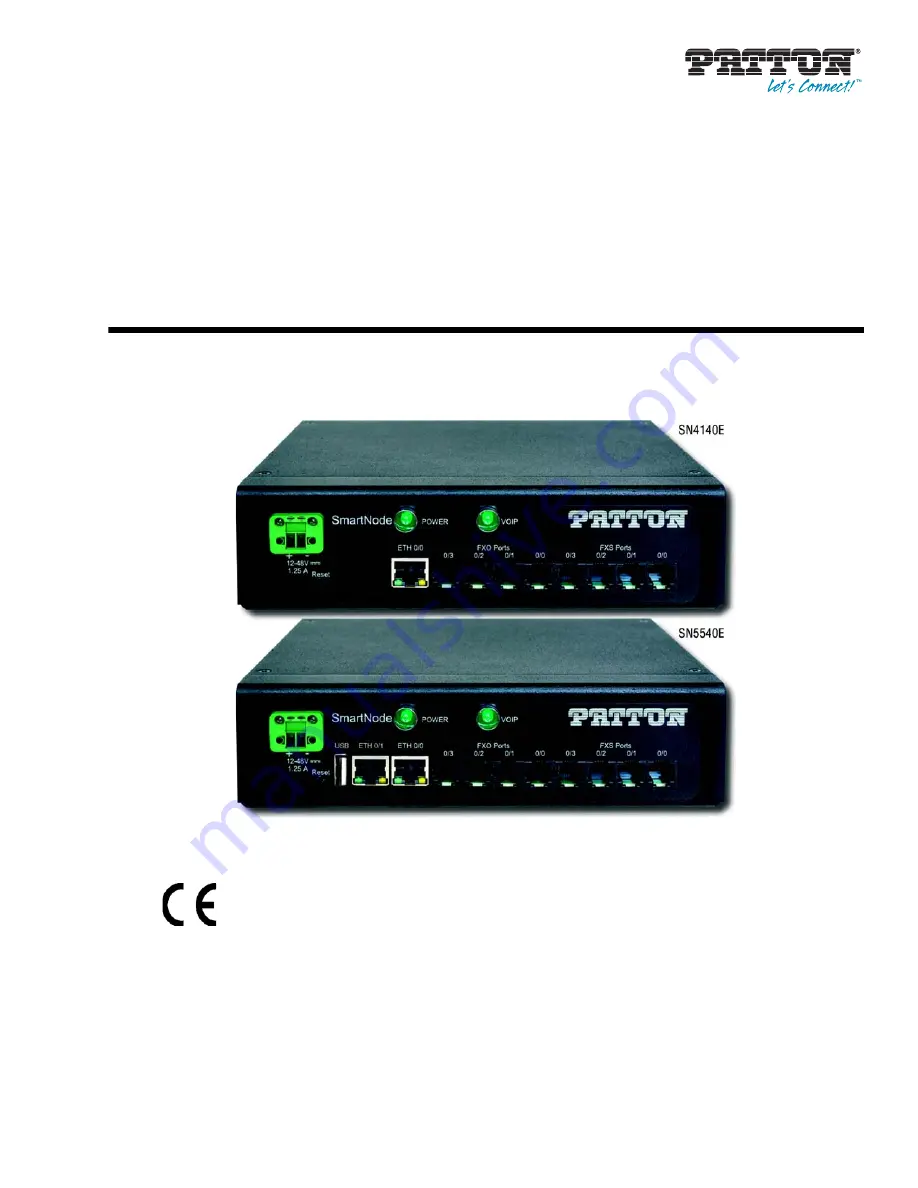
SmartNode 5540E and 4140E Series

Ruggedized Enterprise Session 


Border Controller and VoIP Gateway

User Manual

Sales Office:


+1 (301) 975-1000

Technical Support:


+1 (301) 975-1007

E-mail:


[email protected]

WWW:


www.patton.com

Part Number: 

50000059 Rev. A

Revised: 

November 16, 2021

This is a Class A device and is not intended for use in a residential environment.

REGULATORY MODEL NUMBER: 13260D4-001

Summary of Contents for SmartNode 5540E Series

Page 1: ...teway User Manual Sales Office 1 301 975 1000 Technical Support 1 301 975 1007 E mail support patton com WWW www patton com Part Number 50000059 Rev A Revised November 16 2021 This is a Class A device...

Page 2: ...rms of such license Patton Electronics warrants all SmartNode router components to be free from defects and will at our option repair or replace the product should it fail within one year from the fir...

Page 3: ...tion 29 5 Initial Configuration 37 6 Contacting Patton for Assistance 44 A Compliance Information 47 B Specifications 49 C Cabling 54 D Port pin outs 58 E SmartNode Device Factory Configuration 61 F R...

Page 4: ...E Series eSBC IAD 20 SmartNode 4140E Series VoIP Gateway 22 3 Applications overview 25 Introduction 26 Application for SmartNode 5540E eSBC 26 Application for SmartNode 4140E VoIP Gateway 27 4 SmartNo...

Page 5: ...2 Loading the Configuration optional 43 Additional Information 43 6 Contacting Patton for Assistance 44 Introduction 45 Contact information 45 Contacting Patton Technical Services for Free Support 45...

Page 6: ...59 FXO port 60 E SmartNode Device Factory Configuration 61 Introduction 62 F Reset Button Functions 63 Introduction 64 Resetting the SmartNode device when it is operating and the POWER LED is lit 65 V...

Page 7: ...7 SmartNode 5540E 4140E Series User Manual 7 Notices 76 8 Other Licenses 76 9 Unenforceable Provisions 77 10 Governing Law 77 11 Waiver 77...

Page 8: ...Node to the network 40 15 Connecting the SmartNode to a laptop PC 41 16 Connecting SmartNode device and PC to a LAN with DHCP server 41 17 Typical Ethernet straight through cable diagram for 10 100Bas...

Page 9: ...ntries 30 6 RJ 11 socket 33 7 Factory Default IP Address and Network Mask Configuration 39 8 Factory Default IP Address and Network Mask Configuration 42 9 10 100 Base T RJ 45 socket 59 10 1000Base T...

Page 10: ...arting on page 44 contains information on contacting Patton technical support for assistance Appendix A starting on page 47 provides compliance info for the SmartNode devices Appendix B starting on pa...

Page 11: ...by the user The equipment shall be returned to Patton Electronics for repairs or repaired by qualified service personnel Mains Voltage In systems without a power switch line voltages are present in t...

Page 12: ...rtlichen regulatorischen Anforderungen entsprechenden Schutzschalter abgesichert sein F r mit Wechselstrom betriebene Ger te muss sichergestellt sein dass das verwen dete Netzkabel alle g ltigen Norme...

Page 13: ...ents of council directive 2002 96 EC on Waste of Electri cal and Electronic Equipment WEEE ensure that at end of life you separate this product from other waste and scrap and deliver to the WEEE colle...

Page 14: ...he leading IP address or nodename of a SmartNode is substituted with node in bold face italic font SN The leading SN on a command line represents the nodename of the SmartNode An hash sign at the begi...

Page 15: ...15 Chapter 1 SN5540E SN4140E Series Quick Start Chapter contents Default IP Settings 16 Default Login 16 Analog Port Pinout 16...

Page 16: ...e Enter key after the password prompt Analog Port Pinout FXS and FXO ports use an RJ 11 connector with 6 positions The middle 2 positions 3 and 4 are used as shown in figure 1 on page 17 and described...

Page 17: ...Analog Port Pinout 17 SmartNode 5540E 4140E Series User Manual 1 SN5540E SN4140E Series Quick Start Figure 1 RJ 11 pin outs Table 2 RJ 11 pins 3 and 4 Pin Signal 3 Ring 4 Tip...

Page 18: ...18 Chapter 2 General information Chapter contents SmartNode devices overview 19 SmartNode 5540E Series eSBC IAD 20 SmartNode 4140E Series VoIP Gateway 22...

Page 19: ...and 4140E VoIP Gateway are equipped with up to 4 FXS 4 FXO analog inter faces or up to 8 FXS interfaces and provide the following major functions Analog telephony to voice over IP SIP conversion for...

Page 20: ...ice Section On the products the following model code conventions apply on page 21 describes the SmartNode 4140E Series SmartNode 5540E Series eSBC IAD The SmartNode 5540E eSBC Series support up to 8 v...

Page 21: ...nnect to FXS devices such as the PSTN USB 2 0 port USB 2 0 host port used to connect a USB 3G 4G cellular modem A list of supported USB models can be found here Certified USB Modems 12 48 VDC power te...

Page 22: ...J 11 6 position 4 wire connectors These ports connect to FXS devices such as the PSTN 12 48 VDC power terminal block The SmartNode device requires 12 VDC 1 25 A power for operation POWER LED When lit...

Page 23: ...SmartNode devices overview 23 SmartNode 5540E 4140E Series User Manual 2 General information Figure 4 SN4140E LEDs ports and button...

Page 24: ...mation On the products the following model code conventions apply JS stands for FXS ports JO stands for FXO ports V stands for the number of VoIP calls Note For a complete listing of available models...

Page 25: ...25 Chapter 3 Applications overview Chapter contents Introduction 26 Application for SmartNode 5540E eSBC 26 Application for SmartNode 4140E VoIP Gateway 27...

Page 26: ...s uniquely suited Note Detailed configuration information for SmartNode applications can be found online at www patton com session border controller https www patton com voip iad www patton com voip g...

Page 27: ...ivability is desired see figure 6 on page 28 The major functions of the SmartNode 4140E VoIP Gateway are Optional Patton Cloud network monitoring1 QoS packet tagging Number normalization and mapping F...

Page 28: ...Application for SmartNode 4140E VoIP Gateway 28 SmartNode 5540E 4140E Series User Manual 3 Applications overview Figure 6 SN4140E application...

Page 29: ...ols 31 Power source 31 Installing the SmartNode device 31 Placing the SmartNode device 31 Connecting cables 32 Installing an interface cable on the FXS and FXO interface ports 32 Connecting the 10 100...

Page 30: ...es should include information such as listed in table 5 Network information Network connection considerations that you should take into account for planning are described for several types of network...

Page 31: ...e on page 31 2 Installing interface cables see section Connecting cables on page 32 3 Connecting power see section Connecting the power supply on page 34 When you finish installing the SmartNode devic...

Page 32: ...igure 7 Some models have FXO ports as well with equal number of ports as for FXS The FXS interfaces are connected to analog devices via cables see figure 8 on page 33 terminated with RJ 11 connectors...

Page 33: ...thernet LAN and WAN cables The SmartNode device has automatic MDX auto cross over detection and configuration on the Ethernet ports Any of the two ports can be connected to a host or hub switch with a...

Page 34: ...standards If it is not refer to Chapter 6 Contacting Patton for Assistance on page 44 to find out how to replace it with a compatible cable Note Positive and negative leads are pre terminated in the...

Page 35: ...r source Do the following Figure 12 Power source leads installation 1 Verify that the power source is powered off and that it is compatible with the SmartNode device Note When applying direct DC power...

Page 36: ...secure the wires 5 Apply power to the power source Note The SmartNode device does not have a power switch it powers on when the power source is activated 6 Verify that the green POWER LED is lit see f...

Page 37: ...d IP address 38 Factory default IP Settings 38 Login 39 Changing the WAN IP address 39 Connecting the SmartNode device to the network 40 Connecting the SN4140E to a laptop PC 41 Configure the Desired...

Page 38: ...d stays lit constantly Now the SmartNode device is ready Note The SmartNode device is equipped with Auto MDX Ethernet ports so you can use straight through cables for host or hub switch connections se...

Page 39: ...ator execution mode indicated by as command line prompt With the commands enable and configure you enter the configuration mode 192 168 1 1 enable 192 168 1 1 configure 192 168 1 1 cfg Changing the WA...

Page 40: ...ETH 0 0 port This enables the SmartNode to offer routing services to the PC hosts on LAN ETH 0 1 port The SmartNode device is equipped with Auto MDX Ethernet ports so you can use straight through or...

Page 41: ...traight through cable for host or hub switch connection There are two options for configuring the SmartNode device 1 The SmartNode device is connected to a laptop PC see figure 15 that is configured w...

Page 42: ...by the DHCP server Accessing your SmartNode device via a Telnet session displays the login screen Type the factory default login admin and leave the password empty Press the Enter key after the passwo...

Page 43: ...and you are ready to do phone calls after the SmartNode has rebooted Optionally you may execute the Wizard that matches your application online and import the generated cfg config into the SmartNode d...

Page 44: ...ntact information 45 Contacting Patton Technical Services for Free Support 45 Warranty Service and Returned Merchandise Authorizations RMAs 45 Warranty coverage 45 Out of warranty service 46 Returns f...

Page 45: ...hip ment All of our products are backed by a comprehensive warranty program Note If you purchased your equipment from a Patton Electronics reseller ask your reseller how you should proceed with warran...

Page 46: ...t will be issued upon receipt and inspection of the equipment 30 to 60 days We will add a 20 restocking charge crediting your account with 80 of the purchase price Over 60 days Products will be accept...

Page 47: ...47 Appendix A Compliance Information Chapter contents Compliance 48 EMC compliance 48 Safety compliance 48 CE compliance 48 EC Declaration of Conformity 48 Authorized European Representative 48...

Page 48: ...magnetic compatibility Council Directive 2014 35 EU on the approximation of the laws of the member states relating to electrical equipment designed for use within certain voltage limits Council Direct...

Page 49: ...e 50 Vibration 50 Shock 50 Electrical Protection 50 Optional 50 Capacity 50 Voice Signaling 50 Data Connectivity 51 Voice Processing 51 Call Switching and Services 51 FXS Connectivity 52 FXO Connectiv...

Page 50: ...IN rail mounting clip on unit Optional shelf mounting with the clip removed Enclosure Metal enclosure to be installed in a cabinet on a DIN rail or on a shelf Vibration IEC 60068 2 6 7 5mm 5 8 Hz 2g 1...

Page 51: ...aw G 723 1 6 4 kbps G 729 729a 729ab 8 kbps G 726 16 24 32 40 Kbps AMR NB 4 75 5 15 5 9 6 7 7 4 7 95 10 2 12 2 kbps Fax relay T 38 bypass G 711 iLBC at 13 33 kbps SIP SIP only G 168 2004 echo cancella...

Page 52: ...rammable impedance Ring detection tone detection Caller ID detection FXS DTMF Disconnect supervision Connectivity 1 or 2 10 100 1000Base T Ethernet ports depending on model Auto MDIX USB 2 0 host port...

Page 53: ...ent MIB II and private MIB Built in diagnostic tools Physical Dimensions 8 1 16 W x 6 3 16 D x 2 1 8 H in 20 3 W x 15 8 D x 5 4 H cm Weight 1 lb 15 oz 890 g Power Consumption 7 2 watts Operating Tempe...

Page 54: ...54 Appendix C Cabling Chapter contents Introduction 55 Ethernet 55 Analog FXS 56 Analog FXO 57...

Page 55: ...et ports on the SmartNode device are Auto MDX Use any straight or crossover cable to a host hubs switches PCs or other devices Note Connecting both Ethernet ports to the same switch will only work if...

Page 56: ...nected to analog terminals phones fax machines answering machines etc via cables terminated with RJ 11 connectors see section FXS port on page 59 for details on port pinouts Figure 19 Connecting an FX...

Page 57: ...Note The phone line socket connector type and pinout available from the public network vary from country to country Refer to technical information avail able from your local operator for additional c...

Page 58: ...58 Appendix D Port pin outs Chapter contents Introduction 59 Ethernet 59 FXS port 59 FXO port 60...

Page 59: ...d FXS port The FXS ports use an RJ 11 connector with 6 positions The middle two positions 3 and 4 are used according to table 11 and figure 21 on page 60 Note Pins not listed are not used Table 9 10 1...

Page 60: ...D Port pin outs Figure 21 RJ 11 pinout diagram FXO port The FXO ports use an RJ 11 connector with 6 positions The middle two positions 3 and 4 are used according to table 12 Note Pins not listed are n...

Page 61: ...61 Appendix E SmartNode Device Factory Configuration Chapter contents Introduction 62...

Page 62: ...ction Factory configuration settings for the SmartNode device can be obtained with the following command through the CLI login admin password Enter 192 168 1 1 show config shipping config See Chapter...

Page 63: ...63 Appendix F Reset Button Functions Chapter contents Introduction 64 Resetting the SmartNode device when it is operating and the POWER LED is lit 65 Very exceptional case minimal config recovery 66...

Page 64: ...ating and the POWER LED is lit on page 65 Erase the startup config settings which is followed by a SmartNode device reboot as indicated by the slow blinking of all LEDs see section Resetting the Smart...

Page 65: ...igure 23 SN5540E Reset button Resetting the SmartNode device when it is operating and the POWER LED is lit The Reset button has the following behaviors depending on how many seconds see figure 24 the...

Page 66: ...d Reboot device B press twice with 1 second gap between presses Patton Cloud On boarding procedure Do the following 1 Log into Patton Cloud at https patton io 2 Click on Devices 3 Click on Register De...

Page 67: ...e booted up the device will run using the minimal config Minimal configuration file cli version 4 00 telnet server shutdown ssh server no shutdown web server http shutdown web server https shutdown co...

Page 68: ...68 Appendix G Installing Optional Rack Ears Chapter contents Installing the rack ears 69...

Page 69: ...cluded with the rack ears kit to secure the rack ear 2 Repeat step 1 to install the remaining rack ear on the other side of the device Figure 25 Connecting the 552 GS2 to a CL1300R 3 Install the devic...

Page 70: ...70 Appendix H Installing Optional DIN Rail Mounting Clip Chapter contents DIN rail mounting clip installation 71 Attaching the SmartNode device to a DIN rail using the mounting clip 71...

Page 71: ...top side up place the mounting clip as shown figure 26 2 Using a cross tip screwdriver install the two mounting screws included with the DIN rail mounting clip kit to secure the clip Figure 26 DIN rai...

Page 72: ...27 Mounting clip oriented for installation on DIN rail 2 The SmartNode device can be attached to top hat NS 35 7 5 35 H 7 5 D mm and NS 35 15 35 H 15 D mm section types of DIN rail see figure 28 Insta...

Page 73: ...al H Installing Optional DIN Rail Mounting Clip Figure 29 Installing the device onto the DIN rail 3 Rotate the device until the lower DIN rail lip snaps into the lower DIN rail clip slot see callout 2...

Page 74: ...ent Chapter contents End User License Agreement 75 1 Definitions 75 2 Title 75 3 Term 75 4 Grant of License 75 5 Warranty 76 6 Termination 76 7 Notices 76 8 Other Licenses 76 9 Unenforceable Provision...

Page 75: ...software but are standard commercial software Except for the license use rights otherwise expressly provided in this Agreement no right title or interest in Patton Licensed Products is granted hereun...

Page 76: ...destroying all copies of the licensed Program s B Patton Electronics Company may terminate this Agreement should End User violate any of the provi sions of section 4 Grant of License on page 75 C Upon...

Page 77: ...ereby irrevocably submits to the exclusive jurisdiction of the courts of the State of Maryland USA for any dispute arising under or relating to this agreement and waives user s right to institute lega...

Reviews: