®
ES-9080A
012-07227G
Basic Electrostatics System
21
Demonstration 3: Capacitance and Dielectrics
Introduction
The purpose of this series of demonstrations is to investigate the relationship between charge,
voltage and capacitance for a parallel plate capacitor. Each one of the variables will be held
constant in turn, varying one of the others while measuring the third. The capacitance of a
parallel plate capacitor is given by
, where
is the dielectric coefficient,
A
is the
plate area, and
d
is the plate separation. Various materials can be inserted between the plates
to measure the dielectric coefficient of the materials.
NOTE: At this point, the students should understand the theory of capacitors connected in
parallel. If not, go to Procedure D of this demonstration.
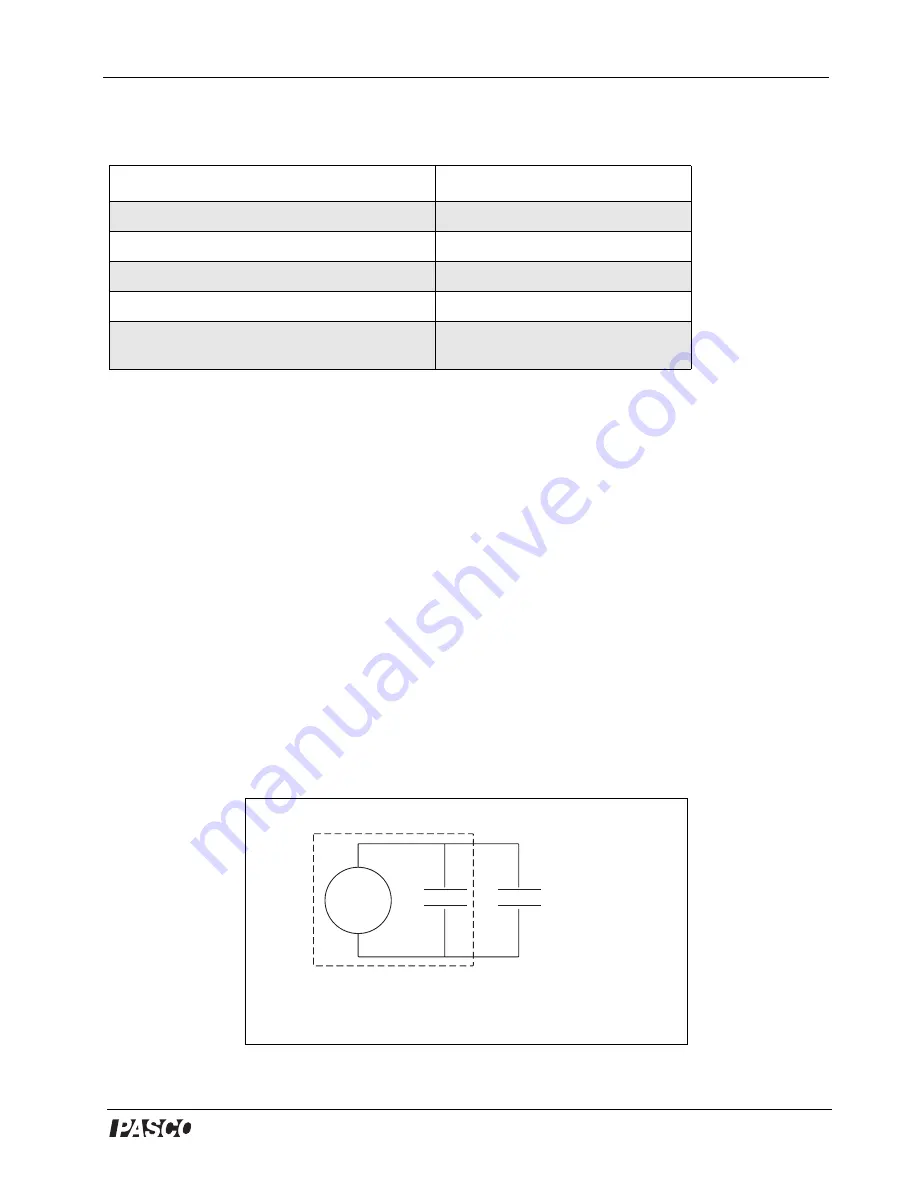
For all experiments, the electrometer can be thought of as an infinite impedance voltmeter in
parallel with a capacitor, as shown in Figure 3.1. The capacitor C
E
represents the internal
capacitance of the electrometer, plus the capacitance of the leads.
Whenever you want quantitative measurements of charge, voltage or capacitance, you need to
consider the effect of the internal capacitance of the electrometer, unless you are certain that
the capacitor you are using has a high enough capacitance to disregard C
E
. This is not true,
however, when using the Basic Variable Capacitor (ES-9079).
Equipment Required:
Electrometer (ES-9078A)
Faraday Ice Pail (ES-9042A)l
Charge Producers (ES-9057B)
Proof Planes (ES-9057B)
Electrostatic Voltage Source (ES-9077)
Signal Input cable (Test leads)
13 cm Conductive Spheres (2) (ES-9059B)
Variable Capacitor (ES-9042A)
Capacitor (about 30 pF) (ES-9043)
Sheet of dielectric material
(See Table 3.1 for options)
C
A
d
------
=
Voltmeter
C
E
C
ext
Figure 3.1: Ideal Schematic of the Electrometer
Capacitance of
object connects
to the
Electrometer
Internal capacitance = 25 pF, without cable


