www.parweld.com
11. Continue to feed the wire through the outlet guide until
20mm of wire is protruding from the front of the machine
torch connector.
12. Reposition the adjustable pressure arms to there original
position to apply pressure. Adjust pressure as necessary.
Note the pressure arm should be adjusted in order to give
the minimum amount of pressure on the wire to allow
reliable feeding,
5.8 Torch Installation
Your Parweld MIG/MAG Welding Torch has been supplied ready to
weld. It has been supplied with the standard consumables denoted
in the product brochure.
To connect the torch to the power source:-
13. Remove the tip adaptor and contact tip
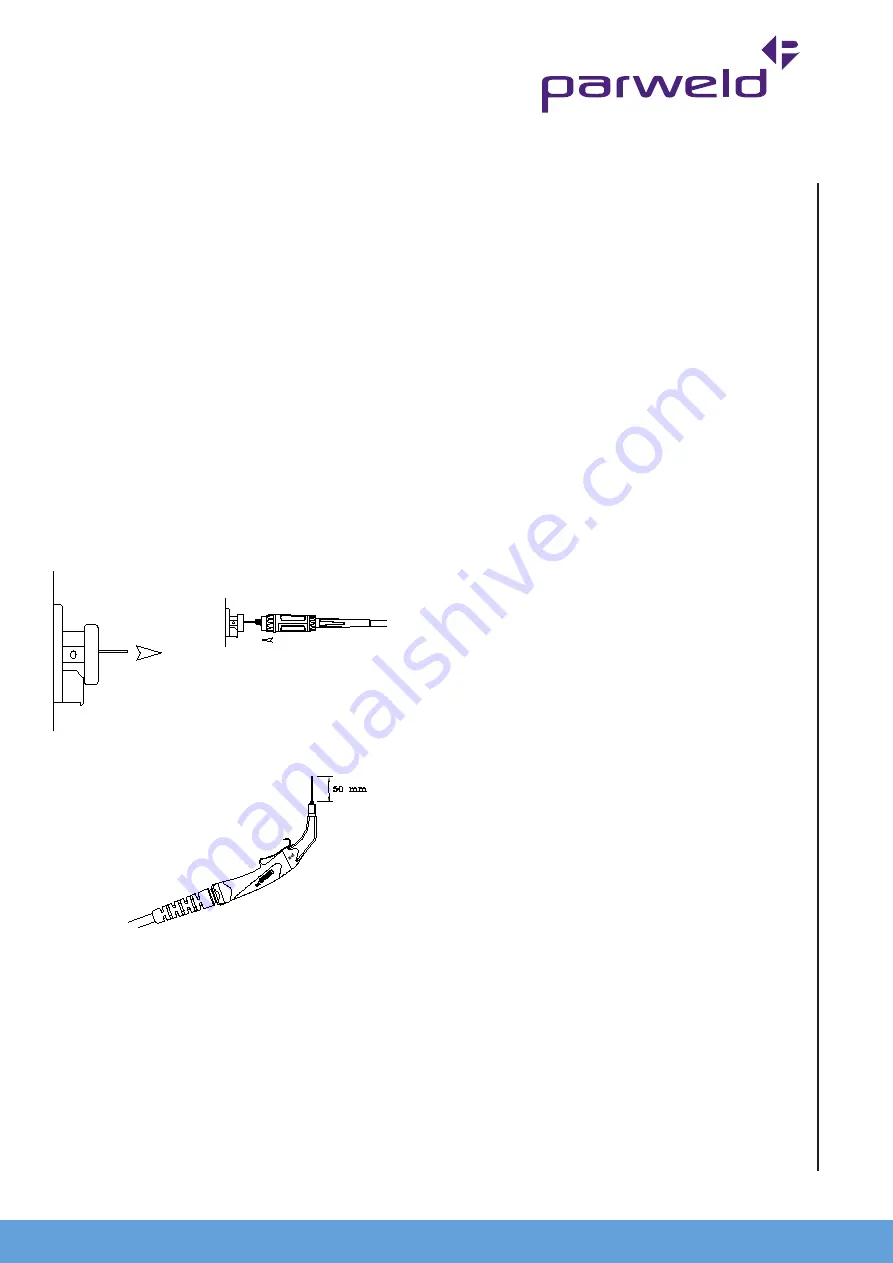
14. Inch the wire from the exit of the wire guide on the feed
unit as Figure 1. Ensure that it does not short out on any
machine panels.
15. Carefully slide the electrode wire into the torch liner and
slowly locate the torch gun plug body into the feed unit central
connector and tighten the gun plug nut as Figure 2
Note;- To aid the initial location of a new torch and to prevent
damage to the gas nipple O-ring a very light application of
grease to the O Ring is beneficial.
16. Keeping the torch as straight as possible, use the power
source inch facility or torch trigger to feed the electrode wire
50mm from the end of the liner conduit.
17.
Once the electrode wire has stopped, refit the tip adaptor,
diffuser, contact tip and gas nozzle.
18. Trim the electrode wire to within 5mm of the face of the
nozzle, this will facilitate jolt free arc initiation.
19.
Press the gas purge button and check the gas flow is
adequate for your application.
20.
An inexpensive flow meter is available from Parweld
reference 806001.
21. If you are using a water-cooled torch ensure you have the
recommended water flow rate.
Note;- It is essential to ensure adequate flow of clean, cool
water to prevent irreparable torch failure, a minimum of 1.2 l/
min is recommended.
9
Fig 1
Fig 2
x
Parweld recommend the use of its XTS water recirculation system
designed specifically for use with all water cooled MIG, TIG and
Plasma welding torches.
The Parweld XTS recirculation equipment can be fitted with a fail-
safe flow protection device to prevent overheating or meltdown.
Note. Water flows into the torch through the blue hose. The blue
hose delivers cold water directly to the prime source of heat, the
swan neck and consumables. The re circulated water is then
passed through the torch power cable to cool the power cable as it is
returned to the cooler through the red water return lead.
Ensure all air is removed from the water cooling circuit before
welding.
5.9 Work Return Lead Connection
Insert the work return lead connector into the receptacle on the front
panel of the machine and twist it clockwise until tightly secured.
Connect the earth clamp to the work piece as close as possible to
the point to be welded and ensure that a good electrical connection
is created to bare metal.
Note the XTM404S has 2 work return lead sockets providing
different inductance settings refer to the Operating Instructions
for your perfered setting.
5.10 Shielding Gas Connection
1. Connect gas hose to the output connection of a gas
regulator capable of supplying the correct gas flow for the
welding operation.
Note if the gas cylinder is to be stored on the back of the
machine ensure it is secured using the retention chain provided
6.0 Operation
1. Switch on the machine using the switch on the front panel.
2. Turn the “VOLTAGE SELECTOR” switches Set voltage
midway between high/low voltages.
NOTE: Check that drive rolls, and torch parts are correct for the
wire size and type being used.
3. The optimum idle roll pressure varies with type of wire, wire
diameter, surface conditions, lubrication, and hardness. As
a general rule, hard wires may require greater pressure,
and soft, or aluminium wire, may require less pressure than
the factory setting. The optimum idle roll setting can be
determined as follows:
4. Press end of gun against a solid object that is electrically
isolated from the welder output and press the gun trigger for
several seconds.
5. If the wire “bird nests”, jams or breaks at the drive roll, the idle
roll pressure is too great. Back the adjustment knob out 1/2
turn, run new wire. If the only result was drive roll slippage,
loosen the Hand nut on the central connector and pull the
gun forward about 6” (15cm) away from the power source.
There should be a slight waviness in the exposed wire. If
there is no waviness, the pressure is too low. Tighten the
adjustment knob 1/4 turn, reinstall the gun cable and repeat
the above steps.
Summary of Contents for XTM404S
Page 1: ...OPERATOR MANUAL ISSUE 2 XTM404S XTM WF400...
Page 17: ...www parweld com 17...


