Start using
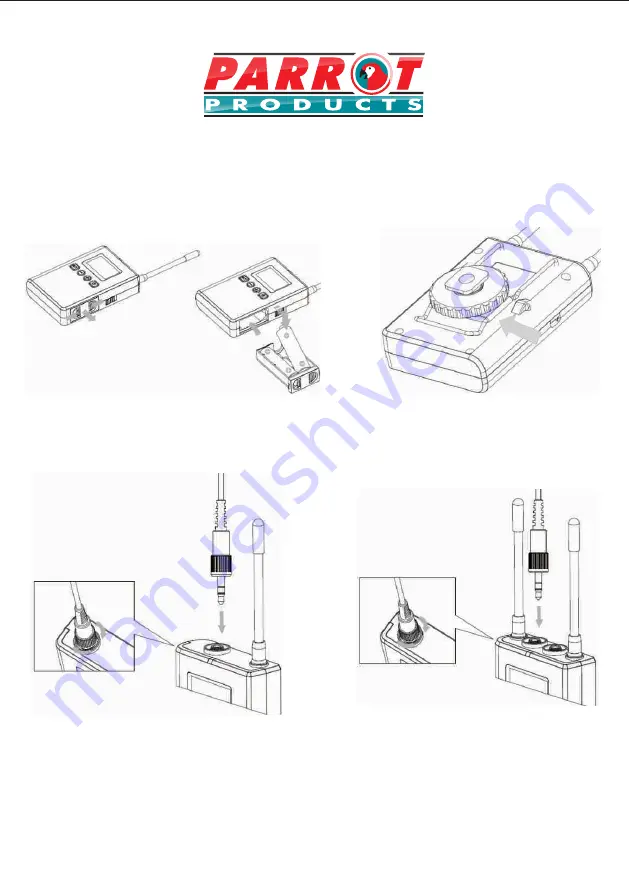
1. Inserting the battery: Press the locking parts to take out
the battery compartment. Check the battery terminals
when inserting the batteries
2. Mount the shoe-mounted connector on the belt-pack clip
of the receiver (press the belt-pack clip inward for easy
installation)
3. Connect the microphone to the MIC socket of the
transmitter, make sure it is fully plugged in and securely
locked
4. Connect the OUT socket of the receiver with the
MIC IN socket of the video camera or AUX IN socket
of other device by using the audio connection cable
5. Turn on the transmitter and receiver
6. Set the transmitter and receiver to the same channel by using the function setting button
Channel adjustment method:
Press the SET button, when “CH / A or CH / B” on the display flashes (CH - ** on
the display of the receiver flashes), adjust the channel by pressing. Press SET again to exit and save the setting,
or exit automatically after 5 seconds and save the setting. For example: channel A transmitter is set as CHA09,
channel B transmitter is set as CHB09, the receiver channel is set as CH-09
3


