background image

11

GB

IE

NI

matches the label on the 
equipment.  
Reduce the risk of injuries and 
accidents by wearing person-
al protection equipment and 
ensuring that the unit is fully 
functional.

  Note noise protection and local 

specifications.

Removing/inserting the 
battery

  1.  To remove the battery from the 

device, press the release button 
(13) on the battery (9) and pull 
the battery out.


2.  To insert the battery (9), place it 

on the guide track (14) and push 
it back into the appliance. It will 
audibly snap in.

  Do not insert the battery until 

the appliance is fully assem-
bled. Risk of injury!

Switching On and Off

  Ensure that you are standing in a 

firm position with both hands grip

-

ping the hedge trimmer away from 
the body. Ensure that the trimmer 
is in contact with no other objects 
before switching on.


  Removing the blade guard:


1.  Press the blade guard (

 11) at 

the points marked 

press

and remove it.


Turning on:


2.  Check that the battery (9) is in 

(see “Removing/inserting the 
battery”).


3.  Press the safety switch (4) at the 

front handle (5).


4.  Press the On/Off switch (7). The 

hedge trimmer will run at top 
speed. 


  Turning off:


5.  Release the safety switch (4) or 

the On/Off switch s (7). 

  Setting the rear handle

The rear handle (8) can be placed into 
three different positions (-90°, 0° and 90°).

1.  Slide the release button (15) back-

wards.

2.  Rotate the rear handle (8) into the de-

sired position.

3.  Let go of the release button (15). The 

rear handle (8) will latch into position.

Working with the Hedge 
Trimmer

  During cutting work, ensure that no 

contact is made with objects, e.g. 
such as wire fencing or main plant 
stems. This may result in damage to 
the cutter bar. 

•  If the blades become jammed with 

solid objects, turn the device off imme-
diately and remove the rechargeable 
battery. Only then should you remove 
the object.

•  Avoid overstraining the equipment dur-

ing work.

Summary of Contents for PHSA 20-Li A1

Page 1: ...CORDLESS HEDGE TRIMMER PHSA 20 Li A1 AKKU HECKENSCHERE Originalbetriebsanleitung CORDLESS HEDGE TRIMMER Translation of the original instructions IAN 311706...

Page 2: ...ourself with all functions of the device Klappen Sie vor dem Lesen die Seite mit den Abbildungen aus und machen Sie sich anschlie end mit allen Funktionen des Ger tes vertraut GB IE NI Translation of...

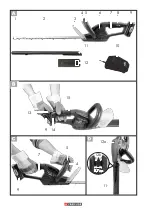
Page 3: ...1 2 3 5 6 7 7 5 4 11 8 9 10 11 14 9 9 13 12 4 1 7 cm 12b 12a 15...

Page 4: ...n isolated cases This is not a fault or defect and it represents no cause for concern The operating instructions constitute part of this product They contain important information on safety use and di...

Page 5: ...the appliance s two hand safety switch and quick stop brake func tion The hand protection guards your hands against twigs and branches Read the sections below to learn more about each operating eleme...

Page 6: ...example times when the electric tool is switched off and times when it is switched on but running without any load Notes on Safety This section details the basic safety instruc tions for working with...

Page 7: ...dy contact with earthed or grounded surfaces such as pipes radiators ranges and refrigerators There is an increased risk of electric shock if your body is earthed or grounded Do not expose power tools...

Page 8: ...not use the power tool if the switch does not turn it on and off Any power tool that cannot be controlled with the switch is dangerous and must be repaired Disconnect the plug from the power source an...

Page 9: ...R HEDGE TRIMMERS Keep all parts of the body away from the cutter blade Do not remove cut material or hold ma terial to be cut when blades are moving Make sure the switch is off when clearing jammed ma...

Page 10: ...in this field All works which are not described in this manual may only be per formed by our Service Centre Many accidents are caused by poorly maintained equipment 3 RESIDUAL RISKS Even if properly o...

Page 11: ...guard 1 Press the blade guard 11 at the points marked press and remove it Turning on 2 Check that the battery 9 is in see Removing inserting the battery 3 Press the safety switch 4 at the front handle...

Page 12: ...from bottom to top If you cut down from the top the thin ner branches will move out which may result in some areas having sparse growth or holes Cut the top edge according to taste in a flat shape ro...

Page 13: ...inal parts Storage Keep the device in the blade guard 14 supplied dry and out of reach of children Wall bracket Suspension device on the underside of the device 12a Using dowels place one screw at the...

Page 14: ...ccess please contact the Service Centre via telephone see Service Center Page 16 Please have the order number mentioned below ready Position Position Description Order No instruction exploded manual d...

Page 15: ...d conscientiously checked prior to delivery The guarantee applies for all material and manufacturing defects This guarantee does not extend to cover product parts that are subject to normal wear and m...

Page 16: ...ng and postage Attention Please send your equipment to our service branch in clean condition and with an indication of the defect Equipment sent carriage forward or by bulky goods express or other spe...

Page 17: ...e Send in to Service Centre for repair Intermittent operation Internal loose contact Send in to Service Centre for repair On Off switch 7 defective Knife bar becomes hot Knife bar 2 is blunt Have the...

Page 18: ...zu schlie en dass sich in Einzelf llen am oder im Ger t Restmengen von Schmierstoffen befinden Dies ist kein Mangel oder Defekt und kein Grund zur Besorgnis Die Betriebsanleitung ist Bestandteil diese...

Page 19: ...es Messer aus gelasertem Spezialstahl Beim Schneid vorgang bewegen sich die Schneidz hne linear hin und her Der Ansto schutz an der Spitze des Messerbalkens verhindert unangenehme R ckschl ge beim Auf...

Page 20: ...terscheiden abh ngig von der Art und Weise in der das Elektro werkzeug verwendet wird Versuchen Sie die Belastung durch Vibrationen so gering wie m glich zu halten Beispielhafte Ma nahmen zur Verringe...

Page 21: ...Es besteht ein erh htes Risiko durch elektrischen Schlag wenn Ihr K rper geerdet ist c Halten Sie Elektrowerkzeuge von Regen oder N sse fern Das Eindringen von Wasser in ein Elektroge r t erh ht das...

Page 22: ...rowerkzeuges kann zu ernsthaften Verletzungen f hren b Tragen Sie pers nliche Schutz ausr stung und immer eine Schutzbrille Das Tragen pers nlicher Schutzausr stung wie Staubmaske rutschfeste Sicherhe...

Page 23: ...rkzeuge mit Sorgfalt Kontrollieren Sie ob bewegliche Teile einwandfrei funktionieren und nicht klem men ob Teile gebrochen oder so besch digt sind dass die Funktion des Elektrowerkzeuges beeintr chtig...

Page 24: ...zuhalten Entfernen Sie einge klemmtes Schnittgut nur bei aus geschaltetem Ger t Ein Moment der Unachtsamkeit bei Benutzung der Heckenschere kann zu schweren Verlet zungen f hren Tragen Sie die Heckens...

Page 25: ...und nachschleifen zu lassen Stumpfe Messer berlasten das Ger t Daraus resultierende Sch den unterliegen nicht der Garantie Versuchen Sie nicht das Ger t selbst zu reparieren es sei denn Sie besitzen h...

Page 26: ...n Sie den Akku erst ein wenn das Ger t vollst ndig montiert ist Es besteht Verlet zungsgefahr Ein und Ausschalten Achten Sie auf einen sicheren Stand und halten Sie das Ger t mit beiden H nden und mit...

Page 27: ...ent spricht dem nat rlichen Pflanzenwachstum und l sst Hecken optimal gedeihen Beim Schnitt werden nur die neuen Jahrestriebe redu ziert so bildet sich eine dichte Verzwei gung und ein guter Sichtschu...

Page 28: ...ken 2 berpr fen Sie Abdeckungen und Schutzeinrichtungen siehe auf Besch digungen und korrekten Sitz Tauschen Sie diese gegebenenfalls aus Leichte Scharten an den Schneidz hnen k nnen Sie selbst gl tte...

Page 29: ...nis umgegossen werden Achten Sie beim Bohren darauf keine Versorgungs leitungen zu besch digen Verwenden Sie geeignete Suchger te um diese auf zusp ren oder nehmen Sie einen Installationsplan zu Hilfe...

Page 30: ...nter Ein Ausschalter 7 defekt Sicherheitsmes serbalken wird hei Sicherheitsmesserbalken 2 stumpf Sicherheitsmesserbalken schleifen oder austauschen lassen Service Center Sicherheitsmesserbalken 2 hat...

Page 31: ...Sie sich bitte telefonisch an das Service Center siehe Service Center Seite 33 Halten Sie die unten genannten Bestellnummern bereit Position Position Bezeichnung Bestell Nr Betriebs Explosions anleitu...

Page 32: ...pa cken gemeldet werden Nach Ablauf der Garantiezeit anfallende Reparaturen sind kostenpflichtig Garantieumfang Das Ger t wurde nach strengen Qualit ts richtlinien sorgf ltig produziert und vor Anlief...

Page 33: ...der Ga rantie unterliegen gegen Berechnung von unserer Service Niederlassung durchf hren lassen Sie erstellt Ihnen gerne einen Kos tenvoranschlag Wir k nnen nur Ger te bearbeiten die ausreichend verpa...

Page 34: ...014 2 2015 EN 62321 2009 We confirm the following in accordance with the 2000 14 EC emissions guideline Sound power level guaranteed 90 dB A measured 87 dB A Compliance evaluation process carried out...

Page 35: ...1 2009 Zus tzlich wird entsprechend der Ger uschemissionsrichtlinie 2000 14 EG best tigt Schallleistungspegel Garantiert 90 dB A Gemessen 87 dB A Angewendetes Konformit tsbewertungsverfahren entsprech...

Page 36: ...36 Exploded Drawing Explosionszeichnung informative informativ PHSA 20 Li A1 20190122_rev02_mt...

Page 37: ...37...

Page 38: ...GRIZZLY TOOLS GMBH CO KG Stockst dter Stra e 20 DE 63762 Gro ostheim GERMANY Last Information Update Stand der Informationen 01 2019 Ident No 72031089012019 GB IE NI IAN 311706...

Page 39: ...AKKU LADEGER T 20 V Originalbetriebsanleitung BATTERY CHARGER 20 V Translation of the original instructions IAN 311706 BATTERY 20 V PAP 20 A1 CHARGER 20 V PLG 20 A1...

Page 40: ...ourself with all functions of the device Klappen Sie vor dem Lesen die Seite mit den Abbildungen aus und machen Sie sich anschlie end mit allen Funktionen des Ger tes vertraut GB IE NI Translation of...

Page 41: ...1 2 3 4 5 5 4 6...

Page 42: ...X 20 V Team series Any other use can damage the device and thus pose a substantial risk to the user This de vice is not suitable for commercial use The warranty is void in the case of commercial use T...

Page 43: ...physi cal sensory or mental capabilities or lack of experience and knowl edge if they have been given su pervision or instruction concerning use of the appliance in a safe way and understand the hazar...

Page 44: ...the device is completely assembled Risk of injury Switch off the device and re move the battery before car rying out any maintenance work The rechargeable battery only reaches its full capacity once...

Page 45: ...e Service Never repair damaged batter ies All battery repairs should be carried out by the manufac turer or authorised customer service centres only Special safety directions for battery operated tool...

Page 46: ...short circuits Do not operate the charger on a combustible surface e g paper textiles Risk of fire due to heat ing during charging If the power cable for this equipment is damaged it must be replaced...

Page 47: ...battery is displayed by illuminating the 3 colour LED lights of the state of charge display 3 LEDs light up red orange and green Battery is fully charged 2 LEDs light up red and orange Battery has a r...

Page 48: ...pment between 10 C and 25 C During storage avoid ex treme cold or heat so the battery does not lose power Cleaning Clean the rechargeable battery 1 and charger 3 with a dry brush or dry cloth Keep the...

Page 49: ...ars of the date of purchase of this product we will repair or replace at our choice the product for you free of charge This guarantee requires the defective equipment and proof of pur chase to be pres...

Page 50: ...ance problems and additional costs please be sure to use only the address communicated to you Ensure that the consignment is not sent carriage forward or by bulky goods express or other special freigh...

Page 51: ...Ger t der Serie Parkside X 20 V Team zu nutzen Jede andere Verwendung kann zu Sch den am Ger t f hren und eine ernsthafte Gefahr f r den Benutzer darstellen Dieses Ger t ist nicht zur gewerblichen Nu...

Page 52: ...gkeiten oder Mangel an Erfah rung und Wissen benutzt werden wenn sie beaufsichtigt oder bez g lich des sicheren Gebrauchs des Ger tes unterwiesen wurden und die daraus resultierenden Gefah ren versteh...

Page 53: ...s Ger t aus und nehmen Sie vor allen Arbeiten den Akku aus dem Ger t Der Akku erreicht erst nach mehrmaligem Laden seine volle Kapazit t Allgemeine Sicherheitshinweise Achtung Beim Gebrauch von Elektr...

Page 54: ...Sie niemals besch dig te Akkus S mtliche Wartung von Akkus sollte nur durch den Hersteller oder bevollm chtige Kundendienststellen erfolgen Spezielle Sicherheitshinweise f r Akkuger te Stellen Sie sic...

Page 55: ...en werden Das Laden von anderen Akkus kann zu Verlet zungen und Brandgefahr f hren Vermeiden Sie mechanische Be sch digungen des Ladeger tes Sie k nnen zu inneren Kurz schl ssen f hren Das Ladeger t d...

Page 56: ...ie jeweils g ltigen Sicherheitshinweise sowie Bestim mungen und Hinweise zum Umweltschutz Defekte die aus unsachgem er Hand habung resultieren unterliegen nicht der Garantie Akku entnehmen einsetzen 1...

Page 57: ...rbrauchte Akkus Eine wesentlich verk rzte Betriebszeit trotz Aufladung zeigt an dass der Akku verbraucht ist und ersetzt werden muss Verwenden Sie nur einen Ersatz Akku den Sie ber den Kundendienst be...

Page 58: ...Ser vice Center Entsorgen Sie Akkus im entladenen Zustand Wir empfehlen die Pole mit einem Klebestreifen zum Schutz vor einem Kurzschluss abzudecken ffnen Sie den Akku nicht Entsorgen Sie Akkus nach...

Page 59: ...sen sofort nach dem Auspa cken gemeldet werden Nach Ablauf der Garantiezeit anfallende Reparaturen sind kostenpflichtig Garantieumfang Das Ger t wurde nach strengen Qualit ts richtlinien sorgf ltig pr...

Page 60: ...ice Sie k nnen Reparaturen die nicht der Ga rantie unterliegen gegen Berechnung von unserer Service Niederlassung durchf hren lassen Sie erstellt Ihnen gerne einen Kos tenvoranschlag Wir k nnen nur Ge...

Page 61: ...2 29 2004 A2 2010 EN 62321 2009 EN 55014 1 2006 A2 2011 EN 55014 2 2015 EN 61000 3 2 2014 EN 61000 3 3 2013 This declaration of conformity 19 is issued under the sole responsibility of the manufactur...

Page 62: ...21 2009 EN 55014 1 2006 A2 2011 EN 55014 2 2015 EN 61000 3 2 2014 EN 61000 3 3 2013 Die alleinige Verantwortung f r die Ausstellung dieser Konformit tserkl rung 19 tr gt der Hersteller Christian Frank...

Page 63: ...25 20190124_rev02_mt...

Page 64: ...GRIZZLY TOOLS GMBH CO KG Stockst dter Stra e 20 DE 63762 Gro ostheim GERMANY Last Information Update Stand der Informationen 01 2019 Ident No 72031089012019 GB IE NI IAN 311706...

Reviews: