background image

A

6

B

10

11

C

D

E

F

6

5

7

8

1

2

3

4

12
13

14

14

16

15

9

Summary of Contents for PEBS 900 - 3

Page 1: ...ildungen aus und machen Sie sich anschließend mit allen Funktionen des Gerätes vertraut Before you begin reading this information please unfold the page with the illustrations and familiarize yourself with all functions of the tool Antes de empezar a leer abra la página que contiene las imágenes y en seguida familiarícese con todas las funciones del dispositivo Prima di leggere aprire la pagina co...

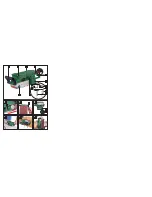
Page 2: ...A 6 B 10 11 C D E F 6 5 7 8 1 2 3 4 12 13 14 14 16 15 9 ...

Page 3: ...so de las herramientas eléctricas Página 9 Indicaciones de seguridad para la lijadora de cinta Página 9 Puesta en marcha Tensar cambiar la lija Página 10 Indicaciones de trabajo Página 11 Aspiración del polvo Página 11 Manejo Conexión y desconexión Página 11 Seleccionar el número de revoluciones y la lija Página 12 Trabajos estacionarios Página 13 Consejos y sugerencias Página 13 Mantenimiento y l...

Page 4: ...nto 1 Rueda de ajuste de la velocidad de la cinta 2 Botón de fijación 3 Interruptor de conexión desconexión 4 Cubierta de la correa dentada 5 Manguito de aspiración 6 Tornillo de ajuste para recorrido de la cinta 7 Mango adicional 8 Ranuras de ventilación 9 Palanca de tensión 10 Caja colectora de polvo 11 Adaptador de succión En estas instrucciones de uso se utilizan los siguientes pictogramas sím...

Page 5: ...lor de emisión de vibraciones ah D 2 828m s2 Tolerancia K 1 5m s2 Advertencia El nivel de vibración indi cado en estas instrucciones se ha determinado egún un procedimiento de medición fijado en la norma EN 60745 y puede usarse como base para la comparación con otros aparatos El nivel de vibraciones variará dependiendo del uso de la herramienta eléctrica y puede en muchos casos superar el valor in...

Page 6: ...ros fines como para transportar o colgar el aparato o para tirar de la clavija de red al desenchu farlo Mantenga el cable al resguar do del calor del aceite de los bordes afilados o de las piezas móviles del aparato Los cables dañados o retorcidos aumentan el riesgo de descarga eléctrica e Al trabajar con herramientas eléctricas al aire libre utilice sólo cables de ex tensión que también estén aut...

Page 7: ...ato sobre una superficie Esta medida de precaución evita que se ponga en marcha el aparato por accidente d Conserve las herramientas eléctricas que no use fuera del alcance de los niños No permita utilizar el aparato a personas que no estén familiariza das con él o que no hayan leído estas indicaciones Las herramientas eléctricas son peligrosas si las usan personas sin expe riencia e Cuide el apar...

Page 8: ...elo J Durante el trabajo sujete siempre el aparato fir memente con las dos manos vea también la fig D Procure mantenerse en una postura fir me y segura J Deje que el aparato se pare por completo y desconéctelo antes de depositarlo J Al hacer pausas en el trabajo al ir a realizar cualquier trabajo en el propio aparato p ej cambiar la lija y si no se va a utilizar el mis mo extraiga siempre el enchu...

Page 9: ...lsa para polvo o en la bolsa para polvo de la aspiradora Esto puede ocurrir especialmente cuando el polvo de la made ra está mezclado con restos de laca o de otras sus tancias químicas y la pieza a pulir se ha calentado después de haber trabajado con ella por largo tiempo Por ello evite a toda costa un recalenta miento de la pieza a pulir y del aparato y antes de hacer una pausa vacíe siempre la c...

Page 10: ... con el aparato en marcha La mejor ve locidad de la cinta depende la pieza de trabajo o material Descubra cuál se el mejor número de re voluciones con un intento práctico En la siguiente tabla encontrará valores orientativos que le ayuda rán en esta tarea Material área de trabajo Madera blanda Lijado grueso granulado 60 Lijado fino granulado 240 Preselección de la rotación alta 5 6 Material área d...

Page 11: ...pernos de los sargentos 14 en los orificios en uno de los lados cortos del mar co de montaje 12 Sujete el marco de montaje 12 a una superficie plana y fija p ej banco de trabajo apretando los sargentos 14 j Introduzca ambas placas de distancia 15 en las perforaciones previstas para ello en la su perficie de apoyo del marco de montaje 12 Para ello las disminuciones tienen que estar dirigidas hacia ...

Page 12: ...aratos únicamen te por personal técnico cualificado y con repuestos originales Así se garanti za que el aparato seguirá siendo seguro J Si es necesario cambiar el enchufe o el cable de alimentación encargue este trabajo al fabricante del aparato o a su servicio de atención al cliente Así se garantiza que el aparato seguirá siendo seguro Q Declaración de conformidad Fabricante Nós Kompernaß GmbH Bu...

Page 13: ...positivi elettrici Pagina 19 Indicazioni di sicurezza per levigatrici a nastro Pagina 19 Messa in funzione Fissare sostituire il nastro abrasivo Pagina 20 Indicazione per il lavoro Pagina 20 Aspirazione delle polveri Pagina 21 Uso Accensione e spegnimento Pagina 21 Selezione del numero di giri del nastro Pagina 22 Lavorazione stazionario Pagina 23 Consigli e trucchi Pagina 23 Manutenzione e Pulizi...

Page 14: ...uttore ON OFF 4 Copertura della cinghia dentata 5 Manicotto di aspirazione 6 Vite di regolazione per il percorso del nastro 7 Maniglia aggiuntiva 8 Fessure di aerazione 9 Leva di fissaggio 10 Box raccolta polveri 11 Adattatore per aspiratore Set di montaggio stazionario 12 Telaio di montaggio 13 Piastre di fissaggio 2x 14 Morsetti a vite 2x Nel presente manuale di istruzioni per l uso vengono util...

Page 15: ... vibrazioni indicato nelle presenti istruzioni d uso è stato misurato in conformità alla procedura di misu razione esplicata nella norma EN 60745 e può essere utilizzato per il confronto tra apparecchi Il livello di vibrazioni si modifica a seconda del tipo di utilizzo dell apparecchio elettrico ed in alcuni casi può essere superiore al valore indicato nelle presenti istruzioni d uso Il carico di ...

Page 16: ...o di parti in movimento dell apparecchio Cavi danneggiati o attor cigliati accrescono il rischio di scossa elettrica e In caso di lavori all aperto utilizzare solamente prolunghe ammesse anche per un loro utilizzo all aperto L utilizzo di una tale prolunga riduce il rischio di scossa elettrica f Qualora non si possa evitare l eserci zio dell elettroutensile in un ambiente umido fare uso di un inte...

Page 17: ...noscano o del quale non abbiano letto le istruzioni d uso I dispositivi elettrici sono pericolosi se utilizzati da persone inesperte e Avere cura dell apparecchio Control lare se parti mobili dell apparecchio funzionano perfettamente e non si bloccano se parti di esso sono rotte o danneggiate che la funzionalità dell apparecchio non sia messa a rischio Fare riparare le parti danneg giate prima di ...

Page 18: ... funzione Osservate la tensione di rete La tensione di rete della fonte di corrente deve corrispondere alle indicazioni sulla targhetta dell apparecchio Apparecchi contrassegnati con 230V possono essere impiegati anche con 220V Q Fissare sostituire il nastro abrasivo Attenzione Togliete sempre la spina dalla presa prima di eseguire lavori sulla smerigliatrice a nastro 1 Allentate prima il disposit...

Page 19: ... mascherina per la polvere Aspirazione delle polveri con box raccolta polveri j Inserite il box raccolta polveri 10 sul bocchetto ne di aspirazione 5 sul lato dell apparecchio Fig C Svuotare il box raccolta polveri j Togliete il box raccolta polveri 10 dal bocchet tone di aspirazione 5 Azinate i due tasti di bloccaggio su entrambi i lati ed aprite il box raccolta polveri 10 svuotatela e battetela ...

Page 20: ...di giri Alto 5 6 Materiale Campo di lavoro Piastre in truciolare Smerigliatura grossa granatura 60 Smerigliatura fine granatura 150 Selezione numero di giri Alto 5 6 Materiale Campo di lavoro Togliere vernici laccature Smerigliatura grossa granatura 60 Smerigliatura fine granatura Selezione numero di giri Alto 5 6 Materiale Campo di lavoro Smerigliatura di laccature Smerigliatura grossa granatura ...

Page 21: ...chettone di aspi razione 5 attraverso l apertura del telaio di montaggio 12 Serrate la vite 16 j Inserite le due piastre di fissaggio 13 sulle apposite aperture sul lato oppostoed avvitateli con le viti preparate Q Consigli e trucchi j Non lavorare mai con lo stesso nastro legno e metallo j Nastri usurati oppure rotti possono danneggiare il pezzo da lavorare Sostituite i fogli abrasivi in tempo j ...

Page 22: ...l relativo servi zio clienti a garanzia della sicurezza dell apparecchio Q Dichiarazione di conformità Produttore Noi la Kompernaß GmbH Burgstr 21 44867 Bochum Germania dichiariamo la conformità di questo prodotto con le seguenti normative europee Normativa per le macchine 98 37 EC Normativa CE per bassa tensione 73 23 EEC EN 60745 1 EN 60745 2 4 Compatibilità elettromagnetica 89 336 EEC 93 68 EEC...

Page 23: ...d use of electrical power tools Page 29 Safety advice for belt sanders Page 29 Preparing for use Tensioning changing the sanding belt Page 30 Advice on use Page 30 Vacuum dust extraction Page 31 Operation Switching on and off Page 31 Selecting the correct rotational speed and sanding belt Page 32 Using the sander in a fixed mounting Page 32 Tips and tricks Page 33 Maintenance and cleaning Page 33 ...

Page 24: ...anufacturer will not accept liability for loss or damage arising from improper use Q Features and equipment 1 Belt speed adjuster wheel 2 Locking knob 3 ON OFF switch 4 Toothed belt cover 5 Dust extraction spout 6 Belt adjuster screw 7 Auxiliary handle 8 Ventilation slots 9 Tensioning lever 10 Dust collection box 11 Extraction adapter The following icons symbols are used in this instruction manual...

Page 25: ...e vibration level given in these instructions has been measured in accordance with a standardised measurement procedure specified in EN 60745 and can be used to compare devices Different uses of the device give rise to different vibra tion levels and in many cases they may exceed the values given in these instructions It is easy to underes timate the vibration load if the electrical power tool is ...

Page 26: ...rking outdoors with an electrical power tool always use ex tension cables that are also approved for use outdoors The use of an extension cable suitable for outdoor use reduces the risk of electric shock f Use a residual current device RCD for protection if operating the electri cal power tool in a moist environ ment is unavoidable The use of an RCD reduces the risk of electric shock 3 Personal sa...

Page 27: ...e device Have dam aged parts repaired before you use the device Many accidents have their ori gins in poorly maintained electrical power tools f Keep cutting tools clean and sharp Carefully maintained cutting tools with sharp cutting edges are less likely to jam and are easier to control g Use the electrical power tool acces sories inserted tools etc in accord ance with these instructions and advi...

Page 28: ...se the tensioner for the sanding belt by moving the tensioning lever 9 fully out wards see fig A The tensioner is now open and the sanding belt can be removed 2 Next insert a new sanding belt or change the belt for one suitable for a different material or one with a different grit size Important The direction of the arrows on the inside of the sanding belt must agree with that on sander housing 3 ...

Page 29: ... collection box 10 knock out the contents on a solid surface Dust extraction using external vacuum extraction Warning If there is an explosive mixture of dust and air you must use a vacuum device espe cially intended for that purpose Danger of fire Do not use vacuum dust extraction dust collection box or vacuum cleaner when sanding metals flying sparks 1 Push the extraction adapter 11 on to the du...

Page 30: ...oarse finish Grit grade 60 Fine finish Grit grade Preselected rotation speed high 5 6 Material type of work Sanding varnish Coarse finish Grit grade 150 Fine finish Grit grade 320 Preselected rotation speed low 1 2 Material type of work Rust removal Coarse finish Grit grade 40 Fine finish Grit grade 120 Preselected rotation speed medium high 3 4 Material type of work Plastic Coarse finish Grit gra...

Page 31: ...the sanding belt properly tensioned so that it does not hang down too much and become unusable due to nicks creases etc Q Maintenance and cleaning Warning Before you carry out any work on the belt sander always pull the mains plug out of the mains socket The belt sander is designed to be maintenance free j Clean the device frequently This should be done immediately after you have finished using it...

Page 32: ...nery Directive 98 37 EC EU Low Voltage Directive 73 23 EEC EN 60745 1 EN 60745 2 4 Electromagnetic Compatibility 89 336 EEC 93 68 EEC EN 50366 EN 55014 1 EN 61000 3 2 EN 61000 3 3 EN 55014 2 Type Description of product Parkside belt sander PEBS 900 Bochum 31 03 2008 Hans Kompernaß Managing Director We reserve the right to make technical modifications in the course of further development ...

Page 33: ...Verwendung und Behandlung des Elektrowerkzeugs Seite 39 Sicherheitshinweise für Bandschleifer Seite 39 Inbetriebnahme Schleifband einspannen wechseln Seite 40 Arbeitshinweise Seite 40 Staubabsaugung Seite 41 Bedienung Ein und Ausschalten Seite 41 Drehzahl und Schleifband wählen Seite 42 Stationäres Arbeiten Seite 42 Tipps und Tricks Seite 43 Wartung und Reinigung Seite 43 Entsorgung Seite 43 Infor...

Page 34: ...r Ver wendung entstandene Schäden übernimmt der Hersteller keine Haftung Q Ausstattung 1 Stellrad Bandgeschwindigkeit 2 Feststellknopf 3 EIN AUS Schalter 4 Zahnriemenabdeckung 5 Absaugstutzen 6 Justierschraube für Bandlauf 7 Zusatz Handgriff 8 Lüftungsschlitze 9 Spannhebel 10 Staubfangbox 11 Absaugadapter Einleitung In dieser Bedienungsanleitung werden folgende Piktogramme Symbole verwendet Bedien...

Page 35: ... genormten Messverfahren gemessen worden und kann für den Gerätevergleich verwendet werden Der Schwingungspegel wird sich entsprechend dem Einsatz des Elektrowerkzeugs verändern und kann in manchen Fällen über dem in diesen Anwei sungen angegebenen Wert liegen Die Schwin gungsbelastung könnte unterschätzt werden wenn das Elektrowerkzeug regelmäßig in solcher Weise verwendet wird Hinweis Für eine g...

Page 36: ...ch bewegenden Geräteteilen Beschädigte oder verwickelte Kabel erhöhen das Risiko eines elektrischen Schlages e Wenn Sie mit einem Elektrowerkzeug im Freien arbeiten verwenden Sie nur Verlängerungskabel die auch für den Außenbereich zugelassen sind Die Anwendung eines für den Außenbereich geeig neten Verlängerungskabels verringert das Risiko eines elektrischen Schlages f Wenn der Betrieb des Elektr...

Page 37: ...ußerhalb der Reichweite von Kindern auf Lassen Sie Personen das Gerät nicht benutzen die mit diesem nicht vertraut sind oder diese Anweisungen nicht gelesen haben Elektrowerkzeuge sind gefährlich wenn sie von unerfahrenen Personen benutzt werden e Pflegen Sie Elektrowerkzeuge mit Sorgfalt Kontrollieren Sie ob beweg liche Teile einwandfrei funktionieren und nicht klemmen ob Teile gebrochen oder so ...

Page 38: ...bei Arbeitspausen vor allen Arbeiten am Gerät z B Wechsel des Schleifpapiers und bei Nichtgebrauch immer den Netzstecker aus der Steckdose Q Inbetriebnahme Beachten Sie die Netzspannung Die Netzspannung der Stromquelle muss mit den Angaben auf dem Typenschild des Gerätes übereinstimmen Geräte die mit 230V bezeichnet sind können auch mit 220V betrieben werden Q Schleifband einspannen wechseln Warnu...

Page 39: ...ren chemischen Stoffen vermischt ist und das Schleifgut nach langem Ar beiten heiß ist Vermeiden Sie deshalb unbedingt eine Überhitzung des Schleifguts und des Gerätes und entleeren Sie vor Arbeitspausen stets die Staub fangbox bzw den Staubbeutel des Staubsaugers Tragen Sie eine Staubschutzmaske Staubabsaugung mit Staubfangbox j Schieben Sie die Staubfangbox 10 auf den Absaugstutzen 5 an der Gerä...

Page 40: ... Drehzahlvorwahl hoch 5 6 Werkstoff Arbeitsbereich Spanplatten Grobschliff Körnung 60 Feinschliff Körnung 150 Drehzahlvorwahl hoch 5 6 Werkstoff Arbeitsbereich Farbe Lacke entfernen Grobschliff Körnung 60 Feinschliff Körnung Drehzahlvorwahl hoch 5 6 Werkstoff Arbeitsbereich Lacke anschleifen Grobschliff Körnung 150 Feinschliff Körnung 320 Drehzahlvorwahl niedrig 1 2 Werkstoff Arbeitsbereich Stahl ...

Page 41: ...orbereiteten Schrauben fest an Q Tipps und Tricks j Niemals mit dem selben Schleifband Holz und Metall bearbeiten j Verschlissene oder eingerissene Schleifbänder können das Werkstück beschädigen Wechseln Sie die Schleifbänder deshalb rechtzeitig aus j Bewahren Sie Schleifbänder nur hängend auf da sie durch Knicke etc unbrauchbar werden Q Wartung und Reinigung Warnung Ziehen Sie den Netzstecker imm...

Page 42: ...g Hersteller Wir Kompernaß GmbH Burgstr 21 44867 Bochum Deutschland erklären hiermit für dieses Produkt die Übereinstimmung mit folgenden EG Richtlinien Maschinenrichtlinie 98 37 EC EG Niederspannungsrichtlinie 73 23 EEC EN 60745 1 EN 60745 2 4 Elektromagnetische Verträglichkeit 89 336 EEC 93 68 EEC EN 50366 EN 55014 1 EN 61000 3 2 EN 61000 3 3 EN 55014 2 Typ Bezeichnung des Produktes Parkside Ban...

Reviews: