12
GB
IE
NI
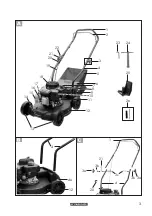
4. Screw the knurled nuts (3a) onto the
screws (3c).
On the right side of the lawn mower,
the
starter cable guide (21) must be
placed on the screw between the
washer (3b) and the handlebar (1) on
the screw (3c).
5. Fasten the Bowden cable (19) using a
cable clamp (
20) to the lower bar (4).
Fitting the starter cable
1. Pull the safety bracket (2) towards the
upper handlebar (1) and hold it in this
position.
2. Slowly pull the starter cable by the
starter handle (22) towards the bar.
3. Guide the starter cable into the starter
cable guide (21).
4. Release the safety bracket (2).
Fitting the wheels
First mount the bars as mounting the wheel
first makes access to the Phillips screw (4a)
for bar mounting difficult.
The cutting height is set by positioning the
wheels. The machine has 3 possible posi-
tions:
65 mm
- large cutting height
→
lower position cutting height (29)
45 mm
- medium cutting height
→
medium position cutting height (29)
25 mm
- low cutting height
→
upper position cutting height (29)
1. Attach each of the four wheels (13)
with a wheel bolt (13b) over a safety
washer (13c) at the desired cutting
height position (29).
Select the same cutting height position
for all four wheels (29)!
When assembling the wheels,
make sure you use the correct
wheel bolt (13b) so that the “L”
and “R” markings on the lawnmower
housing (12) match the “L” and “R”
markings on the bolt head.
The wheel bolts (13b) on the left (“L”) of
the mower are tightened anticlockwise
↺
to ensure they do not loosen by
themselves during operation.
Use the Allen key (23) to screw in the
screws.
2. Cover the wheel bolts (13b) using the
hubcaps (13a).
Removing/attaching the
grass collection box
Caution: Do not run the de-
vice if the grass collection
box or impact protection are
not attached properly. Risk
of injury!
Attaching the grass collection box
to the device:
1. Lift the rear impact protection (6).
2. Hold the grass collection box (5) by the
carrying handle (5a).
3. Hang the grass collection box (5) into
the grass collection box attachment
(27) on the rear of the device.
4. Remove the impact protection (6); it
keeps the grass collection box (5) in
place.
Removing the grass collection box:
5. Lift the impact protection (6).
6. Remove the grass collection box (5) by
the carrying handle (5a).


