background image

PAEXS 20-Li A1

DE

AT

CH

 57


Inhaltsverzeichnis

Einleitung  .  .  .  .  .  .  .  .  .  .  .  .  .  .  .  .  .  .  .  .  .  .  .  .  .  .  .  .  .  .  .  .  .  .  .  .  .  .  .  .  .  .  .  .  .  .  .  .  .  .  .  .  .  .  .  .  .  .  .  .  . 58

Bestimmungsgemäßer Gebrauch   .  .  .  .  .  .  .  .  .  .  .  .  .  .  .  .  .  .  .  .  .  .  .  .  .  .  .  .  .  .  .  .  .  .  .  .  .  .  .  .  .  .  .  .  .  .  .  .  .  .  .  .  .  .  .58
Ausstattung  .  .  .  .  .  .  .  .  .  .  .  .  .  .  .  .  .  .  .  .  .  .  .  .  .  .  .  .  .  .  .  .  .  .  .  .  .  .  .  .  .  .  .  .  .  .  .  .  .  .  .  .  .  .  .  .  .  .  .  .  .  .  .  .  .  .  .  .  .  .  .  .58
Lieferumfang  .  .  .  .  .  .  .  .  .  .  .  .  .  .  .  .  .  .  .  .  .  .  .  .  .  .  .  .  .  .  .  .  .  .  .  .  .  .  .  .  .  .  .  .  .  .  .  .  .  .  .  .  .  .  .  .  .  .  .  .  .  .  .  .  .  .  .  .  .  .  .58
Technische Daten   .  .  .  .  .  .  .  .  .  .  .  .  .  .  .  .  .  .  .  .  .  .  .  .  .  .  .  .  .  .  .  .  .  .  .  .  .  .  .  .  .  .  .  .  .  .  .  .  .  .  .  .  .  .  .  .  .  .  .  .  .  .  .  .  .  .  .58

Allgemeine  Sicherheitshinweise für Elektrowerkzeuge   .  .  .  .  .  .  .  .  .  .  .  .  .  .  .  .  .  .  .  .  .  .  . 59

1 .   Arbeitsplatzsicherheit  .  .  .  .  .  .  .  .  .  .  .  .  .  .  .  .  .  .  .  .  .  .  .  .  .  .  .  .  .  .  .  .  .  .  .  .  .  .  .  .  .  .  .  .  .  .  .  .  .  .  .  .  .  .  .  .  .  .  .  .  .  .59
2 .  Elektrische Sicherheit   .  .  .  .  .  .  .  .  .  .  .  .  .  .  .  .  .  .  .  .  .  .  .  .  .  .  .  .  .  .  .  .  .  .  .  .  .  .  .  .  .  .  .  .  .  .  .  .  .  .  .  .  .  .  .  .  .  .  .  .  .  .59
3 .  Sicherheit von Personen   .  .  .  .  .  .  .  .  .  .  .  .  .  .  .  .  .  .  .  .  .  .  .  .  .  .  .  .  .  .  .  .  .  .  .  .  .  .  .  .  .  .  .  .  .  .  .  .  .  .  .  .  .  .  .  .  .  .  .  .60
4 .  Verwendung und Behandlung des Elektrowerkzeugs    .  .  .  .  .  .  .  .  .  .  .  .  .  .  .  .  .  .  .  .  .  .  .  .  .  .  .  .  .  .  .  .  .  .  .  .  .60
5 .  Verwendung und Behandlung des Akkuwerkzeugs  .  .  .  .  .  .  .  .  .  .  .  .  .  .  .  .  .  .  .  .  .  .  .  .  .  .  .  .  .  .  .  .  .  .  .  .  .  .  .61
6 .   Service   .  .  .  .  .  .  .  .  .  .  .  .  .  .  .  .  .  .  .  .  .  .  .  .  .  .  .  .  .  .  .  .  .  .  .  .  .  .  .  .  .  .  .  .  .  .  .  .  .  .  .  .  .  .  .  .  .  .  .  .  .  .  .  .  .  .  .  .  .  .  .  .  .62
Sicherheitshinweise für Ladegeräte    .  .  .  .  .  .  .  .  .  .  .  .  .  .  .  .  .  .  .  .  .  .  .  .  .  .  .  .  .  .  .  .  .  .  .  .  .  .  .  .  .  .  .  .  .  .  .  .  .  .  .  .  .62
Gerätespezifische  Sicherheits hinweise   .  .  .  .  .  .  .  .  .  .  .  .  .  .  .  .  .  .  .  .  .  .  .  .  .  .  .  .  .  .  .  .  .  .  .  .  .  .  .  .  .  .  .  .  .  .  .  .  .  .  .62
Originalzubehör/-zusatzgeräte   .  .  .  .  .  .  .  .  .  .  .  .  .  .  .  .  .  .  .  .  .  .  .  .  .  .  .  .  .  .  .  .  .  .  .  .  .  .  .  .  .  .  .  .  .  .  .  .  .  .  .  .  .  .  .  .63

Vor der Inbetriebnahme    .  .  .  .  .  .  .  .  .  .  .  .  .  .  .  .  .  .  .  .  .  .  .  .  .  .  .  .  .  .  .  .  .  .  .  .  .  .  .  .  .  .  .  .  .  .  .  . 63

Akku-Pack laden (siehe Abb . A)  .  .  .  .  .  .  .  .  .  .  .  .  .  .  .  .  .  .  .  .  .  .  .  .  .  .  .  .  .  .  .  .  .  .  .  .  .  .  .  .  .  .  .  .  .  .  .  .  .  .  .  .  .  .  .  .63
Akku-Pack ins Gerät  einsetzen/entnehmen    .  .  .  .  .  .  .  .  .  .  .  .  .  .  .  .  .  .  .  .  .  .  .  .  .  .  .  .  .  .  .  .  .  .  .  .  .  .  .  .  .  .  .  .  .  .  .64
Akkuzustand prüfen   .  .  .  .  .  .  .  .  .  .  .  .  .  .  .  .  .  .  .  .  .  .  .  .  .  .  .  .  .  .  .  .  .  .  .  .  .  .  .  .  .  .  .  .  .  .  .  .  .  .  .  .  .  .  .  .  .  .  .  .  .  .  .  .  .64
Schleifblatt wählen   .  .  .  .  .  .  .  .  .  .  .  .  .  .  .  .  .  .  .  .  .  .  .  .  .  .  .  .  .  .  .  .  .  .  .  .  .  .  .  .  .  .  .  .  .  .  .  .  .  .  .  .  .  .  .  .  .  .  .  .  .  .  .  .  .  .64
Schleifblatt befestigen    .  .  .  .  .  .  .  .  .  .  .  .  .  .  .  .  .  .  .  .  .  .  .  .  .  .  .  .  .  .  .  .  .  .  .  .  .  .  .  .  .  .  .  .  .  .  .  .  .  .  .  .  .  .  .  .  .  .  .  .  .  .  .64
Staubabsaugung   .  .  .  .  .  .  .  .  .  .  .  .  .  .  .  .  .  .  .  .  .  .  .  .  .  .  .  .  .  .  .  .  .  .  .  .  .  .  .  .  .  .  .  .  .  .  .  .  .  .  .  .  .  .  .  .  .  .  .  .  .  .  .  .  .  .  .64
Fangbox zur Eigenabsaugung   .  .  .  .  .  .  .  .  .  .  .  .  .  .  .  .  .  .  .  .  .  .  .  .  .  .  .  .  .  .  .  .  .  .  .  .  .  .  .  .  .  .  .  .  .  .  .  .  .  .  .  .  .  .  .  .  .65
Reduzierstück   .  .  .  .  .  .  .  .  .  .  .  .  .  .  .  .  .  .  .  .  .  .  .  .  .  .  .  .  .  .  .  .  .  .  .  .  .  .  .  .  .  .  .  .  .  .  .  .  .  .  .  .  .  .  .  .  .  .  .  .  .  .  .  .  .  .  .  .  .  .65

Inbetriebnahme    .  .  .  .  .  .  .  .  .  .  .  .  .  .  .  .  .  .  .  .  .  .  .  .  .  .  .  .  .  .  .  .  .  .  .  .  .  .  .  .  .  .  .  .  .  .  .  .  .  .  .  .  .  .  . 65

Zusatzhandgriff einstellen  .  .  .  .  .  .  .  .  .  .  .  .  .  .  .  .  .  .  .  .  .  .  .  .  .  .  .  .  .  .  .  .  .  .  .  .  .  .  .  .  .  .  .  .  .  .  .  .  .  .  .  .  .  .  .  .  .  .  .  .  .65
Ein- und ausschalten   .  .  .  .  .  .  .  .  .  .  .  .  .  .  .  .  .  .  .  .  .  .  .  .  .  .  .  .  .  .  .  .  .  .  .  .  .  .  .  .  .  .  .  .  .  .  .  .  .  .  .  .  .  .  .  .  .  .  .  .  .  .  .  .  .65
Drehzahl einstellen   .  .  .  .  .  .  .  .  .  .  .  .  .  .  .  .  .  .  .  .  .  .  .  .  .  .  .  .  .  .  .  .  .  .  .  .  .  .  .  .  .  .  .  .  .  .  .  .  .  .  .  .  .  .  .  .  .  .  .  .  .  .  .  .  .  .65
Arbeitshinweise .  .  .  .  .  .  .  .  .  .  .  .  .  .  .  .  .  .  .  .  .  .  .  .  .  .  .  .  .  .  .  .  .  .  .  .  .  .  .  .  .  .  .  .  .  .  .  .  .  .  .  .  .  .  .  .  .  .  .  .  .  .  .  .  .  .  .  .  .65

Wartung und Reinigung  .  .  .  .  .  .  .  .  .  .  .  .  .  .  .  .  .  .  .  .  .  .  .  .  .  .  .  .  .  .  .  .  .  .  .  .  .  .  .  .  .  .  .  .  .  .  .  .  . 66

Garantie der  Kompernaß  Handels  GmbH   .  .  .  .  .  .  .  .  .  .  .  .  .  .  .  .  .  .  .  .  .  .  .  .  .  .  .  .  .  .  .  .  .  . 66

Service   .  .  .  .  .  .  .  .  .  .  .  .  .  .  .  .  .  .  .  .  .  .  .  .  .  .  .  .  .  .  .  .  .  .  .  .  .  .  .  .  .  .  .  .  .  .  .  .  .  .  .  .  .  .  .  .  .  .  .  .  .  .  . 68

Importeur    .  .  .  .  .  .  .  .  .  .  .  .  .  .  .  .  .  .  .  .  .  .  .  .  .  .  .  .  .  .  .  .  .  .  .  .  .  .  .  .  .  .  .  .  .  .  .  .  .  .  .  .  .  .  .  .  .  .  .  . 68

Entsorgung    .  .  .  .  .  .  .  .  .  .  .  .  .  .  .  .  .  .  .  .  .  .  .  .  .  .  .  .  .  .  .  .  .  .  .  .  .  .  .  .  .  .  .  .  .  .  .  .  .  .  .  .  .  .  .  .  .  .  . 68

Original-Konformitätserklärung   .  .  .  .  .  .  .  .  .  .  .  .  .  .  .  .  .  .  .  .  .  .  .  .  .  .  .  .  .  .  .  .  .  .  .  .  .  .  .  .  .  . 69

Ersatz-Akku Bestellung    .  .  .  .  .  .  .  .  .  .  .  .  .  .  .  .  .  .  .  .  .  .  .  .  .  .  .  .  .  .  .  .  .  .  .  .  .  .  .  .  .  .  .  .  .  .  .  .  . 70

Telefonische Bestellung  .  .  .  .  .  .  .  .  .  .  .  .  .  .  .  .  .  .  .  .  .  .  .  .  .  .  .  .  .  .  .  .  .  .  .  .  .  .  .  .  .  .  .  .  .  .  .  .  .  .  .  .  .  .  .  .  .  .  .  .  .  .  .70

Summary of Contents for 351737 2007

Page 1: ...tion of the original instructions LIXADORA EXCÊNTRICA A BATERIA Tradução do manual de instruções original SMERIGLIATRICE ECCENTRICA Traduzione delle istruzioni d uso originali AKKU EXZENTERSCHLEIFER Originalbetriebsanleitung IAN 351737_2007 LIJADORA EXCÉNTRICA RECARGABLE SMERIGLIATRICE ECCENTRICA PAEXS 20 Li A1 ...

Page 2: ...n seguida familiarícese con todas las funciones del dispositivo Prima di leggere aprire la pagina con le immagini e prendere confidenza con le diverse funzioni dell apparecchio Antes de começar a ler abra na página com as imagens e de seguida familiarize se com todas as funções do aparelho Before reading unfold the page containing the illustrations and familiarise yourself with all functions of th...

Page 3: ...A ...

Page 4: ...PAP 20 A2 PAP 20 A3 PAP 20 B1 PAP 20 B3 Los tiempos de carga Tempi di ricarica Corrientes de carga La corrente di ricarica 2 Ah Acumulador Accumulatore PAP 20 A1 B1 3 Ah Acumulador Accumulatore PAP 20 A2 4 Ah Acumulador Accumulatore PAP 20 A3 B3 max 2 4 A Cargador Carica batteria PLG 20 A1 A4 60 min 2 4 A 90 min 2 4 A 120 min 2 4 A max 3 5 A Cargador Carica batteria PLG 20 A2 45 min 3 5 A 60 min 3...

Page 5: ...rios equipos adicionales originales 7 Antes de la puesta en funcionamiento 7 Carga de la batería consulte la fig A 7 Inserción extracción de la batería del aparato 8 Comprobación del nivel de carga de la batería 8 Selección del papel de lija 8 Fijación del papel de lija 8 Aspiración del polvo 8 Depósito de polvo para la aspiración interna 9 Manguito reductor 9 Puesta en funcionamiento 9 Ajuste del...

Page 6: ...o apagado Botón de desencastre Pestaña depósito de polvo Depósito de polvo para la aspiración interna Manguito reductor para la aspiración externa Conexión del adaptador Papel de lija Placa lijadora Tornillo Mango adicional Rueda de ajuste de la velocidad Figura A Led del nivel de carga de la batería Botón del nivel de carga de la batería Batería Cargador rápido Led de control verde Led de control...

Page 7: ...tá desco nectada y los momentos en los que está co nectada pero funciona sin carga Indicaciones generales de seguridad para las herramientas eléctricas ADVERTENCIA Lea todas las indicaciones de seguridad las instrucciones las ilustraciones y los da tos técnicos suministrados con esta herra mienta eléctrica El incumplimiento de las si guientes instrucciones puede provocar descargas eléctricas incen...

Page 8: ... reduce el riesgo de lesiones c Evite que el aparato pueda ponerse en mar cha accidentalmente Asegúrese de que la herramienta eléctrica esté apagada antes de conectarla a la red eléctrica o a la batería asirla o transportarla Si transporta la herra mienta eléctrica con los dedos en el interruptor o conecta la herramienta eléctrica ya encendida a la red eléctrica puede provocar accidentes d Antes d...

Page 9: ...rse la herramienta eléctrica de forma segura en caso de imprevistos 5 Uso y manejo de la herramienta inalámbrica a Cargue la batería exclusivamente con los cargadores recomendados por el fabricante El uso de un cargador con una batería que no le corresponde entraña peligro de incendios b Utilice exclusivamente las baterías indicadas para las herramientas eléctricas El uso de otras baterías puede p...

Page 10: ...Este cargador solo puede cargar las siguientes baterías PAP 20 A1 PAP 20 A2 PAP 20 A3 PAP 20 B1 PAP 20 B3 Encontrará la lista actual de baterías compa tibles en www Lidl de Akku ADVERTENCIA No use el cargador si el cable el cable de red o el enchufe están dañados Un cable de red dañado supone un peligro de muerte por descarga eléctrica Indicaciones de seguridad específicas para el aparato Fije la ...

Page 11: ...patibles con el aparato ADVERTENCIA No utilice accesorios no recomendados por PARKSIDE ya que podrían provocar descar gas eléctricas o incendios Antes de la puesta en funcionamiento Carga de la batería consulte la fig A CUIDADO Desconecte siempre el enchufe de la red eléctrica antes de extraer la batería del cargador rápido o de introducirla en él INDICACIÓN Nunca cargue la batería con una tempera...

Page 12: ...l de lija ADVERTENCIA Antes de realizar trabajos en el aparato extraiga la batería INDICACIÓN Antes de fijar un nuevo papel de lija limpie el polvo y la suciedad de la placa lijadora Montaje de los papeles de lija con fijación de velcro Puede montar el papel de lija en la placa lijadora por medio del velcro Asegúrese de que los orificios de aspiración del papel de lija y de la placa lijadora coin ...

Page 13: ...n externa Desmontaje Retire el tubo del aspirador de polvo del man guito reductor para la aspiración externa Desconecte el manguito reductor Puesta en funcionamiento INDICACIÓN Encienda siempre el aparato antes de ponerlo en contacto con el material y a continuación desplace el aparato sobre la pieza Ajuste del mango adicional El mango adicional puede ajustarse en varias posiciones Para ajustar el...

Page 14: ...echa de compra Si se detectan de fectos en el producto puede ejercer sus derechos legales frente al vendedor Estos derechos legales no se ven limitados por la garantía descrita a con tinuación Condiciones de la garantía El plazo de la garantía comienza con la fecha de compra Guarde bien el comprobante de caja ya que lo necesitará como justificante de compra Si dentro de un periodo de tres años a p...

Page 15: ...s centros de asistencia técnica autoriza dos la garantía perderá su validez La garantía no cubre los siguientes casos Desgaste normal de la capacidad de la batería Uso comercial o industrial del producto Daño o alteración del producto por parte del cliente Incumplimiento de las instrucciones de seguridad y mantenimiento y errores en el manejo Daños provocados por fuerza mayor Proceso de reclamació...

Page 16: ...a Según la Directiva europea 2012 19 EU las herramientas eléctricas usadas deben recogerse por separado para someterse a un reciclaje ecológico Puede informarse acerca de las posibilidades de desecho de los aparatos usados en su administra ción municipal o ayuntamiento No deseche la batería con la basura doméstica Las baterías defectuosas o agotadas deben reciclarse según la Directiva 2006 66 EC D...

Page 17: ...xpedición de esta declaración de conformidad recaerá sobre el fabricante El objeto descrito de la declaración cumple con las disposiciones de la Directiva 2011 65 EU del Parlamento Europeo y del Consejo del 8 de junio de 2011 sobre las restricciones a la utilización de determinadas sustancias peligrosas en aparatos eléctricos y electrónicos Normas armonizadas aplicadas EN 62841 1 2015 EN 62841 2 4...

Page 18: ...íses no pueda realizarse el pedido de recambios por Internet En tal caso póngase en contacto con la línea de asistencia técnica Pedido por teléfono Servicio España Tel 902 59 99 22 0 08 EUR Min 0 11 EUR llamada tarifa normal 0 05 EUR Min 0 11 EUR llamada tarifa reducida Para garantizar la rápida tramitación de su pedido mantenga a mano el número de artículo p ej IAN 351737 del aparato para todas s...

Page 19: ...21 Prima della messa in funzione 21 Carica del pacco batteria vedere fig A 21 Inserimento rimozione del pacco batteria dall apparecchio 22 Controllo della carica della batteria 22 Scelta del foglio abrasivo 22 Fissaggio del foglio abrasivo 22 Aspirazione della polvere 22 Cassetta di raccolta per aspirazione indipendente 23 Giunto di riduzione 23 Messa in funzione 23 Regolazione dell impugnatura su...

Page 20: ...OFF Tasto di sblocco Linguetta cassetta di raccolta Cassetta di raccolta per aspirazione indipendente Giunto di riduzione per aspirazione esterna Attacco adattatore Foglio abrasivo Piastra di levigatura Vite Impugnatura supplementare Ruota di regolazione del numero di giri Figura A Spia LED della batteria Tasto del livello di carica della batteria Pacco batteria Caricabatteria rapido LED di contro...

Page 21: ...azione tutte le componenti del ciclo di esercizio per esempio i tempi nei quali l elettroutensile è spento e i tempi in cui è acceso ma funziona senza carico Avvertenze di sicurezza generali per elettro utensili AVVERTENZA Leggere tutte le avvertenze di sicurezza le istruzioni le illustrazioni e i dati tecnici di cui è dotato questo elettroutensile Il mancato rispetto delle seguenti istruzioni può...

Page 22: ... tipo e dell impiego dell elettro utensile riduce il rischio di lesioni c Evitare l accensione involontaria Accertarsi che l elettroutensile sia spento prima di colle garlo all alimentazione e o alla batteria sollevarlo o trasportarlo Se si tiene il dito sull interruttore mentre si sposta l elettroutensile o si collega l elettroutensile alla rete elettrica con l interruttore su ON si possono verif...

Page 23: ...a batteria a Caricare le batterie solo con i caricabatteria consigliati dal costruttore Se un caricabatteria adatto a un determinato tipo di batteria viene utilizzato con batterie diverse vi è pericolo di incendio b Utilizzare solo le batterie appositamente previste per gli elettroutensili L uso di batterie diverse può dare luogo a lesioni e al rischio di incendio c Tenere la batteria non utilizza...

Page 24: ...ficato Il caricabatteria è indicato solo per l uso in ambienti interni ATTENZIONE Questo caricabatteria può caricare solo le seguenti batterie PAP 20 A1 PAP 20 A2 PAP 20 A3 PAP 20 B1 PAP 20 B3 Su www Lidl de akku è disponibile un elenco aggiornato di tutte le batterie compatibili AVVERTENZA Non utilizzare il caricabatteria in caso di danni al cavo al cavo di alimentazione o al connettore di rete I...

Page 25: ...nti Accessori apparecchi aggiuntivi originali Utilizzare solo accessori e apparecchi aggiuntivi indicati nel manuale o la cui sede sia compatibile con l apparecchio AVVERTENZA Non usare accessori che non siano stati consigliati da PARKSIDE In caso contrario vi è pericolo di folgorazione o incendio Prima della messa in funzione Carica del pacco batteria vedere fig A CAUTELA Staccare sempre la spina...

Page 26: ...glio abrasivo AVVERTENZA Rimuovere il pacco batteria prima di eseguire lavori sull apparecchio NOTA Prima di fissare un nuovo foglio abrasivo rimuovere la polvere e lo sporco dalla piastra di levigatura Applicazione di fogli abrasivi con velcro È possibile applicare il foglio abrasivo con fissaggio in velcro alla piastra di levigatura Verificare che i fori di aspirazione del foglio abrasivo coinci...

Page 27: ...o flessibile dell impianto di aspirazione polveri dal giunto di riduzione per aspirazione esterna Staccare il giunto di riduzione Messa in funzione NOTA Accendere sempre l apparecchio prima che venga a contatto con il materiale e portare l apparecchio sul pezzo da lavorare solo dopo l accensione Regolazione dell impugnatura supplementare È possibile regolare l impugnatura supplementare in diverse ...

Page 28: ... ha una garanzia di 3 anni dalla data di acquisto Qualora questo prodotto presentasse vizi Le spettano diritti legali nei con fronti del venditore del prodotto La garanzia qui di seguito descritta non costituisce alcun limite a tali diritti legali Condizioni di garanzia Il periodo di garanzia decorre dalla data di ac quisto Si prega di conservare bene lo scontrino di cassa Quest ultimo è necessari...

Page 29: ...a Il prodotto è destinato esclusivamente all uso do mestico e non a quello commerciale La garanzia decade in caso di impiego improprio o mano missione uso della forza e interventi non eseguiti dalla nostra filiale di assistenza autorizzata Il periodo di garanzia non si applica nei seguenti casi normale usura della capacità della batteria uso commerciale del prodotto danneggiamento o modifica del p...

Page 30: ...i centri di raccolta e riciclaggio Non smaltire gli elettroutensili assieme ai normali rifiuti domestici In base alla Direttiva europea 2012 19 EU gli elettroutensili usati devono essere raccolti separatamente e conferiti a un centro per il riciclaggio ecologico Per lo smaltimento dell apparecchio una volta che ha terminato la sua funzione informarsi presso l amministrazione comunale Non smaltire ...

Page 31: ...mità L oggetto della dichiarazione sopra descritto soddisfa le prescrizioni della Direttiva 2011 65 EU del Parlamento Europeo e del Consiglio Europeo dell 8 giugno 2011 sulla restrizione dell uso di determinate sostanze pericolose nelle apparecchiature elettriche ed elettroniche Norme armonizzate utilizzate EN 62841 1 2015 EN 62841 2 4 2014 EN 60335 1 2012 A13 2017 EN 60335 2 29 2004 A2 2010 EN 62...

Page 32: ...rebbe esaurirsi entro breve tempo NOTA In alcuni Paesi non è possibile ordinare online i pezzi di ricambio In questo caso contattare la linea diretta di assistenza Ordine telefonico Assistenza Italia Tel 02 36003201 Service Malta Tel 80062230 Per garantire una rapida evasione dell ordine tenere a portata di mano il codice articolo ad es IAN 351737 dell apparecchio Il codice dell articolo è indicat...

Page 33: ...34 Acessórios aparelhos adicionais de origem 35 Antes da colocação em funcionamento 35 Carregar o bloco acumulador ver fig A 35 Colocar retirar o bloco acumulador do aparelho 36 Verificar o estado do acumulador 36 Escolher a folha de lixa 36 Fixar folha de lixa 36 Aspiração de pó 36 Caixa de pó para aspiração própria 37 Redutor 37 Colocação em funcionamento 37 Ajustar o punho adicional 37 Ligar e ...

Page 34: ... de desbloqueio Patilha caixa de pó Caixa de pó para aspiração própria Redutor para aspiração externa Ligação para adaptador Folha de lixa Placa de lixar Parafuso Punho adicional Regulador da velocidade de rotação Figura A LED do visor do acumulador Botão do estado do acumulador Bloco acumulador Carregador rápido LED de controlo verde LED de controlo vermelho Conteúdo da embalagem 1 Lixadora excên...

Page 35: ...Instruções gerais de segurança para ferra mentas elétricas AVISO Leia todas as instruções de segurança ou tras instruções figuras e os dados técnicos que estão incluídos nesta ferramenta elétri ca O não cumprimento das seguintes instru ções pode causar choque elétrico incêndio e ou ferimentos graves Guarde todas as instruções de segurança e outras instruções para futuras consultas O conceito ferra...

Page 36: ...Se durante o transporte da ferramenta elétrica tiver o dedo no interruptor ou ligar a ferramenta elétrica a uma fonte de alimentação quando esta já se encontra ligada podem ocorrer acidentes d Retire as ferramentas de ajuste ou chaves de parafusos antes de ligar a ferramenta elétri ca Uma ferramenta ou uma chave presente numa parte rotativa da ferramenta elétrica pode causar ferimentos e Evite uma...

Page 37: ...omendados pelo fabricante Se um carregador adequado a um tipo específico de acumuladores for utilizado com outros acumuladores existe perigo de incêndio b Utilize apenas os acumuladores previstos para a ferramenta elétrica em questão A utilização de outros acumuladores pode causar ferimentos e perigo de incêndio c Mantenha o acumulador que não está a ser utilizado afastado de clipes moedas chaves ...

Page 38: ...dor pode carregar apenas as seguintes baterias PAP 20 A1 PAP 20 A2 PAP 20 A3 PAP 20 B1 PAP 20 B3 Em www lidl de akku pode consultar uma lista atualizada da compatibilidade dos acu muladores AVISO Não utilize o carregador com o cabo o cabo de alimentação ou a ficha elétrica dani ficado a Cabos de alimentação danificados colocam em risco a vida devido a choque elétrico Instruções de segurança especí...

Page 39: ... o aparelho AVISO Não utilize acessórios que não tenham sido recomendados pela PARKSIDE Isto pode provocar um choque elétrico ou incêndio Antes da colocação em funcionamento Carregar o bloco acumulador ver fig A CUIDADO Retire sempre a ficha da tomada antes de colocar ou retirar o bloco acumulador do carregador rápido NOTA Nunca carregue o bloco acumulador a uma temperatura ambiente inferior a 10 ...

Page 40: ... Fixar folha de lixa AVISO Retire o bloco acumulador do aparelho antes de realizar trabalhos no mesmo NOTA Antes de fixar uma nova folha de lixa remova qualquer vestígio de pó e sujidade da placa de lixar Colocar folhas de lixa com aderência por velcro A folha de lixa pode ser colocada na placa de lixar por meio de um fecho de velcro Tenha atenção à correspondência dos orifícios de aspiração na fo...

Page 41: ...a do aparelho de aspiração de pó do redutor para a aspiração externa Retire o redutor Colocação em funcionamento NOTA Ligue o aparelho sempre antes do contacto com o material e só depois coloque o apare lho sobre a peça a trabalhar Ajustar o punho adicional Pode rodar o punho adicional para diversas posições Para ajustar o punho adicional desaperte o parafuso Ajuste o punho adicional para a posiçã...

Page 42: ... são limitados pela nossa garantia que passamos a transcrever Condições de garantia O prazo de garantia tem início na data da com pra Por favor guarde bem o talão de compra Este é necessário como comprovativo da compra Se no prazo de três anos a contar da data de compra deste produto ocorrer um defeito de ma terial ou de fabrico o produto será reparado ou substituído por nós ao nosso critério grat...

Page 43: ...nça e manutenção utilização incorreta danos por motivos de força maior Procedimento em caso de acionamento da garantia Para garantir um processamento rápido do seu pedido siga por favor as seguintes instruções Para todos os pedidos de esclarecimento tenha à mão o talão de compra e o número do artigo p ex IAN 12345 como comprovativo da compra O número do artigo consta da capa do ma nual de instruçõ...

Page 44: ...m de vida informe se na junta de freguesia ou câmara municipal da sua área de residência Não coloque acumuladores no lixo doméstico Acumuladores com defeito ou usados têm de ser reciclados em conformidade com a Diretiva 2006 66 EC Devolva o bloco acumulador e ou o aparelho nos pontos de reco lha disponibilizados Relativamente às possibilidades de eliminação de ferramentas elétricas do bloco acumul...

Page 45: ...formidade O objeto da declaração acima descrito cumpre os regulamentos da Diretiva 2011 65 EU do Parlamento Europeu e do Conselho de 8 de junho de 2011 relativamente à limitação da utilização de determinadas substâncias perigosas em aparelhos elétricos e eletrónicos Normas harmonizadas aplicadas EN 62841 1 2015 EN 62841 2 4 2014 EN 60335 1 2012 A13 2017 EN 60335 2 29 2004 A2 2010 EN 62233 2008 EN ...

Page 46: ...amente NOTA Em alguns países pode não ser possível efetuar a encomenda de peças sobresselentes online Neste caso contacte a linha direta de Assistência Técnica Encomenda por telefone Assistência Portugal Tel 70778 0005 0 12 EUR Min Para garantir um rápido processamento da sua encomenda tenha o número de artigo p ex IAN 351737 do aparelho disponível para eventuais questões O número de artigo pode s...

Page 47: ...8 Original accessories auxiliary equipment 49 Before use 49 Charging the battery pack see fig A 49 Attaching disconnecting the battery pack to from the appliance 50 Checking the battery charge level 50 Selecting a sanding sheet 50 Fitting the sanding sheet 50 Dust extraction 50 Dust box 51 Reducer 51 Use 51 Adjusting the additional handle 51 Switching on and off 51 Setting the rotational speed 51 ...

Page 48: ...ng from improper usage This appliance is not intended for commercial use Features ON OFF switch Release button Tab dust box Dust box Reducer for external extraction appliances Adapter fitting Sanding sheet Sanding plate Screw Additional handle Speed setting wheel Figure A Battery display LED Battery charge level button Battery pack Quick charger Green control LED Red control LED Package contents 1...

Page 49: ...s of oper ation must be included e g times when the power tool is switched off and times where the power tool is switched on but running without load General power tool safety warnings WARNING Read all safety warnings instructions illus trations and specifications provided with this power tool Failure to follow all instruc tions listed below may result in electric shock fire and or serious injury ...

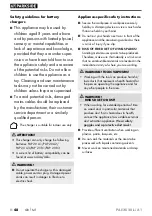
Page 50: ... wrench before turning the power tool on A wrench or a key left attached to a rotating part of the power tool may result in personal injury e Do not overreach Keep proper footing and balance at all times This enables better control of the power tool in unexpected situations f Dress properly Do not wear loose clothing or jewellery Keep your hair and clothing away from moving parts Loose clothes jew...

Page 51: ...t being used store rechargeable battery units away from paper clips coins keys nails screws or other small metal objects that could cause the contacts to be bridged Short circuiting the contacts of a rechargeable battery unit may result in heat damage or fire d Fluids may leak out of rechargeable battery units if they are misused If this happens avoid contact with the fluid If contact occurs flush...

Page 52: ...anger to life due to electric shock Appliance specific safety instructions Secure the workpiece A workpiece securely held by a clamping device or vice is much safer than one held in your hand Do not rest your hands next to or in front of the appliance and the area being worked as there is a risk of injury if you slip RISK OF FIRE DUE TO FLYING SPARKS Sanding metal causes sparks to be produced Ther...

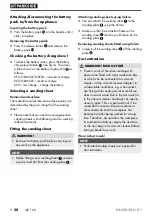
Page 53: ...ck from or connect the battery pack to the high speed charger NOTE Never charge the battery pack at an ambient temperature of below 10 C or above 40 C If a lithium ion battery is to be stored for an extended period the charge level should be checked regularly The optimum charge level is between 50 and 80 The storage climate should be cool and dry and the ambient temperature should be between 0 C a...

Page 54: ... remove any dust and dirt from the sanding plate Attaching sanding sheets using Velcro You can attach the sanding sheet to the sanding plate using the Velcro Make sure that the extraction holes on the sanding sheet match up with those on the sanding plate Removing sanding sheets fitted using Velcro Simply pull the sanding sheet off the sanding plate Dust extraction WARNING RISK OF FIRE There is a ...

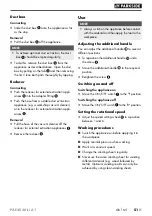
Page 55: ...the reducer Use NOTE Always switch on the appliance before contact with the material and then apply the tool to the workpiece Adjusting the additional handle You can adjust the additional handle to several different positions To reposition the additional handle undo the screw Move the additional handle to the required position Retighten the screw Switching on and off Switching the appliance on Mov...

Page 56: ...mbH warranty Dear Customer This appliance has a 3 year warranty valid from the date of purchase If this product has any faults you the buyer have certain statutory rights Your statu tory rights are not restricted in any way by the warranty described below Warranty conditions The warranty period starts on the date of purchase Please keep your receipt in a safe place This will be required as proof o...

Page 57: ...r authorised Service centres The warranty period does not apply to Normal reduction of the battery capacity over time Commercial use of the product Damage to or alteration of the product by the customer Non compliance with safety and maintenance instructions operating errors Damage caused by natural hazards Warranty claim procedure To ensure quick processing of your case please observe the followi...

Page 58: ...entally compatible manner Your local community or municipal authorities can provide information on how to dispose of the worn out appliance Do not dispose of batteries in your normal household waste Defective or worn out rechargeable batteries must be recycled according to Directive 2006 66 EC Take the battery pack and or tool to a nearby collection facility Please consult your local authorities r...

Page 59: ...t of the declaration described above complies with the requirements of the Directive 2011 65 EU of the European Parliament and Council of 8 June 2011 on the limitations of use of certain dangerous substances in electrical and electronic appliances Applied harmonised standards EN 62841 1 2015 EN 62841 2 4 2014 EN 60335 1 2012 A13 2017 EN 60335 2 29 2004 A2 2010 EN 62233 2008 EN 55014 1 2017 EN 5501...

Page 60: ...ly short time NOTE Online ordering of replacement parts might not be possible in some countries In this is the case please contact the Service hotline Telephone ordering Service Great Britain Tel 0800 404 7657 Service Malta Tel 80062230 To ensure fast processing of your order have the article number of your appliance to hand e g IAN 351737 in case of questions The article number can be found on th...

Page 61: ...degeräte 62 Gerätespezifische Sicherheits hinweise 62 Originalzubehör zusatzgeräte 63 Vor der Inbetriebnahme 63 Akku Pack laden siehe Abb A 63 Akku Pack ins Gerät einsetzen entnehmen 64 Akkuzustand prüfen 64 Schleifblatt wählen 64 Schleifblatt befestigen 64 Staubabsaugung 64 Fangbox zur Eigenabsaugung 65 Reduzierstück 65 Inbetriebnahme 65 Zusatzhandgriff einstellen 65 Ein und ausschalten 65 Drehza...

Page 62: ...eine Haftung Nicht für den gewerblichen Gebrauch bestimmt Ausstattung EIN AUS Schalter Entriegelungstaste Lasche Fangbox Fangbox zur Eigenabsaugung Reduzierstück zur Fremdabsaugung zweiteilig Adapteranschluss Schleifblatt Schleifplatte Schraube Zusatzhandgriff Drehzahl Stellrad Abbildung A Akku Display LED Taste Akkuzustand Akku Pack Schnellladegerät grüne Kontroll LED rote Kontroll LED Lieferumfa...

Page 63: ...s weise Zeiten in denen das Elektrowerkzeug abgeschaltet ist und solche in denen es zwar eingeschaltet ist aber ohne Belastung läuft Allgemeine Sicherheitshinweise für Elektrowerkzeuge WARNUNG Lesen Sie alle Sicherheitshinweise An weisungen Bebilderungen und technischen Daten mit denen dieses Elektrowerkzeug versehen ist Versäumnisse bei der Einhaltung der nachfolgenden Anweisungen können elektris...

Page 64: ...chuhe Schutzhelm oder Gehörschutz je nach Art und Einsatz des Elektrowerkzeugs verringert das Risiko von Verletzungen c Vermeiden Sie eine unbeabsichtigte Inbetrieb nahme Vergewissern Sie sich dass das Elekt rowerkzeug ausgeschaltet ist bevor Sie es an die Stromversorgung und oder den Akku anschließen es aufnehmen oder tragen Wenn Sie beim Tragen des Elektrowerkzeugs den Fin ger am Schalter haben ...

Page 65: ...fflächen trocken sauber und frei von Öl und Fett Rutschige Griffe und Griffflächen erlauben keine sichere Bedienung und Kontrolle des Elektrowerkzeugs in unvorhergesehenen Situationen 5 Verwendung und Behandlung des Akkuwerkzeugs a Laden Sie die Akkus nur mit Ladegeräten auf die vom Hersteller empfohlen werden Durch ein Ladegerät das für eine bestimmte Art von Akkus geeignet ist besteht Brandgefah...

Page 66: ...t ist nur für den Betrieb im Innenbereich geeignet ACHTUNG Dieses Ladegerät kann nur die folgenden Batterien laden PAP 20 A1 PAP 20 A2 PAP 20 A3 PAP 20 B1 PAP 20 B3 Eine aktuelle Liste der Akkukompatibilität finden Sie unter www Lidl de Akku WARNUNG Betreiben Sie das Ladegerät nicht mit be schädigtem Kabel Netzkabel oder Netz stecker Beschädigte Netzkabel bedeuten Lebens gefahr durch elektrischen ...

Page 67: ...trischem Schlag und Feuer führen Vor der Inbetriebnahme Akku Pack laden siehe Abb A VORSICHT Ziehen Sie immer den Netzstecker bevor Sie den Akku Pack aus dem Schnelllade gerät nehmen bzw einsetzen HINWEIS Laden Sie den Akku Pack nie wenn die Um gebungstemperatur unterhalb 10 C oder oberhalb 40 C liegt Soll ein Lithium Ionen Akku längere Zeit gelagert werden muss regelmäßig der Ladezustand kontroll...

Page 68: ...ätter mit Kletthaftung anbringen Sie können das Schleifblatt mittels Klett verschluss an der Schleifplatte anbringen Achten Sie auf Übereinstimmung der Absaug löcher am Schleifblatt und Schleifplatte Schleifblätter mit Kletthaftung abziehen Ziehen Sie das Schleifblatt einfach von der Schleifplatte ab Staubabsaugung WARNUNG BRANDGEFAHR Beim Arbeiten mit Elektrowerkzeugen die über eine Fangbox verfü...

Page 69: ...stück Zusatzhandgriff einstellen Sie können den Zusatzhandgriff in mehrere Positionen einstellen Lösen Sie zum Verstellen des Zusatzhand griffes die Schraube Stellen Sie den Zusatzhandgriff in die gewünschte Position ein Ziehen Sie die Schraube wieder fest Ein und ausschalten Gerät einschalten Drücken Sie den EIN AUS Schalter in die Position I Gerät ausschalten Drücken Sie den EIN AUS Schalter in ...

Page 70: ...Produkts gesetzliche Rechte zu Diese gesetzlichen Rechte werden durch unsere im Folgenden dargestellte Garantie nicht eingeschränkt Garantiebedingungen Die Garantiefrist beginnt mit dem Kaufdatum Bitte bewahren Sie den Kassenbon gut auf Dieser wird als Nachweis für den Kauf benötigt Tritt innerhalb von drei Jahren ab dem Kaufdatum dieses Produkts ein Material oder Fabrikationsfehler auf wird das P...

Page 71: ...die Garantie Garantiezeit gilt nicht bei normaler Abnutzung der Akkukapazität gewerblichen Gebrauch des Produktes Beschädigung oder Veränderung des Produktes durch den Kunden Missachtung der Sicherheits und Wartungs vorschriften Bedienungsfehler Schäden durch Elementarereignisse Abwicklung im Garantiefall Um eine schnelle Bearbeitung Ihres Anliegens zu gewährleisten folgen Sie bitte den folgenden ...

Page 72: ... Elektrowerkzeuge getrennt gesammelt und einer umweltgerechten Wiederverwertung zugeführt werden Möglichkeiten zur Entsorgung des ausgedienten Gerätes erfahren Sie bei Ihrer Gemeinde oder Stadtverwaltung Werfen Sie Akkus nicht in den Hausmüll Defekte oder verbrauchte Akkus müssen gemäß Richtlinie 2006 66 EG recycelt werden Geben Sie Akku Pack und oder das Gerät über die angebotenen Sammeleinrich t...

Page 73: ...ng trägt der Hersteller Der oben be schriebene Gegenstand der Erklärung erfüllt die Vorschriften der Richtlinie 2011 65 EU des Europäischen Parlaments und des Rates vom 8 Juni 2011 zur Beschränkung der Verwendung bestimmter gefährlicher Stoffe in Elektro und Elektronikgeräten Angewandte harmonisierte Normen EN 62841 1 2015 EN 62841 2 4 2014 EN 60335 1 2012 A13 2017 EN 60335 2 29 2004 A2 2010 EN 62...

Page 74: ... nicht online vorgenommen werden Kontaktieren Sie in diesem Fall bitte die Service Hotline Telefonische Bestellung Service Deutschland Tel 0800 5435 111 Kostenfrei aus dem dt Festnetz Mobilfunknetz Service Österreich Tel 0820 201 222 0 15 EUR Min Service Schweiz Tel 0842 665566 0 08 CHF Min Mobilfunk max 0 40 CHF Min Um eine schnelle Bearbeitung Ihrer Bestellung zu gewährleisten halten Sie bitte f...

Page 75: ...STRASSE 21 44867 BOCHUM GERMANY www kompernass com Estado de las informaciones Versione delle informazioni Estado das informações Last Information Update Stand der Informationen 12 2020 Ident No PAEXS20 LiA1 112020 1 IAN 351737_2007 ...

Reviews: