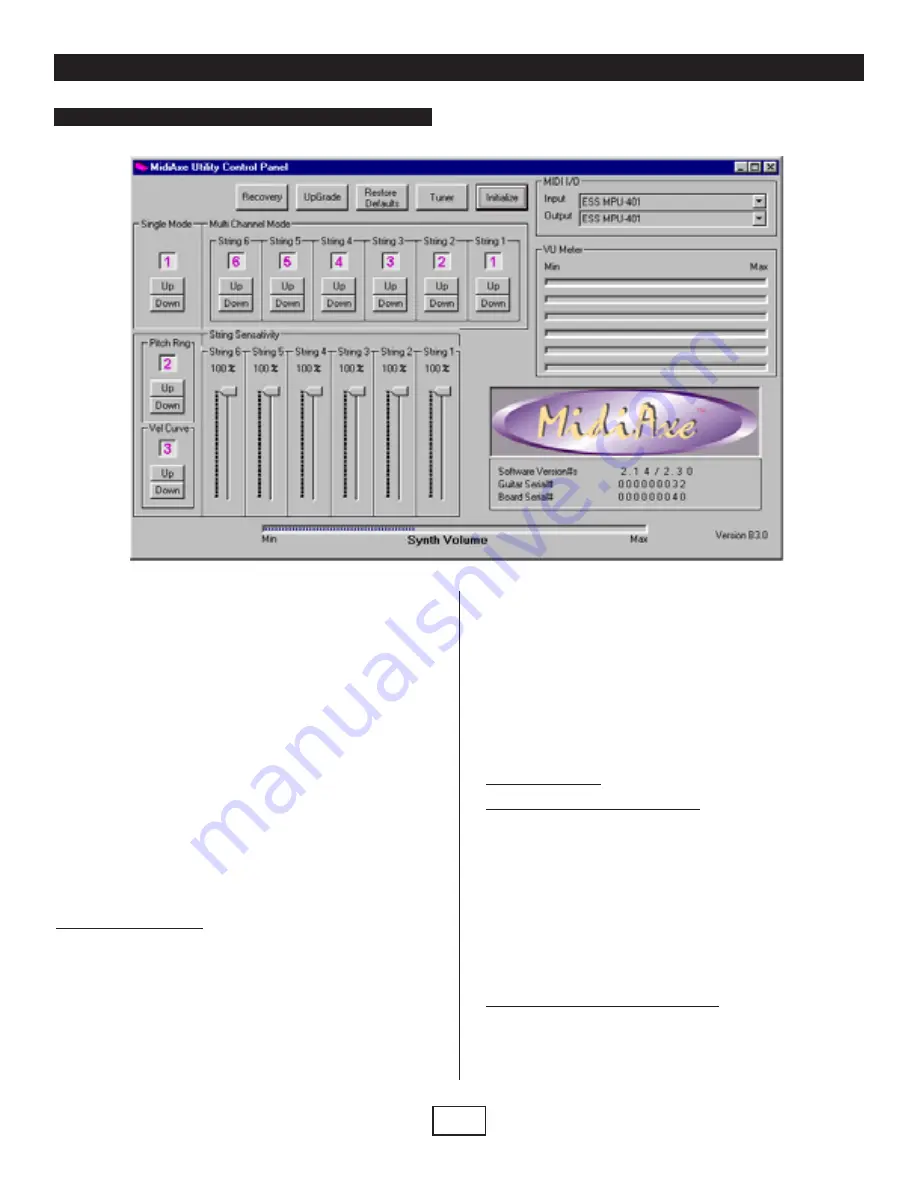
The MidiAxe™ Utilities Panel is a Windows 95/98/NT software program that
allows users to customize settings for their MidiAxe Equipped digital guitar,
check the status of the MidiAxe software, and provides a method for upgrad-
ing the guitar to future versions of the MidiAxe operating system software
(these software upgrades may be obtained from the MidiAxe website at
www.midiaxe.com). Most of the controls are on the panel map to simple MIDI
"System Exclusive" (SysEx) commands which can also be created using
other third party MIDI panel design tools or programmable hardware MIDI
control devices (see the MidiAxe User's Manual for the SysEx command
specification).
All of the parameters of the MidiAxe that can be changed by panel controls
are programmed at the time of the change and remain in effect thereafter. If
the user gets lost or simply wants to return the guitar to the original configu-
ration it is a simple operation to just hit the "Restore Defaults" button.
NOTE: Normally most MidiAxe users will not normally need to use this panel because
the most common controls are preset at the factory for easy plug and play operation.
However, because each user may want to customize his or her guitar parameters, the
MidiAxe Utilities are provided to make for a completely programmable MIDI Guitar system.
Software Installation
Each MidiAxe™ Equipped guitar is shipped with a CD containing this utility
which enables the more technical user to access some of the programmable
features of the MidiAxe Equipped system. The install is accomplished by
inserting the CD in the CD-ROM drive and using Windows Explorer to locate
the setup program.
Steps:
1) Insert the MidiAxe™ Utilities CD into the CD ROM Drive
2) Double Click on "setup.exe"
3) Follow the install dialog boxes for selection of the location
on your hard disk
4) When the install has completed, reboot the computer
and then select:
START
➩
PROGRAMS
➩
MIDIAXE UTILITIES
NOTE: If the setup fails or is cancelled, all temporary files will be removed from
the computer and the user may try again later.
Panel Operation
Selecting the Proper System MIDI Interface
The first step to using the panel is to make sure the correct MIDI interface on
the computer is selected. There is a MIDI I/O selection pull down list in the
upper right hand corner of the panel. Select the desired MIDI input and MIDI
output device appropriate for your computer and make sure the MidiAxe™
Equipped guitar is connected as follows:
MidiAxe Guitar MIDI OUT
➩
Computer MIDI IN
MidiAxe Guitar MIDI IN
➩
Computer MIDI OUT
Initializing the Panel to the MidiAxe Settings
The next step in using the MidiAxe™ Utilities panel is to press the INITIALIZE
button. This tells the MidiAxe™ Equipped guitar to upload all of its current set-
tings to the panel including the software version information, serial numbers,
and the current control settings for all of the programmable parameters.
MIDIFly CD ROM (PC) Editor:
MidiAxe™ Utilities Rev 1.0
P
a
r
k
e
r
®
M
I
D
I
F
l
y
™
5
MIDIFly CD-ROM (PC) Editor


