background image

                                                      DVR HD 750 


9


Device switching on/off 

1. To switch on the device push the 

Power 

button. 

2. To switch off the device press 

Power

 button and hold it for three seconds. 


Device operation mode 

 The device is operating in three modes: video record mode           / photoshooting mode /            / playback 
mode           . 

Mode

 button is used to select an operation mode. 


Video recording 

1. When powered from the car's lighter socket, the device will switch on and start recording automatically. 
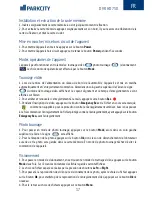
In the left top corner of the screen video mode icon is displayed           , as well as recording time and 
flashing icon 


2. To stop and re-start the recording manually, press 

Rec

 button. 

3. During video recording press 

Emergency Rec 

button and the current file will be marked as non-removable 


to prevent later overwriting. You can also immediately start file recording protected from later overwriting 
by pressing 

Emergency Rec

 button before starting the recording. 


Photoshooting 

1. To switch to the photoshooting mode, press Mode button; in the upper left corner of the screen the 
following icon will be displayed          . 
2. To take a picture press 

Snap

 button, you will hear a locking sound, the picture will be stored to the 

memory card. When taking a picture, try to avoid shaking the device. 
 

Playback 

1. To switch to the playback mode in the video record mode press 

Mode

 button twice. The thumbnails of 

the stored files will be displayed on the screen.  
2. Select the required file by pressing 

Left

 or 

Right 

buttons.  

3. To switch to video playback or photo viewing after the file is selected press 

Ok 

button, to start / stop 

video playback repeatedly press 

Ok

 button. 

4. To return to file selection press 

Menu 

button. 

5. To delete files, press 

Menu

 button during file selection, then select the action “

Delet file

” - to delete the 

current file, or “

Delete all

” - to delete all files. 


Built-in motion sensor 

When motion detection recording is enabled, the device will start recording only when there is movement 
in the Camera view. If there is constant movement, the recording is continuous; if the movement stops, the 
recording will be stopped in 20 sec, after the stop of movement in the Camera view. 


ENG 

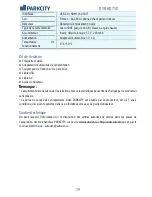
Summary of Contents for DVR HD 750

Page 1: ...USER MANUAL DVR HD 750 Benutzerhandbuch Manuel de l utilisateur Manuale Utente Manual del usuario اﻟﻣﺳﺗﺧدم دﻟﯾل Руководство пользователя ...

Page 2: ...UILDING SIX XINTIAN INDUSTRIAL ZONE FUYONG TOWN BAN AN DISTRICT SHENZHEN CHINA EU Importer Irvine Trading LP 43 Duke Street Edinburgh EH6 8HH United Kingdom EU Representative VICO ELECTRONICS LIMITED http www vico electronics com jeanlouis vico electronics com ...

Page 3: ...serting and removing a memory card 9 Device switching on off 9 Device operation mode 9 Video recording 9 Photoshooting 9 Playback 9 Built in motion sensor 10 Connecting to personal computer PC 10 Connecting to TV 10 System reset 10 Specification 10 Scope of delivery 11 Technical support 11 ENG ...

Page 4: ...herkarte 12 Betriebsmodi des Geräts 13 Einschalten Ausschalten des Gerätes 13 Betriebsmodi des Geräts 13 Videoaufnahme 13 Fotoaufnahme 13 Betrachtung 13 Eingebauter Näherungsschalter 14 Anschluß an den Personalcomputer PC 14 Anschluß ans Fernsehgerät 14 Rücksetzen Reset 14 Technische Daten 14 Lieferumfang 15 Technische Unterstützung 15 DE ...

Page 5: ...carte mémoire 17 Mise en marche mise hors circuit de l appareil 17 Modes opératoires de l appareil 17 Tournage vidéo 17 Photo tournage 17 Visionnement 17 Détecteur de mouvement inséré 18 Connexion à l ordinateur personnel PC 18 Connexion à la télé 18 Reset de système 18 Spécifications techniques 18 Kit de livraison 19 Soutien technique 19 FR ...

Page 6: ... 21 Activación desactivación del dispositivo 21 Modos de funcionamiento del dispositivo 21 Grabación de vídeo 21 Fotografía 21 Visualización 21 Sensor de movimiento empotrado 22 Conexión al ordenador personal PC 22 Conexión al televisor 22 Restablecimiento del sistema 22 Características técnicas 22 Juego de la entrega 23 Asesoría técnica 23 ESP ...

Page 7: ...ard 25 Accensione spegnimento del dispositivo 25 Regimi di funzionamento del dispositivo 25 Ripresa video 25 Fotografia 25 Riproduzione 25 Rilevatore di movimento incorporato 26 Connessione al computer personale PC 26 Connessione al televisore 26 Reset del sistema 26 Caratteristiche tecniche 26 Kit di fornitura 27 Supporto tecnico 27 ITA ...

Page 8: ... الذاكرة بطاقة وإخراجها 9 2 تشغيل إيقاف الجهاز 9 2 التشغيل نظام اختيار 9 2 الفيديو تصوير 9 2 التصوير 29 العرض 29 المدمج الحركة كاشف 03 ب التوصيل الكمبيوتر جهاز 03 ب التوصيل التلفزيون جهاز 3 0 النظام تعيين إعادة 3 0 ال مواصفات التقنية 3 0 العبوة محتويات 01 المالحظة 01 الفني الدعم 01 AR ...

Page 9: ...е карты памяти 33 Включение выключение устройства 33 Режимы работы устройства 03 Видеосъемка 03 Фотосъемка 03 Просмотр 33 Встроенный детектор движения 34 Подключение к персональному компьютеру ПК 34 Подключение к телевизору 34 Системный сброс 34 Технические характеристики 34 Комплект поставки 35 Техническая поддержка 35 RU ...

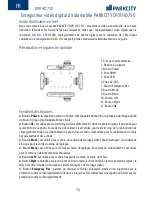
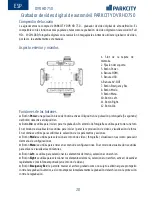
Page 10: ...photoshooting mode itisusedtotakeapicture Intheplayback mode used to start stop video playbak photo viewing In the menu used to confirm the selected parameters or actions Mode button used to select video record mode photoshooting mode playback mode and to exit setup menu Menu button used to enter setup menu In the playback mode it is used to return to view thumbnails Left button used to select men...

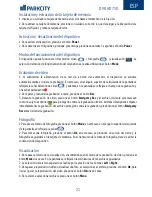
Page 11: ... press Mode button in the upper left corner of the screen the following icon will be displayed 2 To take a picture press Snap button you will hear a locking sound the picture will be stored to the memory card When taking a picture try to avoid shaking the device Playback 1 To switch to the playback mode in the video record mode press Mode button twice The thumbnails of the stored files will be dis...

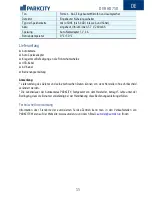
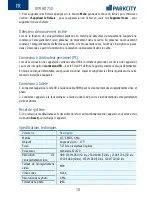
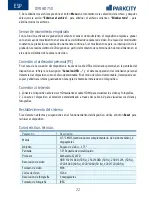
Page 12: ...vice operation press Reset button to restart the device Specification Parameter Description Matrix 1 0 CMOS 4 Mp Camera lens Viewing angle 175 Display 3 0 LCD display Processor Ambarella A7LA70 Video resolution HDR 1920 1080 30 f s 2560 1080 30 f s 2304 1296 30 f s 1920 1080 60 f s 1920 1080 30 f s 1280 720 60 f s Video format MP4 Video Codec H 264 Photo resolution 4 Mp Picture format JPEG Interfa...

Page 13: ...PARKCITY DVR lifecycle set by the manufacturer is 3 years provided that the device is operated in strict compliance with this manual Technical support Information about the authorized services centres can be received in the points of purchase of PARKCITY products or online www autoden ru And by e mail autoden autoden ru ENG ...

Page 14: ...Aufzeichnung Im Modus der Fotoaufnahme ist für Erstellung des Fotobildes verwendbar Im Betrachtungsmodus ist für Starten Stoppen der Videowiedergabe sowie Fotobetrachtung verwendbar Im Menü benutzt man für Bestätigung der Auswahl von Parametern und Handlungen Taste Mode ist für die Auswahl des Videoaufnahme Fotoaufnahme Modus von Betrachtung sowie für Ausgang aus dem Konfigurationsmenü verwendbar ...

Page 15: ...cken Sie bitte die Taste Rec 0 Während der Aufzeichnung drücken Sie die Taste Emergency Rec und die aktuelle Datei wird als unlöschbar angemerkt zwecks des Schutzes vor dem Rückschreiben Auch Sie können die Aufzeichnung der Datei anzufangen die schon vor Rückschreiben durch das Drücken der Taste Emergency Rec vor dem Anfang von Aufzeichnung geschutzt ist Fotoaufnahme 1 Für Übergang in Fotoaufnahme...

Page 16: ...auswechselbare Platte feststellen Im Modus der auswechselbaren Platte können Sie die auf der Karte im Gerät eingespreicherten Dateien betrachten kopieren und entfernen Anschluß ans Fernsehgerät 1 Schließen Sie das Gerät ans HD Fernsehgerät mit demHDMI Kabel für Betrachtung der Videoaufzeichnungen und Fotobilder an 2 Schließen Sie das Gerät an ein übliches Fernsehgerät mit AV Kabel für Betrachtung ...

Page 17: ...USB Kabel AV Kabel Bedienungsanleitung Anmerkung Lieferumfang des Gerätes und seine technischen Daten können von dem Hersteller ohne Vorbescheid verändert werden Die Lebensdauer der Autokameras PARKCITY festgesetzt von dem Hersteller beträgt 0 Jahre unter der Bedingung dass die Benutzer vollständig bei der Handhabung diese Bedienungsanleitung erfüllen Technische Unterstützung Information über Stan...

Page 18: ...tilisé pour le start stop de l enregistrement En mode de photo tournage il est utilisé pour la réception de la photo En mode de visionnement il est utilisé pour le start stop de la reproduction de l enregistrement vidéo de visionnement de photo Dans le menu il est utilisé pour la confirmation du choix des paramètres et des actions Bouton Mode est utilisé pour le choix de la mode de tournage vidéo ...

Page 19: ... Pendant l inscription de vidéo appuyez sur le bouton Emergency Rec et le fichier en cours sera marqué comme non supprimé pour la protection contre le réenregistrement ultérieur Aussi vous pouvez à la fois commencer l enregistrement du fichier protégé contre le réenregistrement ayant appuyé sur le bouton Emergency Rec avant l enregistrement Photo tournage 1 Pour passer en mode de photo tournage ap...

Page 20: ...t le SD du PC définira l appareil comme le disque démontable En mode du disque démontable vous pouvez visionner copier et supprimer les fichiers gardés sur la carte mémoire installée à l appareil Connexion à la télé 1 Connectez l appareil à la télé HD à l aide du câble HDMI pour le visionnement des enregistrements vidéo et photo 2 Connectez l appareil à la télé ordinaire à l aide du câble AV pour ...

Page 21: ...xation sur le pare brise Câble USB Câble AV Guide d utilisateur Remarque L assortiment de la livraison de l installation et ses caractéristiques peuvent êtrechangéspar le producteur sans préavis La durée de service des enregistreurs vidéo PARKCITY est établie par le producteur est de 0 ans à condition qu ils soient exploités dans la conformité sévère avec ce guide d utilisateur Soutien technique O...

Page 22: ... se utiliza para iniciar parar la grabación En el modo de fotografía se utiliza para tomar una foto En el modo de visualización se utiliza para iniciar parar la reproducción de vídeos visualización de fotos En el menú se utiliza para confirmar la selección de los parámetros y acciones Botón Mode se utiliza para seleccionar el modo de vídeo fotografía visualización así como para salir del menú de c...

Page 23: ...ano presione el botón Rec 3 Durante la grabación de vídeo presione el botón Emergency Rec y el archivo corriente será marcado como no sujeto a eliminar para protegerlo contra la regrabación ulterior Además Usted puede empezar inmediatamente la grabación del archivo protegido contra la regrabación presionando el botón Emergency Rec antes de iniciar la grabación Fotografía 1 Para pasar al modo de fo...

Page 24: ...ción Conexión USB y el sistema operativo del ordenador personal detectará del dispositivo como el disco desmontable En el modo del disco desmontable Usted puede ver copiar y eliminar archivos guardados en la tarjeta de memoria instalada en el dispositivo Conexión al televisor 1 Conecte el dispositivo al televisor HD mediante el cable HDMI para visualizar los vídeos y fotografías 2 Conecte el dispo...

Page 25: ...n el parabrisas Cable USB Cable AV Manual del usuario Nota El juego de la entrega del dispositivo y sus características técnicas podrán ser cambiados por el fabricante sin notificación previa El plazo de funcionamiento de los grabadores de vídeo PARKCITY establecido por el fabricante constituye 3 años con la condición de que se explotan en estricta conformidad con el presente manual Asesoría técni...

Page 26: ... la registrazione Nel regime di fotografia si usa per fotografare Nel regime di riproduzione si usa per iniziare terminare la riproduzione dei files video o foto Nel menu si usa per confermare parametri e azioni Pulsante Mode si usa per selezionare il regime ripresa video fotografia riproduzione e anche per uscire dal menu dei settaggi Pulsante Menu si usa per entrare nel menu dei settaggi Nel reg...

Page 27: ...le per proteggerlo dalla successiva cancellazione Si può anche iniziare a registrare da subito un file protetto dalla cancellazione premendo il pulsante Emergency Rec prima di iniziare la registrazione Fotografia 1 Per entrare nel regime fotografia premere il pulsante Mode in contemporanea nell angolo sinistro superiore si presenterà il segno 2 Per fare una foto premere il pulsante Ok allora si se...

Page 28: ...evisore 1 Connettere il dispositivo ad un televisore HD attrevarso un cavo HDMI per visionare le registrazioni video e fotofrafie 2 Connettere il dispositivo ad un televisore normale attrevarso un cavo AV per visionare le registrazioni video e fotofrafie Reset del sistema Se registrano malfunzionamenti e rallentamenti del dispositivo ricorrere al pulsante Reset per ripristinare il dispositivo Cara...

Page 29: ...o e le sue caratteristiche tecniche possono essere modificati dal fabbricante senza preavviso Il periodo di servizio dei registratori video PARKCITY stabilito dal fabbricante è pari a 0 anni a condizione che si usano in stretta conformità al presente manuale Supporto tecnico Le informazioni sulla presenza dei centri di assistenza autorizzati sono disponibili presso i punti vendita dei prodotti PAR...

Page 30: ...DVR HD 750 28 AR ...

Page 31: ...DVR HD 750 29 AR ...

Page 32: ...DVR HD 750 30 AR ...

Page 33: ...DVR HD 750 31 AR ...

Page 34: ...ает устройство длительное нажатие 0 сек кнопки отключает устройство Кнопка Ok используется для начала остановки записи В режиме фотосъемки используется для получения фотоснимка В режиме просмотра используется для начала остановки воспроизведения видеозаписи просмотра фото В меню используется для подтверждения выбора параметров и действий Кнопка Mode используется для выбора режима видеосъемки фотос...

Page 35: ...rgency Rec и текущий файл будет помечен как неудаляемый для защиты от последующей перезаписи Также Вы можете сразу начать записьфайла защищенного от перезаписи нажав кнопку Emergency Rec перед началом записи Фотосъемка 1 Для перехода в режим фотосъемки нажмите кнопку Mode при этом в верхнем левом углу экрана отобразится значок 2 Для получения фотоснимка нажмите кнопку Ok при этом раздастся звук за...

Page 36: ...визору 1 Подключите устройство к HD телевизору с помощью HDMI кабеля для просмотра видеозаписей и фотоснимков 2 Подключите устройство к обычному телевизору с помощью AV кабеля для просмотра видеозаписей и фотоснимков Системный сброс Если в работе устройства замечены сбои и зависания воспользуйтесь кнопкой Reset для перезагрузки устройства Технические характеристики Параметр Описание Матрица 1 0 КМ...

Page 37: ...мплект поставки устройства и его технические характеристики могут быть изменены производителем без предварительного уведомления Срок службы видеорегистраторов PARKCITY установленный производителем составляет 0 года при условии что они эксплуатируются в строгом соответствии с данным руководством Техническая поддержка Информацию о расположении авторизованных сервисных центров можно получить в местах...

Page 38: ......

Page 39: ......

Page 40: ......

Reviews: