www.paramondo.de
13
Sicherheitshinweise • Safety instructions
Ensure that all screws are tightened evenly.
Uneven tightening can result in tension in
the aluminium and cast components as well
in the brickwork and therefore lead to failure
of the attachments.
Perform the fitting work in accordance with
the applicable occupational health and safe
-
ty guidelines and standards.
Safety ropes and/or safety belts fixed
to the articulated brackets may only be
removed after testing the attachment
of all components.
Check all equipment (scaffolding, ladders,
tools, etc.) and safety equipment (belts, ro-
pes, etc.) for da,age prior to use.
Always use suitable protective equipment
(gloves, safety boots, goggles, hearing pro-
tection, etc.).
If several persons work on the system, their
activities must be coordinated.
The working area beneath the awning must
be blocked off and protected to ensure that
persons cannot walk beneath the suspended
load without any protection.
The fitting and service personnel must be
instructed in accordance with all safety regu-
lations.
Prior to fitting, check that all movable com
-
ponents are seated securely in their bearings
and brackets (supporting tube, fabric roller,
joints, brackets) and ensure that the articula
-
ted brackets cannot move uncontrolledly.
Climbing aids:
Do not lean climbing aids against, or
fix them to, the awning. They must stand
firmly and provide sufficient support. Only
use climbing aids with sufficient loadbearing
capacity.
Fall protection:
There is a risk of falling when working at gre-
at height. Use suitable fall protection.
Crushing and shearing zones:
Crushing and shearing zones are located bet-
ween the front profile and cassette and/or
covers and profiles that meet. Clothing and/
or body parts may be caught by the system
and pulled in!
Uncontrolled operation:
There is a risk of crushing and falling when
working on the awning!
When working on an electrically operated
system, disconnect the power supply (e.g.
circuit breaker / fuse OFF) and ensure that it
cannot be accidentally switched on again or
manually operated.
The crank of manually operated systems
must be removed and stored securely.
If awnings are operated by several users, an
overriding, switched interlock must be fitted
that makes it impossible to retract and ex-
tend the awning.
Automatically retracting and exten-
ding systems may cause injury.
Ensure that automatically controlled systems
are secured accordingly and that warning
devices are installed, if applicable (warning
lights, acoustic signals, warning signs).
Proper use:
Use awnings for their defined purpose only,
as sun protection.
Awnings cannot be used in all weathers
and therefore must be retracted in wind or
storms as well as rain or snow.
If the awning is fitted with an automatic con
-
troller (e.g. wind and sun monitor), this
Summary of Contents for AuBenrollo - Senkrechtmarkise nach MaB
Page 27: ...www paramondo de 27 Wandmontage Wall assembly A B C O O 4...
Page 28: ...28 www paramondo de Wandmontage Wall assembly A B C Check 5...
Page 30: ...30 www paramondo de Wandmontage Wall assembly A B C 7...
Page 43: ...www paramondo de 43 Wandmontage Wall assembly CLICK OR A B C 23...
Page 45: ...www paramondo de 45 Wandmontage Wall assembly A B C A B C 25...
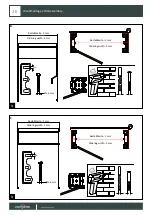
Page 46: ...46 www paramondo de O O 6 mm 6 Wandmontage Wall assembly Bestellh he Ordering Height A B C 26...
Page 48: ...48 www paramondo de 2mm 2mm Bestellh he Ordering Height A B C Wandmontage Wall assembly 28...
Page 49: ...www paramondo de 49 Wandmontage Wall assembly A B C A B C 29...
Page 50: ...50 www paramondo de Wandmontage Wall assembly O O 4 mm 4 mm B 30...
Page 51: ...www paramondo de 51 Wandmontage Wall assembly 4 mm O O 4 mm C 30...
Page 52: ...52 www paramondo de Wandmontage Wall assembly A B C...
Page 58: ...58 www paramondo de Deckenmontage Ceiling Installation O O A B C 5...
Page 59: ...www paramondo de 59 Deckenmontage Ceiling Installation A B C Check 6...
Page 61: ...www paramondo de 61 Deckenmontage Ceiling Installation A B C 8...
Page 63: ...www paramondo de 63 Deckenmontage Ceiling Installation CLICK A B C 10...
Page 65: ...www paramondo de 65 Deckenmontage Ceiling Installation A B C A B C 12...
Page 68: ...68 www paramondo de Deckenmontage Ceiling Installation 2mm 2mm A B C 15...
Page 69: ...www paramondo de 69 Deckenmontage Ceiling Installation A B C A B C 16...
Page 70: ...70 www paramondo de Deckenmontage Ceiling Installation O O 4 mm 4 mm B 17...
Page 71: ...www paramondo de 71 Deckenmontage Ceiling Installation 4 mm O O 4 mm C 17...
Page 72: ...72 www paramondo de Deckenmontage Ceiling Installation A B C...


