5
Installation Guide
AT-HDR-CAT-2
DC 48V
LAN
HDMI
AUDIO OUT
IN
OUT
IR
RS-232
RX TX
RX
TX
MASTER
1
2
HDBaseT OUT
RX
RX
TX
TX
RS-232
IR
R
L
1
2
FW
EDID
AT-HDR-CAT-2
POWER
INT
LOCK
2
1
OUT
IN
HDMI
LEARN
HDBaseT
Installation
Optional
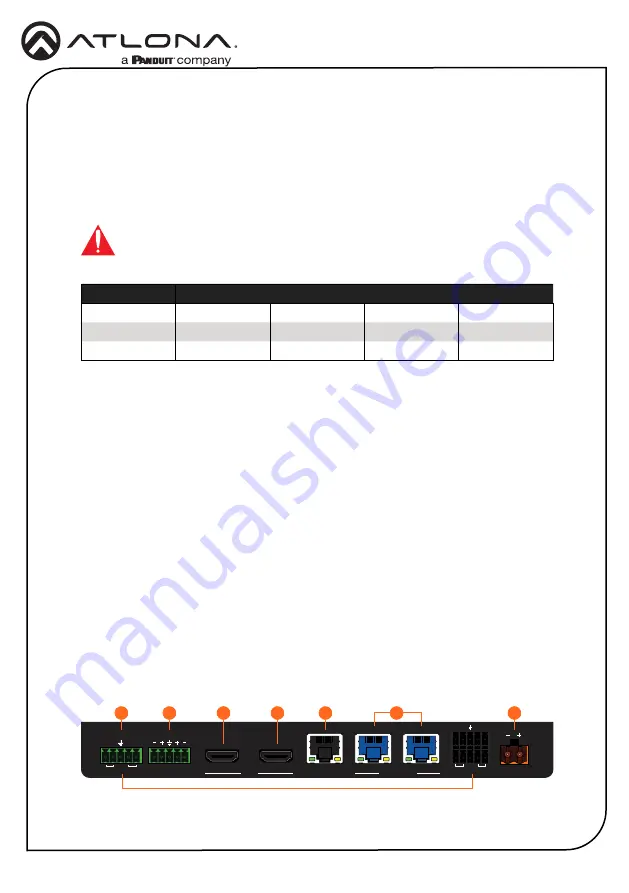
1. Connect an HDMI cable from a source to the
HDMI IN
port.
2. Connect an HDMI cable from the
HDMI OUT
port to a local display.
3. Connect up to two Ethernet cables from the
HDBaseT OUT
ports to compatible PoE-
capable receivers. Refer to the table below for information on maximum cable length and
supported resolutions.
IMPORTANT:
Stranded or patch cable is not recommended due to per
-
formance issues. Sheilded cables are strongly recommended to minimize
signal noise and interference.
Cable
4K/UHD - Feet / Meters
1080p - Feet / Meters
HDMI
15
5
30
10
CAT5e/6
115
35
200
60
CAT6a/7
130
40
230
70
4. Connect an Ethernet cable from the
LAN
port to the Local Area Network (LAN). This step
will be required in order to access the built-in web server.
5. Connect the included power supply to the
DC 48V
connector and connect the power cord
to an available electrical outlet.
3
5
6
1
2
4
7
6. Connect an RS-232 or IR cable from the control system to the RS-232/IR ports. Refer to
the AT-HDR-CAT-2 User Manual for more information.
•
MASTER RS-232/IR
Connecting to this port will provide direct control of the AT-HDR-CAT-2. Control can be
performed using either RS-232 or electrical IR.
•
RS-232/IR 1
and
RS-232/IR 2
Each of these ports is associated to the respective
HDBaseT OUT
port. This allows
RS-232 pass-through zone control of a display (sink) device that is connected to a
PoE-compatible receiver. Control can be performed using RS-232 or electrical IR.
7. Connect an audio output device to the
AUDIO OUT
port. Refer to the AT-HDR-CAT-2 User
Manual for more information.


