
11
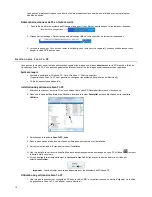
After your first scan, a folder titled
Photo1
is added to the file structure, and the scanned images will be saved to the following
location by default, unless you click the
Browse
button and select a different location:
Windows XP
: C:\Documents and Settings\(
your username
)\My Documents\My Pictures\Photo1\
Windows Vista
: C:\Users\(
your username
)\Pictures\Photo1\
Windows 7
: C:\Users\(
your username
)\My Pictures\Photo1\
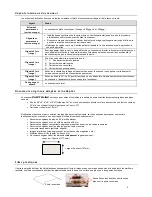
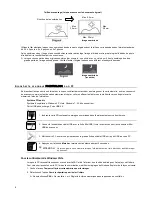
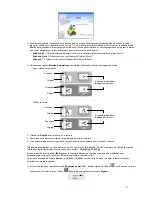
1. Select the
Auto Rotate
option for the desired scanned image orientation.
Without Auto Rotate feature:
With auto Rotate:
2. Click
Apply
; the window will close.
3. Scan your original as instructed beginning on page 7.
The scanned image will be saved to the location you selected in step 2 above.
File Naming Convention
Each scanned image is given a file name with the prefix
PD
followed by a 4- digit sequential number in the order the images
are stored.
For example,
PD0001.jpg
,
PD0002.jpg
.
If the file name reaches
PD9999.jpg
in the
Photo1
folder, a new folder titled
Photo2
will automatically be created to store
subsequent new files, and so on.
There can be up to 99 folders (
Photo1..9
,
PD0001... PD9999
) on a memory card. If exceeded, the Status/Card indicator light
blinks.
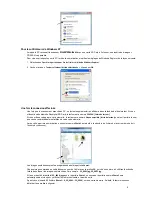
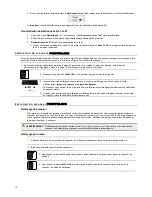
If you want to start the
Scan To PC Manager
manually, double-click the
icon on the Desktop, or
right-click the
icon in the system tray and select
Setting
.
If you want to temporarily close the
Scan To PC Manager
, right-click on the icon and select
Exit
.
Important
- the
Exit
option will not be available for Windows XP users.
Uninstalling the Scan To PC Manager
1. From the PC Start menu, select:
All Programs
>
Scan To PC
>
Uninstall Driver
Scanner
Original
Scanner
Original
Scanned image when
displayed on-screen
Scanned image when
displayed on-screen
Scanner
Original
Scanner
Original