Pandigital L1 Series Laser Printer
User's Guide
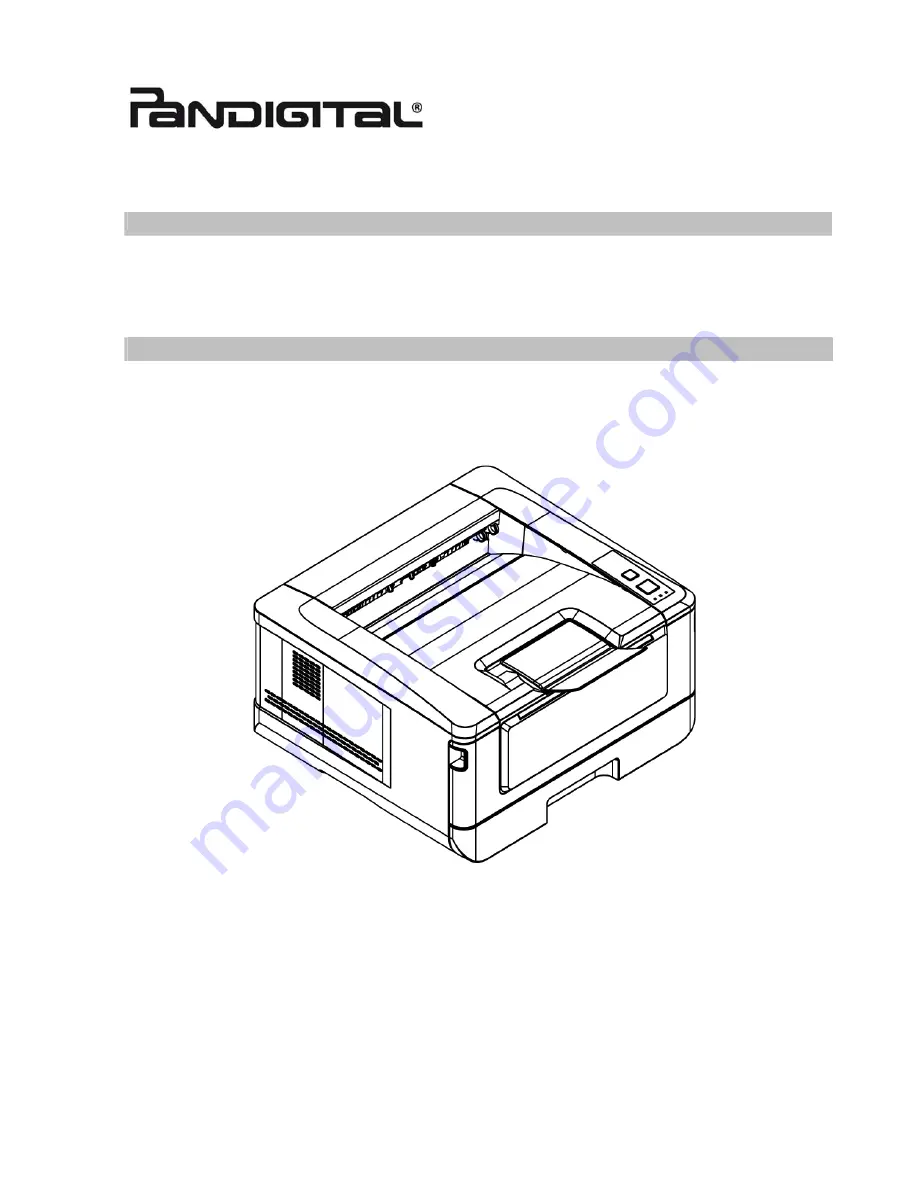
Pandigital
Page 1: ...Pandigital L1 Series Laser Printer User s Guide Pandigital ...
Page 2: ... damage to property Important Indicates operational requirements and restrictions Please read and follow these instructions to ensure a proper operation and to avoid damage to the machine Note Indicates further explanation or clarification Reading this is highly recommended WARNING To avoid hazardous electric shock or fire do not remove any covers or screws other than those specified in this manua...
Page 3: ...tice the machine smells after a period of frequent or extended use Do not modify this product as a fire electrical shock or breakdown could result If the product employs a LSU printhead the LSU beam source could cause blindness Do not attempt to remove the covers and panels which have been fixed to the product Some products have a high voltage part or a LED beam source inside that could cause an e...
Page 4: ... are registered trademarks of Microsoft Corporation in the United States and or other countries Other product names used herein are for identification purposes only and may be trademarks of their respective companies We disclaim any and all rights to those marks Warranty The information contained in this document s is subject to change without notice The manufacturer makes no warranty of any kind ...
Page 5: ...locate the receiving antenna Increase the separation between the equipment and receiver Connect the equipment into an outlet on a circuit different from that to which the receiver is connected Consult the dealer or an experienced radio TV technician for assistance This device complies with Part 15 of the FCC Rules Operation is subject to the following two conditions 1 This device may not cause har...
Page 6: ...puter so that the interface cable can easily reach between the device and the computer Do not place or store the device Outdoors Near excessive dirt or dust water or heat sources In locations subject to shocks vibrations high temperature or humidity direct sunlight strong light sources or rapid changes in temperature or humidity Do not use the device with wet hands Never disassemble modify or atte...
Page 7: ...ects on the unit It may cause unbalance and the device may fall down This may result in injury Store the AC Power cord USB cable bundled out of the reach of children to avoid the risk of injury Keep plastic bags bundled out of the reach of children to avoid the danger of suffocation If you are not going to use the device for a long period unplug the USB cable from the electrical outlet ...
Page 8: ...e used for local and network printing up to A4 size Features This product provides the following features to make your print out more efficient and effective Print on Both Sides Prints two pages one on each side on a single sheet of paper Collate Prints multiple copies at one time and sorts the printed pages ...
Page 9: ...A4 size Print Multiple Pages on a Single Sheet Prints two or four pages of the original on a single sheet of paper A maximum of 16 pages can be printed on a single sheet of paper Print Watermark Print text such as confidential important content or image in the background ...
Page 10: ...Overview 3 External View The Front View 1 Output Tray 4 Front Cover 2 Handle of the Front Cover 5 Paper Stopper 3 Main Paper Tray 6 Control Panel 6 5 1 2 4 3 ...
Page 11: ...User s Guide 4 The Rear View 6 5 1 2 4 3 1 USB Port Type A to USB flash disk 4 Power Receptacle 2 USB Port Type B to PC 5 Rear cover 3 LAN Port 6 Handle of the Rear Cover ...
Page 12: ...Overview 5 Package Contents Main unit Software CD Printer Driver User Manual USB Cable Toner Cartridge Power Cable ...
Page 13: ...ing job Press 3 seconds to Print the usage report Power button Short press to turn on the printer Long press to turn off the printer Alert LED Turn flashing to indicate an error LAN LED Indicate LAN connection Power Ready LED Turn solidly on when the printer is turned on ...
Page 14: ...ssigned by your network administrator or by DHCP Server Note 1 DHCP server With DHCP Dynamic Host Configuration Protocol a host can automatically be given a unique IP address each time it connects to a network making IP address management an easier task for network administrators If the DHCP server is available from your network you do not need to enter TCP IP subnet mask gateway and DNS informati...
Page 15: ...ration Space Please reserve the following operation space Measuring unit mm Machine dimension 402 x 380 x 205 mm WxDxH Removing the Packing Materials Remove the packing materials including plastic bags and tapes for product protection ...
Page 16: ...move the package cushion and tapes on the toner cartridge before using it Installing the Toner Cartridge Please follow these steps to install the toner cartridge 1 Unpack the new toner cartridge 2 Remove the protective cover 3 Tilt the toner cartridge up and down and then right and left 10 times to distribute the toner evenly inside the toner cartridge Toner Cartridge ...
Page 17: ...r clothing or other fabric wipe off the toner with a dry cloth Wash the items in cold water and dry them in the shade To prevent the toner cartridge from damage do not expose it more than several minutes 4 Open the front door by pulling the handles on both sides as shown 5 Lift the handle of the drum unit up and then pull it out as shown ...
Page 18: ... until you hear it lock into place 5 Hold the handle of the drum and toner cartridge assembly and insert the assembly to its original place 6 Press down the handle of the toner cartridge to fix the toner cartridge 6 Close the front cover Drum unit Toner Cartridge ...
Page 19: ...User s Guide 12 Installing the Paper Stopper Gently lift the end of the paper stopper Paper Stopper ...
Page 20: ...ay To insert paper to the main paper tray 1 Fan your paper first to ensure that the pages do not stick together 2 Align the edges of the documents by tapping the bottom of the stack against the table top Rotate the stack 90 degrees and repeat ...
Page 21: ...User s Guide 14 3 Lift the handle of the main paper tray and then pull out the main tray 4 Push the width guide tab and move the width guide to the correct position for the paper size being loaded ...
Page 22: ... the correct position for the paper size being loaded 6 If you want to load a sheet of paper larger than the length of A4 press down the first length adjustment latch and at the same time slide the manual tray to the right until it reaches the paper size you want ...
Page 23: ... move the tray back to the original Letter length press down the second length adjustment latch and at the same time slide the manual tray to the left 7 Load the paper stack with the print side Facing Down as illustrated ...
Page 24: ... pages 70 g m plain paper Paper size A4 210 x 297 mm A6 105 x 148 mm A5 148 x 210 mm B6 125 x 176 mm B5 176 x 250 mm Letter 216 x 279 mm Legal 216 x 356 mm Custom Size 76 2 x 127 mm 216 x 356 mm 3 x 5 in 8 5 x 14 in Paper weight 16 28 lbs 60 105 g m Duplex printing is available only for paper in A4 B5 or Letter size ...
Page 25: ...per stack so that the top page is now on bottom and then reload it to the paper tray Pack and seal the remaining paper with the original packaging and store the paper in a dark and dry location away from the sunshine Paper which collects much moisture is easy to cause jam during printing Important To avoid the chance of miss fed make sure the length guide tab and length slider are installed in the...
Page 26: ...19 Loading the Manual Tray To insert paper to the manual tray 1 Hold the handle of the manual tray and pull it down to open the manual tray 2 Pull out the tray extension to fit your desired paper length Manual Tray ...
Page 27: ...k together 4 Align the edges of the documents by tapping the bottom of the stack against the table top Rotate the stack 90 degrees and repeat 5 Load the paper stack with the print side Facing UP as illusrated 6 Slide the paper guides so that they lightly touch the paper stack ...
Page 28: ... or media which we have recommended Make sure to fan your paper before loading it to the paper tray If there are instructions about the printing side on the package of your paper please follow the instructions to load your paper properly with the correct printing side to the paper tray If the printing quality is not satisfactory or paper jams are easily to occur turn over the paper stack so that t...
Page 29: ...unction 1 Connect one end of your network cable to an available port of your Ethernet Hub 2 Connect the other end to the LAN port at the back of the product as shown Connecting to Power 1 Connect the of the power cable to the power jack of your product 2 Connect the other end to an appropriate power outlet ...
Page 30: ... To turn on the printer press the power button located on the control panel Ready LED will be lit Note When the product is not in use please long press the power button until the Ready LED is turned off to get a zero power consumption state ...
Page 31: ... installing the printer s driver 1 Insert the supplied CD into your CD ROM drive The installation menu appears as shown below 2 Click Install Printer Driver and follow the on screen instructions to install the program 3 When the Setup Type dialog box appears select USB 4 During installation the USB Connection dialog box will be prompted to instruct you to connect the machine to your computer with ...
Page 32: ...he on screen instruction to complete the installation 6 When the Finish dialog box appears click Finish to complete If you have successfully installed the printer s driver you will find a printer L1XX has been added in the Printers and Faxes option from the Control Panel Pandigital L1XX Printer ...
Page 33: ...ll Scanner Driver and Printer Driver and follow the on screen instructions to complete the installation of the program 3 When the Setup Type dialog box appears check TCP IP and click Next to continue If you need to connect the product to a wireless network check USB since the Network Setup Tool is included in the USB driver and only available when the product is connecting to your computer through...
Page 34: ...ally and all the product s host names found in the network will be displayed in the box of the Automatic Search Use your mouse to choose your desired host name to be connected 5 During installation the USB Connection dialog box will be prompted to instruct you to turn on the printer and then connect the printer to your computer with a USB cable 6 When the Finish dialog box appears choose Finish to...
Page 35: ...matically installed onto your computer Follow these steps to update the IP address to the product in a wired network 1 Make sure the product is connected to your computer via a USB cable 2 Start Network Setup Tool by choosing the Start button and then select All Programs L1XX printer Network Setup Tool in succession The following Network Setup Tool screen will be prompted L1 Printer 3 On the Gener...
Page 36: ...o update the IP information to the product 7 If update is successfully an Update Device Successfully message will be displayed and the Network Setup Tool will be automatically closed Uninstalling the Scanner Driver and Printer Driver 1 From the Start menu select All Programs the L1 Series Printer and then Uninstall Driver Or from the Start menu select Control Panel Add or Remove Programs the L1 Se...
Page 37: ... side of your ID card are printed in one side of a sheet Knowing the Scan Module Card Feeder Output Tray USB Cable Fixing Screws x 2 Installing the Scan Module 1 Note two reserved holes on the side wall beneath the operational panel and fasten the scanning module with two fixing screws as shown 2 Connect the USB cable to the USB port on rear side USB Port USB Cable Fixing Screws ...
Page 38: ...2 In a second the front side and the rear side of your ID card will be copied in one side of a sheet Note Only one card can be inserted at one time The scan module does not allow to be fed more than one card at a time To change the default settings of the optional scan module CSA6 for ID card please go to the product s embedded web page as described on page 36 ...
Page 39: ...he machine The product s settings can be customized via the product s embedded web page How to customize the product s settings via these two methods will be described in the following sections Note When installing the product for the first time it is recommended that the Administrator retain the default system settings The settings can be customized at a later date once you are familiar with the ...
Page 40: ...e preceding section to setup the product s network settings 1 Open your browser and type the product s IP address on the URL address for example HYPERLINK http 10 1 23 73 http 10 1 23 73 and press Enter In a second the embedded web page will be displayed 2 Enter your desired setting on your selected items ...
Page 41: ...isplays the IP address Mac Address Displays the Mac address Wi Fi IP Displays the Wi Fi IP address Wi Fi Mac Displays the Wi Fi Mac address Wi Fi SSID Displays the Wi Fi SSID name Toner Remain Displays the toner remain of the toner cartridge System Usage Page Selects Download to download the system usage page to your computer to print the usage report System Settings Factory Default Item Descripti...
Page 42: ...tion of the product Factory Default Item Description Option Host Name Host Name Dipslay the host name for the product Ethernet Settings DHCP Enables DHCP Off On IP Address Set up an IP address Input the IP address of the product Subnet Mask Input the subnet mask number Gateway Input the gateway for your IP Auto Obtain WINS DNS Off On Primary DNS Server Sets up the primary DNS server address for th...
Page 43: ...Address Filter Configuration Note 1 DHCP server With DHCP Dynamic Host Configuration Protocol a host can automatically be given a unique IP address each time it connects to a network making IP address management an easier task for network administrators If the DHCP server is available from your network you do not need to enter TCP IP subnet mask gateway and DNS information Instead this information...
Page 44: ...ceding section Knowing the Product s Default IP Address to get the product s IP address from the DHCP server 2 Open your browser 3 Type the product s IP address on the URL field of your browser For example 10 1 23 73 The following embedded web page will be displayed 3 On the product s web page choose FW Update on the left side The FW Update page will be displayed 4 Choose Browse to find the firmwa...
Page 45: ...ver Properties Dialog Box To display the Printer Driver Properties dialog box 1 Click Start on the system tray and choose Printers and Faxes 2 Right click the product s printer name and choose Properties 3 The product s Printer Properties dialog box appears ...
Page 46: ...Configuring the Printer s Driver 39 4 Click Printing Preferences to prompt the following Printing Preferences dialog box ...
Page 47: ...er tab the Layout tab the Watermark tab and the Duplex tab The contents of each tab will be explained in the following sections The Basic Tab The Basic tab contains settings for Orientation Copies Effect Density Toner Save and Invert Orientation Choose your orientation Choice Portrait Landscape Portrait Landscape ABC ABC ...
Page 48: ...copies to be printed You can enter up to 999 Collate Click to print your document in the page order such as 1 2 3 1 2 3 1 2 3 N to 1 Click to reverse the printing order of your document As a result the last page of your document will be printed first and vice versa ...
Page 49: ... quality Density Click to lighten or darken your document Density level 1 7 Default 3 Toner Save Allows you to print your document using the toner saving mode Invert Invert makes each image pixel inverted to its complementary color For example the original black text on white background becomes white text on black background ...
Page 50: ...ce A4 A5 A6 B5 B6 Legal Letter User Define Tray Choose the tray from which your paper should be fed Choice Auto Manual Tray Main Tray Auto means automatically select the paper tray which matches the paper size of your document Media Type Choose the type of media to be used for printing Choice Plain Thin Thick Laser Paper Postcard Bond Envelope Only available in the manual tray for one side printin...
Page 51: ...Size N up N up Choose number of pages to be printed on a single sheet of paper Choice Off 2up 2 in 1 4 up 4 in 1 9 up 9 in 1 16 up 16 in 1 Border Choose if you wish to add border around each page when printing more than one page on a single sheet of paper Choice None Border Line Dashed Line ...
Page 52: ...ght Left then Down Down then Left Right then Down Down then Left Down then Right Left then Down Output Paper Size User Define Scale You can reduce or enlarge your printed image using the Slider Bar Scaling rate 25 400 Fit to Paper Output the full page of the selected original including the four margins Center Print your image in the center of the output paper ...
Page 53: ...rmark only on the first page Clear the check box will print watermark on all pages Text Choose and click New Add to add new watermark text Click the Edit button to change or the Remove button to delete Image Choose and click New Add to add watermark image Click the Edit button to change or the Remove button to delete You can choose your image in file format such as BMP TIFF or JPEG ...
Page 54: ...x appears Name Name your watermark text This name will be shown in the Watermark text list String Enter your watermark text such as confidential important and so on Typeface Choose your font type for your watermark text Style Choose the style of your watermark text Choice Regular Bold Italic Bold Italic Position Choose the position of your watermark text Choice Center Tile ...
Page 55: ... the watermark name will be shown in the Text list Editing a current watermark text To edit a current watermark text 1 Choose the waternark name that you wish to edit from the Text list 2 Click the Edit button The Watermark Edit dialog box appears 3 Change your settings for the selected watermark text and choose OK to complete Removing a current watermark text To remove a current watermark text 1 ...
Page 56: ...our watermark image Size Specify the size of your watermark image Choice Actural Size Fit to Page Tile Position Choose the position of your watermark image Choice Top Left Top Center Top Right Center Center Left Center Right Bottom Center Bottom Right Bottom Left Shading Specify a relative density for the watermark text Choice Lightest Light Medium Dark Darkest 2 Click the OK button to save the se...
Page 57: ...ist 2 Click the Edit button The Watermark Edit dialog box appears 3 Change your settings for the selected watermark image and choose OK to complete Removing a current watermark Image To remove a current watermark image 1 Choose the waternark name that you wish to remove from the Image list 2 Click the Remove button The watermark image will be removed ...
Page 58: ...per Choice Flip Horizontal Flip Vertical Booklet Booklet no reduction Duplex Flip Horizontal Check to flip the duplex document on the left edge Flip Vertical Check to flip the duplex document on the bottom edge Note The duplex feature supports only page sizes of A4 B5 and letter with paper weight between 60g m2 and 105g m2 ...
Page 59: ...s provided to set the amount of time the printer waits for data to come from computer during a job If the data stream pauses for longer than the specified number of seconds the job is cancelled Permitted timeout values 60 1800 seconds default timeout values 300 seconds ...
Page 60: ...n the control panel Stopping the current print job from the software program When you send the print job a dialog box appears briefly on the screen You can cancel the print job from the dialog box If several requests have been sent to the product through your software they might be waiting in a print queue for example in Windows Print Manager See the software documentation for specific instruction...
Page 61: ...sing the Classic Start menu view Choose Start Settings Printers in succession Or Windows Vista using the default Start menu view Choose Start Control Panel Hardware and Sound Printers in succession Or Windows 7 Choose Start Control Panel Hardware and Sound Devices and Printers in succession 2 In the list of printers double click the name of this product to open the print queue or spooler 3 Select ...
Page 62: ...Monitor is available when the printer is connected directly to a host computer via the USB port or a network port Printer Status Monitor is installed when you install the printer driver as described in the preceding section Accessing Printer Status Monitor Double click the Printer Status Monitor icon on the system tray The following printer status window appears Printer Status Monitor icon Pandigi...
Page 63: ...rinter b Progress Bar The progress bar to access the latest data of the specified printer c Delete Errors Delete all the error messages d Save Errors to CSV Save error message to a CSV file e All Users Jobs Check the box to show All users jobs f Job Box Show all the jobs in queue g Enable Check the box to enable accessing the status of a specified printer h Printer Displays the connected printer i...
Page 64: ...k to show the information of the paper tray and the consumables parts such as Drum Toner Cartridge The Consumables window k IP for a Shared Printer Click here to enter the IP for a shared printer to get the printer status Drum Usage Remain ...
Page 65: ...atus Monitor window Language Displays the language of the window Status Alert Update Time Display in Pop up Window Define the interval to refresh the printer error status Choice 1 5 10 minute Custom 1 1400 minute Check the Pop up Window box to automatically show the error status in a pop up window on the system tray ...
Page 66: ...Solution Toner low 200032 Toner that remains is lower than 10 The machine can still perform printing or copying function yet with poor quality Drum near end 200043 Drum that remains is lower than 10 Call the service personnel to order and replace the drum Toner empty 200031 Toner has run out Replace a new toner cartridge No Drum 200041 Please install drum and restart MFP Drum life ends 200042 Drum...
Page 67: ...rinter parts that fail Motor error 000001 Press button to erase or call service When Printer is booted the scanner and printer engine Initialization fail Restart MFP Scanner lamp error 002007 Please close flatbed cover and Press button to erase or call service The CIS lamp is damaged or not lit Call service personnel to replace the CIS unit Fan fails 200090 Call service personnel to replace the fa...
Page 68: ... ready Try again later Printer is busy with current job Wait until current job is completed Buffer full Job abort Memory is not enough to process the scanned images Buffer full Print scanned images 1 Cancel job 2 Memory is not enough to process the scanned images Press 1 to print the first few images which have not exceeded the memory limit or press 2 to cancel job Resetting default settings fails...
Page 69: ...um unit out to clear jam paper Paper jam 200327 Please open front cover and pull drum unit out to clear jam paper Paper jam 200328 Please open front cover and pull drum unit out to clear jam paper Paper jam 200329 Please open front cover and pull drum unit out to clear jam paper Paper jam 200330 Please open front cover and rear cover to clear jam paper Paper jam 200331 Please open front cover and ...
Page 70: ...ng the handles of the front cover on both sides as illustrated Rear Cover Open the rear cover by pulling the handle of the rear cover as shown Duplex Tray Pull the duplex tray beneath the rear cover out of the main unit Manual Tray Open the manual tray by grasping the handle and pull it down ...
Page 71: ...hese steps to remove the jammed paper 1 Open the Front Cover and the Rear Cover 1 Pull down the Fuser Path as indicated 2 Pull down the Release Arm on both sides 4 Slowly remove the jammed paper 5 If there is difficulty to pull off the jammed paper remove the printer cartridge first 6 Rotate the Release Wheel to slowly pull out the jammed paper ...
Page 72: ...650 Printer runtime error 201651 Firmware error 201701 Printer MB NVRAM reading error 201702 Printer MB NVRAM writing error 201703 Printer MB NVRAM reading error while comparing 201704 Printer MB NVRAM comparing error 201711 Printer Drum Unit NVRAM reading error 201712 Printer Drum Unit NVRAM writing error 201713 Printer Drum Unit NVRAM reading error 201714 Printer Drum Unit NVRAM comparing error ...
Page 73: ...ture absorption Light print entire page 1 Make sure that the toner cartridge is fully installed 2 Make sure that the Toner Save setting is turned off in the printer driver 3 Try using a different type of paper 4 The toner cartridge might be almost empty Replace the toner cartridge Light print partial page 1 Make sure that the toner cartridge is fully installed 2 The toner level might be low Replac...
Page 74: ...the toner cartridge Dirty background entire page 1 The paper might not meet the printer s specifications for example the paper is too thin 2 Check if there is enough toner in the toner cartridge If not please replace toner cartridge 3 Call the service personnel for help Print blank page Check if there is enough toner in the toner cartridge If not please replace the toner cartridge If this error ha...
Page 75: ...gain call service for help Loose toner 1 If you have observed a rougher texture on one side of your paper try printing on the smoother side 2 The paper might not meet the printer s specifications for example the paper surface is not smooth or paper too thick 3 Media type incorrect Please choose proper media type for your paper ...
Page 76: ...m still exists after trying the above solution please contact our technical support US and Canada Area Pandigital Inc 6815 Mowry Ave Newark CA 94560 USA TEL 1 510 739 2369 FAX 1 510 739 6060 E MAIL support pandigital com Web Site http www pandigital com ...
Page 77: ...opies paper may not feed smoothly or noise occurs during paper feeding Follow the procedure below to clean the Pad in the Cassette You need to prepare cotton swab 1 Remove all paper in the cassette 2 Moisten a cotton swab with isopropyl alcohol 95 3 Clean the rubber part of the pad Pad Cassette Important After cleaning the smeared Pad dry it completely ...
Page 78: ...ppear defective image of regular interval Follow the procedure below to clean the drum unit 1 Turn off the power and remove the power cord from the power outlet 2 Open the front cover by pulling the handles on both sides as shown 2 Lift the handle of the drum unit and toner cartridge assembly and gently remove the assembly ...
Page 79: ...User s Guide 72 Drum unit 3 Remove the toner cartridge from the drum unit as shown Drum unit Toner Cartridge 4 Clean the drum unit with a clean and soft cloth Clean this area ...
Page 80: ...ow message through the printer monitoring program Pandigital Status Monitor Buy a new toner cartridge and have it ready before you receive Replace Toner message Note The drum unit and the toner cartridge are two separate parts Follow these steps to replace the toner cartridge Removing the Toner Cartridge 3 Turn off the power and remove the power cord from the power outlet 4 Open the front cover by...
Page 81: ...ser s Guide 74 2 Lift the handle of the drum unit and toner cartridge assembly and gently remove the assembly Drum unit 3 Remove the toner cartridge from the drum unit as shown Drum unit Toner Cartridge ...
Page 82: ...evenly inside the toner cartridge 4 Install the new toner cartridge to the drum unit Warning Be careful not to inhale toner To avoid print quality problems DO NOT touch the toner rollers If toner gets on your clothing or other fabric wipe off the toner with a dry cloth Wash the items in cold water and air dry To prevent the toner cartridge from damage do not expose it more than several minutes Dru...
Page 83: ...ligned with the arrow on the drum unit If it is not printed pages may have a vertical stripe 6 Hold the handle of the toner cartridge assembly and insert the toner cartridge assembly to its original place Press the handle to fix it firmly in place 7 Close the front cover Note Do not dispose of the toner cartridge Put the used toner cartridge into the bundled plastic bag and then return it to a dea...
Page 84: ...oring program Pandigital Status Monitor Buy a new toner cartridge and have it ready before you receive Replace Drum Unit message Follow these steps to replace the toner cartridge Removing the Drum Unit and the Toner Cartridge Assembly 1 Turn off the power and remove the power cord from the power outlet 2 Open the front cover by pulling the handles on both sides as shown 3 Lift the handle of the dr...
Page 85: ...User s Guide 78 4 Remove the toner cartridge from the drum unit as shown Drum unit Toner Cartridge ...
Page 86: ...rmly in place Note If toner gets on your clothing or other fabric wipe off the toner with a dry cloth Wash the items in cold water and air dry Do not dispose of the toner cartridge Put the used toner cartridge into the bundled plastic bag and then return it to a dealer or service representative The latter recycles or deals with the collected toner cartridges in accordance with the relevant regulat...
Page 87: ...print out time 11 seconds A4 SEF standard tray Warmup Time 25 seconds Recommended monthly print volume 1 500 pages Maximum monthly print duty cycle 15 000 pages Paper capacity 10 pages 70g m plain paper Paper size A4 A5 A6 B5 B6 Letter Legal Customized size 76 4 x 135 216 x 356 mm Manual tray Paper weight 60 163 g m 16 43 lbs Paper capacity 250 pages 70g m plain paper Paper size A4 A5 A6 B5 B6 Let...
Page 88: ...ted operation system Windows XP Windows 7 Windows 8 Windows 10 Dimemsion WxDxH 404 x 380 x 204 mm 15 9 x 14 9 x 8 in Weight 8 5 kg 18 73 lb Power source 100 120Vac 60Hz 12A 220 240Vac 50 60Hz 6 5A Power consumption 1 5kg Temperature Operation Environment Humidity 10 C 32 C 15 80 no dew Product Lifecycle Printer life 5 year or 60 000 pages Toner Cartridge 5 000 pages ISO19752 Drum Unit 15 000 pages...