background image

RANGE CTRL:

Click this window to open a pop-up menu with the list of

Range Controls

:

Above the list is a POLARITY button. This selects whether the range control is
applied positively or negatively. By default it is positive (+). Click the button to
change the polarity.

Click on a Range Control to select it. The menu will close automatically.

To close the menu without selecting a range controller, either select OFF, click the

X

or click anywhere in the panels above the menu screen.

Here all the sources shown are

external

ones; as before, those MIDI sources that

have a default assignment within the FI are shown in white with the name
following it in brackets.

A Range Control is used to give you real-time, direct live control over the depth of
modulation from the source to the destination.

e.g. If the Range Control is PITCH, then the modulation depth from the control
source will change according to whether you play in the lower register or the
higher register of your instrument.

Continuing the example, if the polarity is

positive

(+) then modulation will increase

as you play from low to high. By contrast, if the polarity is

negative

(-), the

behavior is reversed.

Range Control is explained in a bit more detail

further below

.

Go to

Table of Contents

60

Summary of Contents for Future Impact v3

Page 1: ...g MIDI Synthesizer for bass guitar keyboard and other instruments User Guide Version 3 60 June 10 2021 Written by Peter Kenney and Andras Szalay Panda Audio Ltd www panda audio com Product website www...

Page 2: ...the Parameters and Setting the Instrument Mode 12 A Quick Word About Firmware 13 Detailed Manual 14 The Instrument Modes 15 The Boot Menu 16 Updating the Firmware of the Future Impact v3 18 Firmware U...

Page 3: ...Block 50 Effects Block 51 Effect 1 Overdrive 52 Effect 2 Equalizer 53 Effect 3 Chorus 54 Effect 4 Delay 56 Tap Tempo 57 Adjusting Effects on the FI with the PARAMETER and EDIT Dials 58 Flexi Controlle...

Page 4: ...IDI 75 Setting the MIDI Channel 75 MIDI Thru 75 Program Change Out 75 MIDI Related Performance Features 76 Expression 76 Sustain 76 MIDI Implementation 77 Compatible MIDI Interfaces 80 Specifications...

Page 5: ...uired but not included A 9V stabilized 100mA center negative Roland Boss type power supply A compatible MIDI interface and two MIDI cables for use with either a PC Windows 7 and above or MAC OS X 10 6...

Page 6: ...put is entirely possible when not using your instrument input to trigger the oscillators It was originally designed for use with bass guitar but in version 3 the pitch range has been extended so that...

Page 7: ...gnal is sent to the audio output so the input instrument signal can be split using a Y cable or splitter box prior to the audio input socket Synth and EWI Mode audio input signal can be decoupled from...

Page 8: ...Top Panel Controls and Display Connections Go to Table of Contents 8...

Page 9: ...a very helpful FAQ section at the very end of this manual Setting up the Future Impact v3 Connect your bass guitar to the INPUT socket connect the OUTPUT socket to an amplifier Connect a 9V stabilize...

Page 10: ...ult in notes of unintended pitch being triggered on the synthesizer Due care must be given to muting between subsequent notes so that the pitch detection circuit can accurately hear a new pitch and a...

Page 11: ...mpo for the Delay effect Editing the Sounds For each sound you can edit up to nine different sound parameters directly on the pedal via the Top Panel Controls and save the changes There are also two g...

Page 12: ...he filter Lower values yield a darker sound higher values yield a brighter sound The range of this parameter can be altered in the Boot Menu RESONANCE Boosts the frequencies around the filter cutoff f...

Page 13: ...default value 5 upon power on The program loaded at power on will be reset to 1 INSTRUMENT MODE InS Value bSS Bass SPL Split Gtr Guitar Snt Synth EUI EWI Default on reset is bSS Choose the option for...

Page 14: ...nterfaces The Appendix contains block diagrams of the FI s signal path and some useful lookup tables of the filter and LFO frequency settings A tremendous amount of care and effort has been put into m...

Page 15: ...parate bass guitar and synth channels may be desired In this mode you must split the signal prior to the FI s input with a splitter box or a Y cable for the two destinations Everything works as in Bas...

Page 16: ...Flexi source The Boot Menu From here you can reset all hardware parameters change how the footswitches select programs set the range of the filter set the Tune Base set the FI s MIDI channel set the I...

Page 17: ...g the PROGRAM footswitch will only cue the next program but will not engage it the number in the pedal s LCD will change and start to blink but the sound will not yet change You must press the ON OFF...

Page 18: ...s bSS Choose the option for your instrument If your instrument is not listed above then choose either Bass or Guitar whichever one best fits the pitch range of your instrument See the Instrument Modes...

Page 19: ...y to update your pedal s firmware via the Editor Suite is detailed in the section on the File Menu Firmware Update Failure If for some reason the firmware update was unsuccessful e g due to poor data...

Page 20: ...th views allow you to load and save program files albeit in slightly different ways The differing ways are explained in the dedicated sections for each view If you simply want to audition new sounds c...

Page 21: ...Select your interface from both the FI Input Device and the Output Device drop down menus on the left hand side of the box All MIDI Device Settings are explained below Connect your FI your computer a...

Page 22: ...above the remaining items are explained below The File Menu The options in this menu are explained below Select Directory Specifies the location that the Editor uses for loading and saving program fil...

Page 23: ...not receive confirmation of the writing action and an error message will appear both cables must be used Write All Programs from Files to FI Writes all programs from your selected directory to the FI...

Page 24: ...users and upload sounds of your own However all the programs hosted on the Program Database are accessible directly within the Manager Firmware Update Offers an alternate to the recommended browser ba...

Page 25: ...an do this by performing a RESET ALL Alternatively if you do not want to lose any program settings made with the PARAMETER and EDIT dials you can manually set the Tune Base to 440 Hz or any other desi...

Page 26: ...ce themed background LCD is a photorealistic skin depicted in the Alternative Editor Skin section Note Switching between the classic and LCD skins requires the Editor Suite to be restarted Save any ed...

Page 27: ...gram Database site which allows you to browse audition and download patches shared by other users Global programs or upload your own all directly within the Editor Suite The viewing area of the Manage...

Page 28: ...ons of this section and the associated Program Pane below it are used to browse and select FI program files on your computer and online for editing and auditioning Any selected program s can simply be...

Page 29: ...o unhighlight all program files within a single folder INVERT SELECTION Click to change all highlighted files to unhighlighted ones and vice versa SEND TO BANK Click to send all currently selected pro...

Page 30: ...to your computer or upload them to the Online Program Database From left to right the buttons functions are as follows NEW Click to create a new blank template This will clear all 99 tiles It will not...

Page 31: ...ete contents of the Tile Window to your pedal If you only want to send a single program or a specific set of programs to the pedal select only those tiles you wish to send before pressing UPLOAD TO FI...

Page 32: ...the name of a singly selected tile you can change the category of any number of tiles simultaneously To change the name of a tile click the tile to select it Now click the name shown in the text box i...

Page 33: ...ge The third page shows how the Effects Block is inserted into the structure of the FI The FI has two basic sound sources The harmonizer and input instrument block and the synthesizer block The synthe...

Page 34: ...scussed further in the section on Building Your First Sound Note1 The and buttons can only be used to scroll through Local programs i e those stored in folders on your computer they cannot be used to...

Page 35: ...CF Block a combination of the ENVELOPES and LFO Blocks a combination of the DISTORTION and MAIN MIXER Blocks the EFFECTS Block and the four FLEXI Controllers Click on a checkbox to select a block Any...

Page 36: ...he right side then press COPY Alternative Editor Skin Instead of the classic Future Impact Editor skin you can use this photorealistic LCD skin You can select this using the View Menu Note Switching b...

Page 37: ...licking a slider will reset it to its lowest value Pressing CTRL Z or CTRL Y will respectively undo or redo any edits made to parameters VCO Block The FI contains four identical Voltage Controlled Osc...

Page 38: ...his parameter determines the initial amplitude of the decaying portion of the saw waveform and whether the volume increases or decreases from that point on A setting of 63 causes the decay envelope to...

Page 39: ...o contains only the odd numbered overtones of the harmonic series but as their frequencies increase their volumes taper off much more steeply than those in the square wave This gives a deep sound with...

Page 40: ...also happen between separate oscillators when the sum of the amplitudes i e VOLUME sliders of all four of the FI s oscillators exceeds 127 The effect of foldover distortion between oscillators that ar...

Page 41: ...ilter is an equalizer set to 2100 Hz and Q 0 8 The slider cuts or boosts by up to 11dB at this frequency A setting of 64 is flat 0dB Note Whenever MIDI is being used to trigger the FI the Distortion B...

Page 42: ...ESTART and ADSR in RESET TO ZERO which are selected using the Envelope Mode slider Moving from left to right the sliders of the Envelopes Block are as follows ENV MODE VINTAGE RESTART RESET Sets the b...

Page 43: ...ve giving full ADSR envelopes practically identical to those found in a classic 1970s 3 oscillator monosynth They can be adjusted in a range of 1 millisecond to 10 seconds Unlike the AD and AR envelop...

Page 44: ...s have both 12dB and 24dB per octave slopes and two scaling modes The VCF Block is split into two sections in the Editor 1 VCF INPUT A five channel audio mixer which feeds into the filter 2 FILTER As...

Page 45: ...Synthesizer Although relatively few of the factory sounds use this feature this can be used to perfectly mask any potential tracking errors or latency of the synthesizer sound Beware that even when i...

Page 46: ...from the cutoff value set by the VCF FRQ slider in the program The range is set by VCF CONTROL RANGE in the Boot Menu BPF FRQ OFF 1 24 Sets the cutoff frequency of the parallel second bandpass only f...

Page 47: ...tinuously changing signal which exactly follows the amplitude curve of the input instrument Accent outputs a steady signal determined by the instrument s initial loudness value When the FI is played u...

Page 48: ...to zero then the set LFO amplitude is reached immediately LFO VCF VCO 0 127 Sets the LFO depth individually for both destinations If desired the modulation depths of both LFO VCF and VCO can be contr...

Page 49: ...the same so the greater the distance between the two notes the longer portamento time will be PORTAMENTO MODE PUSHBUTTON ALWAYS LEGATO This switch determines whether portamento will happen on every ne...

Page 50: ...pitch bend range both up and down in semitones when the pitch bend wheel is used Main Mixer Block This is a simple two channel audio mixer situated before the final output to the effect section Moving...

Page 51: ...cts can be displayed at any one time Click on one of the four tabs OVERDRIVE EQUALIZER CHORUS DELAY above the panel to display that effect s panel that tab will now become light gray to indicate it ca...

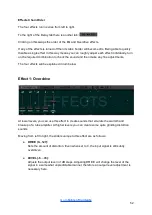
Page 52: ...ments The four effects will be explained in turn below Effect 1 Overdrive At lower levels you can use this effect to create sounds that emulate the warmth and breakup of a tube amplifier At higher lev...

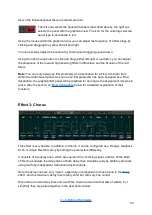
Page 53: ...ID1 FRQ MID2 FRQ 0 127 Adjusts the center frequency of the equalizer stages in the range of 170 7000Hz MID1 Q MID2 Q 10 100 Adjusts the resonance Q of the equalizer stages in a range of 1 10 MID1 BOOS...

Page 54: ...parameter has been assigned as a Flexi destination the graphical EQ panel will be disabled for as long as the assignment remains in place See the section on Flexi Controllers below for a detailed expl...

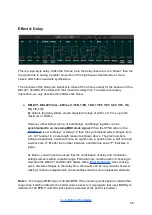
Page 55: ...nes 1 and 2 Higher amounts result in the delay time being cyclically shifted further to either side of the value set by the two delay time sliders FBCK LEVEL 0 127 Adjusts the feedback level A higher...

Page 56: ...set to Delay1 or Delay1 2 then the synchronized slider changes from a 0 127 readout to a note length readout as shown above The plain numbers indicate respectively a sixteenth note an eighth note a qu...

Page 57: ...red delay settings of the program engage the Tuner again and press the Program footswitch once The decimal point will go dark again Tap Tempo is automatically cancelled whenever a program change occur...

Page 58: ...x and provide a way to control almost any slider based parameter in the Editor in a very flexible and intuitive way from a choice of control sources 10 What does this mean Well one example of a contro...

Page 59: ...o select whether the control source modulates the destination parameter either smoothly or in quantized steps e g If the destination is PITCH COARSE then CONTINUOUS will adjust the pitch smoothly wher...

Page 60: ...as before those MIDI sources that have a default assignment within the FI are shown in white with the name following it in brackets A Range Control is used to give you real time direct live control o...

Page 61: ...t slider determines the base unmodulated value of the parameter i e it functions exactly as the normal non split slider did The position of the right slider which can be set above or below that of the...

Page 62: ...roller from within the slider based panel As soon as an EQ parameter has been assigned as a Flexi destination the graphical EQ panel will be disabled for as long as the assignment remains in place Rem...

Page 63: ...control directly as we play These are known as internal sources In the FI there is also a group of external sources and these sources are under our direct control as we play The group consists of the...

Page 64: ...rent applications using a broad range of frequencies VCO3 LFO is four times faster than VCO4 LFO See the LFO Frequency Lookup Tables in the Appendix for details of the actual frequencies VCO3 LFO is f...

Page 65: ...adjusted Consequently access to the pink noise filter cutoff parameter is inhibited whenever a Flexi is assigned to that slider Pink noise is also affected when LFO4 MIDI Sync is enabled see note 2 of...

Page 66: ...setting of 12 or 24 semitones to create a whammy pedal effect for the oscillators Create asymmetrical LFO behavior by using an LFO as a control source and selecting a non linear transformation curve...

Page 67: ...o 0 127 12 2 3rd logarithmic VCF volume of Main Mixer 127 5 Portamento time 0 127 13 7 Main output volume 127 11 Filter cutoff 64 64 Sustain 0 65 Portamento ON OFF 127 66 FI ON OFF 67 Program decremen...

Page 68: ...that due to the various gain stages in the signal path you may need to raise several sliders above minimum in order to hear anything To hear your dry instrument signal turn up the INSTR slider in the...

Page 69: ...to show you the above method so that you fully understand the processes and signal paths involved in setting up a synth sound from scratch Now that you have you may be happy to learn that there is a...

Page 70: ...d also mix in some of your dry instrument signal using the INSTR slider in the Main Mixer If you wanted to you could also switch the filter back on and adjust its settings and the VCF envelope setting...

Page 71: ...utoff to allow sound through start with 52 Keep the Slope on 12dB Use the lowpass filter and set the resonance to about 30 As you might guess from the name an envelope controlled filter makes use of t...

Page 72: ...can be applied at low LFO speeds You could also try adding a second delay line with different LFO and MOD settings to further thicken your sound FI as Flanger A flanger is fairly similar to chorus bu...

Page 73: ...your sound cyclically This is quite a straightforward effect to achieve use a Flexi Controller with an LFO as its source and a volume slider as its destination The volume slider could be a single VCO...

Page 74: ...eriment with pulse width offset setting to further change the harmonic content of the sound Try adding subtle envelope or envelope follower control to add bloom to the notes Add EQ to beef up the bass...

Page 75: ...and SysEx data MIDI Thru is turned on or off via the Boot Menu Program Change Out When a change of program occurs on the FI by using the PROGRAM footswitch or the EDIT BANK UP dial then the FI will se...

Page 76: ...movement of the sound even after the sustain has been engaged Once Sustain has been engaged the envelopes in the Envelopes Block can no longer be triggered however their decay stages will continue un...

Page 77: ...to both VCF and VCO LFO Modu la tion The depth set in the program will be reached if CC1 is at maximum 127 Practically speaking the modulation value s in the program will be multiplied with the MIDI c...

Page 78: ...utput of the FI including any delay trails etc It is independent of all program parameters It is smoothed and acts logarithmically Beware if you use a keyboard or a MIDI pedal to adjust the volume of...

Page 79: ...footswitch If 64 then scrolling stops again When the Tuner is engaged then values of 64 send a tap to the Tap Tempo function If 64 then the message is ignored 89 Tuner ON OFF toggle Tap Tempo entry mo...

Page 80: ...ro M Audio Midisport 4x4 M Audio Firewire 1814 Behringer UMC404HD Presonus Firepod Bespeco BM USB100 Focusrite Scarlett 8i6 Focusrite Scarlett 18i6 Audiobox USB RME UFX ESI M4U XL Focusrite Scarlett 2...

Page 81: ...pling Distortion calculated at 128 kHz oversampling Connectors Audio in jack Audio out jack 5 pin DIN MIDI in 5 pin DIN MIDI out 5 5 2 1 mm DC socket for 9V stabilized center negative supply Controls...

Page 82: ...has a separate decay envelope for saw amplitude Each VCO can generate complex dynamically changing waveforms using foldover distortion Harmonizer with 3 voices variable transposition High quality gui...

Page 83: ...negative Roland Boss type power supply Additional requirement for sound editing A MIDI interface and two MIDI cables for use with a PC Windows 7 and above or MAC OS X 10 6 Snow Leopard and above Mini...

Page 84: ...Appendix Go to Table of Contents 84...

Page 85: ...Algorithm Block Diagrams Go to Table of Contents 85...

Page 86: ...Go to Table of Contents 86...

Page 87: ...Go to Table of Contents 87...

Page 88: ...7 78 51 155 56 63 311 13 75 622 25 E 40 82 41 52 164 81 64 329 63 76 659 26 F 41 87 31 53 174 61 65 349 23 77 698 46 F 42 92 50 54 185 00 66 369 99 78 739 99 G 43 98 00 55 196 00 67 392 00 79 783 99 G...

Page 89: ...66 98 2349 32 110 4698 64 122 9397 27 D 87 1244 51 99 2489 02 111 4978 03 E 88 1318 51 100 2637 02 112 5274 04 F 89 1396 91 101 2793 83 113 5587 65 F 90 1479 98 102 2959 96 114 5919 91 G 91 1567 98 1...

Page 90: ...18 26 0 78 46 1 38 66 1 98 7 0 21 27 0 81 47 1 41 67 2 01 8 0 24 28 0 84 48 1 44 68 2 04 9 0 27 29 0 87 49 1 47 69 2 07 10 0 30 30 0 90 50 1 50 70 2 10 11 0 33 31 0 93 51 1 53 71 2 13 12 0 36 32 0 96...

Page 91: ...3 09 123 3 69 84 2 52 104 3 12 124 3 72 85 2 55 105 3 15 125 3 75 86 2 58 106 3 18 126 3 78 87 2 61 107 3 21 127 3 81 88 2 64 108 3 24 89 2 67 109 3 27 90 2 70 110 3 30 91 2 73 111 3 33 92 2 76 112 3...

Page 92: ...7 0 84 27 3 24 47 5 64 67 8 04 8 0 96 28 3 36 48 5 76 68 8 16 9 1 08 29 3 48 49 5 88 69 8 28 10 1 20 30 3 60 50 6 00 70 8 40 11 1 32 31 3 72 51 6 12 71 8 52 12 1 44 32 3 84 52 6 24 72 8 64 13 1 56 33...

Page 93: ...48 124 14 88 85 10 20 105 12 60 125 15 00 86 10 32 106 12 72 126 15 12 87 10 44 107 12 84 127 15 24 88 10 56 108 12 96 89 10 68 109 13 08 90 10 80 110 13 20 91 10 92 111 13 32 92 11 04 112 13 44 93 1...

Page 94: ...s hazardous chemicals in the REACh regulation WEEE As with the disposal of all old electrical and electronic equipment this product is not to be treated as regular household waste Instead it should be...

Page 95: ...ould be returned to us only after consultation and if we have explicitly requested that it be returned You must pay for the cost of shipping the device back to us It is up to you which shipping servic...

Page 96: ...en function correctly again How do I access the Tuner Press and hold the ON OFF footswitch to turn the Tuner on press the footswitch again to turn it off How do I choose which sound plays when the ped...

Page 97: ...very intuitive to use and it won t take long before you have learned how to use it fully If you don t have your pedal or the Editor Suite to hand then you can listen to sound clips of programs on the...

Page 98: ...ick the Bank folder then the v3 5 Factory Default Sounds From the File Commands click SELECT ALL then click SEND TO BANK Now from the Bank Commands in the upper central portion of the screen click UPL...

Page 99: ...cillator pitches you can even change the chord quality on the fly If you are using the FI purely as a substitute for a single effect pedal such as chorus distortion flanger etc where the synthesizer s...

Page 100: ...ad that section for details Why isn t my MIDI interface working with the FI Whilst most MIDI interfaces are well implemented and can transfer large SysEx packages such as the FI firmware update some m...

Reviews: