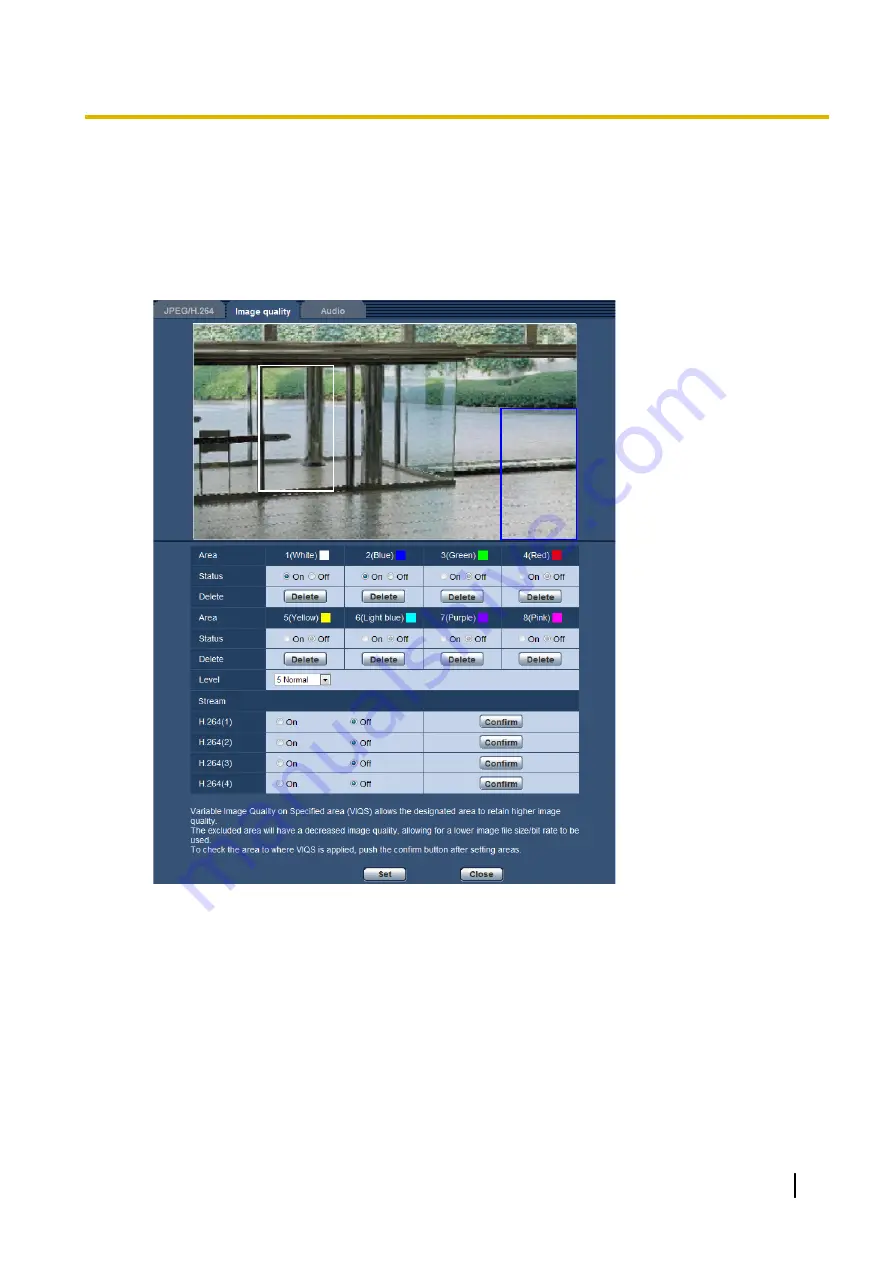
11.8 Configure the VIQS area
The VIQS area is specified by following the steps below.
1.
Drag the mouse on the screen to specify the area (up to 8 areas).
→
The specified area is set to area “1(White)”, and the outline is displayed.
The areas are set in the area number order from number 1. The color next to the area number show
the color of the corresponding outline.
2.
Configure the difference level in the image quality between specified areas and non-specified areas. The
greater the difference level, the more the image quality of the non-specified area is reduced. This makes
it possible to moderate the image data size.
3.
Select On/Off to activate/deactivate a distributed image of “H.264(1)”, “H.264(2)”, “H.264(3)”, or “H.
264(4)”.
4.
Click the [Set] button.
→
This unit is updated with the setting contents. Click the [Delete] button corresponding to the area to be
deleted.
5.
Click the [Confirm] button.
→
The image (“H.264(1)”, “H.264(2)”, “H.264(3)”, or “H.264(4)”) that the [Confirm] button was pressed for
is displayed. When a window is newly opened and about 3 seconds pass, the currently outputted bit
rate can be confirmed with the configured VIQS.
Operating Instructions
97
11 Configure the settings relating to images and audio [Image/Audio]


