


WJ-HD616/716 Quick Guide Local Operation
15
Ver.1.0
Select camera channels
Move the cursor onto the [Ch] button, and then press
the [SET] button (click with the mouse).
- The camera channel setup menu will be displayed.
To select a camera channel, rotate the jog dial
(inside), click the button using the mouse and click
on a camera number
Specify the time range
Move the cursor onto the [Time & date] button, and
then press the [SET] button, (click with the mouse).
- The time & Date setup menu will be displayed.
Front keyboard
Move the cursor onto the entry field, and then press
the [SET] button. The software keyboard (for time and
date entry) will be displayed.
Mouse
Click on the Calendar button to call up the calendar
and select the date and times by clicking the ( ) by
each of the parameters.
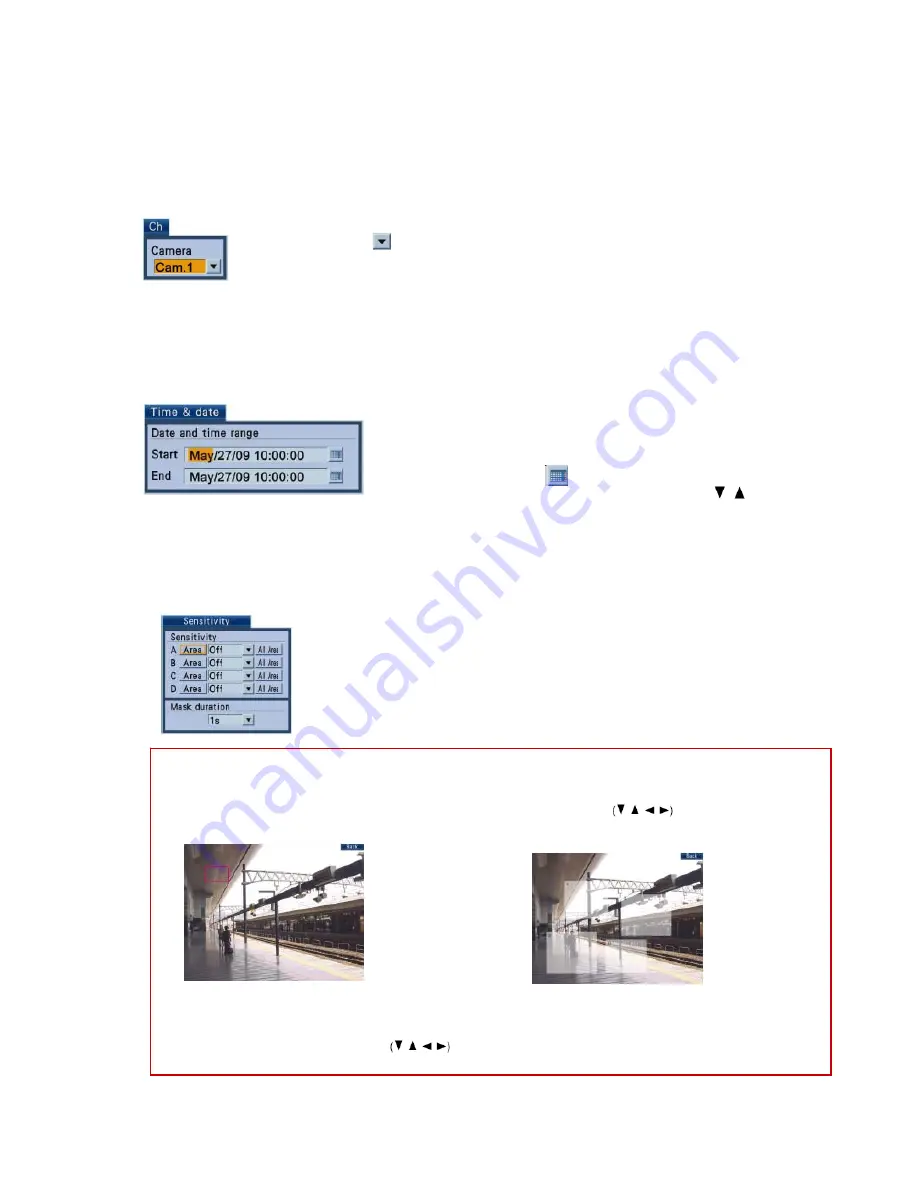
Filter by detection area or detection sensitivity
Move the cursor onto the [Sensitivity] button, and then
press the [SET] button.
→
The sensitivity setup menu will be displayed.
Up to 4 detection areas (A - D) can be set. It is also
possible to set the whole displayed area as the
detection area by pressing [SET] button after moving
the cursor onto the [All Area] button. (using the USB
mouse click on the [All Area] button).
Set detection areas and detection sensitivities for
each of them as follows:
1. Move the cursor onto the [Area]
button of any of the detection area (A
- D), and then press the [SET]
button. (Using the USB mouse click
[Area].
2. Set the start point of the detection
area. Move the cursor to a point to be
set as the start point of the detection
area using the arrows buttons ,
and then press the [SET] button.
3. Set the end point of the detection area.
Move the cursor to a point to be set as the
end point of the detection area using the
arrow buttons (CDAB) and then press the
[SET] button. Up to 4 detection areas can be
set by repeating steps 1 - 3.
Operation of VMD
Search


