background image

Introducción

Este es un producto adicional diseñado para utilizarlo con los siguientes Sistemas de Videoportero electrónico de Panasonic.
– VL-SWD501EX/VL-SWD501UEX (Estación de control principal: VL-MWD501EX)
(Los modelos correspondientes están sujetos a cambios sin previo aviso).
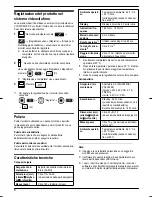
Antes de utilizarlo, debe registrar este producto con su sistema de Videoportero electrónico.

R

En este manual únicamente se describen los pasos necesarios para registrar el producto y empezar a utilizarlo. Lea la
Instrucciones de funcionamiento del Sistema de Videoportero electrónico para obtener más información.

R

Las ilustraciones mostradas en los manuales pueden variar ligeramente con respecto al producto en cuestión.

Nombres de productos utilizados en este manual

N.º de modelo

Nombre del producto

Nombre en este manual

VL-MWD501EX

Estación de control principal

Control principal

VL-WD613EX

Estación de control inalámbrico

Control secundario

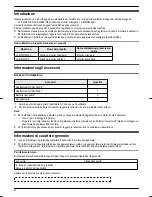
Información sobre los accesorios

Accesorios incluidos

Accesorio

Cantidad

Adaptador de CA/PNLV226CE

*1

1

Adaptador de CA/PNLV226E

*1

1

Pilas recargables

*2

2

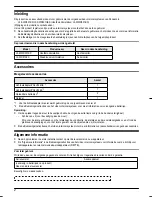
Cargador

1

*1 Deseche correctamente el adaptador de CA que no vaya a utilizar.
*2 Lea la Instrucciones de funcionamiento del Sistema de Videoportero electrónico para obtener más información sobre cómo

cambiar las pilas.

Nota:

R

Necesitará los siguientes elementos adicionales (adquiridos localmente) para instalar el cargador en la pared.
– Tornillos x 2 (para el montaje en pared):

Prepare los tornillos según el material, estructura, fuerza y demás factores de la zona de montaje y el peso total de los
objetos que se vayan a montar.

R

Lea la Instrucciones de funcionamiento del Sistema de Videoportero electrónico para obtener más información sobre
accesorios adicionales o repuestos.

Información general

R

Si tuviese algún problema, en primer lugar póngase en contacto con el distribuidor de su equipo.

R

Consulte la sección "Información general" en las Instrucciones de funcionamiento del Sistema de Videoportero electrónico
para obtener información sobre la directiva R&TTE.

Para futuras consultas

Le recomendamos que mantenga un control de la siguiente información, ya que le puede ser útil para las reparaciones bajo la
garantía.

N.º de serie

Fecha de la compra

(en el compartimento de la pila del producto)
Nombre y dirección del distribuidor

2

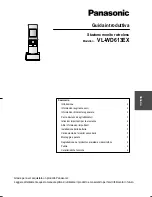
Summary of Contents for VL-WD613EX

Page 1: ...y instructions 4 Other important information 4 Battery installation 4 Charging the sub monitor 5 Wall mounting 5 Registering the product to the Video Intercom System 5 Cleaning 6 Specifications 6 Thank you for purchasing a Panasonic product Please read this manual before using the product and save it for future reference English Français Deutsch Italiano Español Nederlands ...

Page 2: ... Charger 1 1 Appropriately dispose of the AC adaptor that will not be used 2 Please read the Operating Instructions of the Video Intercom System for information about replacement batteries Note R You will need the following additional items locally procured to install the charger on the wall Screws x 2 for wall mounting Prepare the screws according to the material structure strength and other fact...

Page 3: ... the metal parts of the AC adaptor when unplugging it Unplugging the AC adaptor while holding its cord or the cord s plugs may result in fire electric shock or injury Preventing accidents R Do not use the product in health care facilities if any regulations posted in the area instruct you not to do so Hospitals or health care facilities may be using equipment that could be sensitive to external RF...

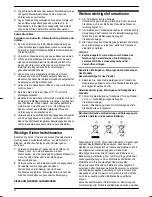
Page 4: ...ing Instructions of the Video Intercom System Settings are returned to their default values when initialization is performed Information for Users on Collection and Disposal of Old Equipment and used Batteries A B C These symbols A B C on the products packaging and or accompanying documents mean that used electrical and electronic products and batteries should not be mixed with general household w...

Page 5: ...ns When the operating temperature is low page 6 When the sub monitor is picked up off the charger or used during charging When the sub monitor s signal is out of range R The sub monitor does not overcharge even if it is continuously placed in the charger Battery level Icon Battery level High Medium Low Needs charging R See page 6 for a guide on operating times for the sub monitor Note R When the s...

Page 6: ...y Frequency range 1 88 GHz to 1 90 GHz Talking method Hands free Operating time 1 Standby use approx 80 hours Charging time 2 Approx 8 hours 3 Transmitting range Approx 100 m line of sight distance from the main monitor 1 When used fully charged in an operating temperature of 20 C 2 When the operating temperature is 20 C The charging time may increase when the operating temperature is lower than t...

Page 7: ...7 Notes ...

Page 8: ...8 Notes ...

Page 9: ...tallation des piles 5 Chargement du moniteur secondaire 5 Montage mural 6 Enregistrement du produit sur le système d intercom vidéo 6 Nettoyage 6 Spécifications 6 Merci d avoir acquis un produit Panasonic Lisez attentivement le présent manuel avant d utiliser le produit et conservez le pour référence ultérieure Guide de démarrage Station du moniteur sans fil Modèle VL WD613EX Français ...

Page 10: ...r secteur PNLV226CE 1 1 Adaptateur secteur PNLV226E 1 1 Piles rechargeables 2 2 Chargeur 1 1 Mettez correctement au rebut l adaptateur secteur non utilisé 2 Veuillez lire le Mode d emploi du système d intercom vidéo pour des informations sur les piles de rechange Remarques R Vous aurez besoin des éléments supplémentaires suivants achetés sur place pour installer le chargeur au mur Vis x 2 pour mon...

Page 11: ...rise secteur puis en l essuyant avec un chiffon sec Une accumulation de poussière risquerait de provoquer un défaut de protection contre l humidité etc susceptible d être à l origine d un incendie R Débranchez le produit de la prise secteur s il émet de la fumée une odeur anormale ou un bruit inhabituel ou en cas de chute ou d endommagement physique du produit Ces états peuvent être à l origine d ...

Page 12: ...rtantes R L adaptateur secteur est utilisé comme dispositif principal de déconnexion Assurez vous que la prise secteur est installée à proximité du produit et qu elle est facilement accessible R Reportez vous au Mode d emploi du système d intercom vidéo pour des informations sur les précautions relatives à l utilisation du produit et à son environnement d installation R L utilisation du produit à ...

Page 13: ...les rechargeables Panasonic spécifiées dans le Mode d emploi du système d intercom vidéo R Essuyez les extrémités des piles à l aide d un chiffon sec R Evitez de toucher les extrémités des piles et les contacts de l unité Chargement du moniteur secondaire Connectez uniquement l adaptateur secteur Panasonic fourni au chargeur page 2 Connexions de l adaptateur secteur A 1 B 1 Enfoncez fermement la f...

Page 14: ...essif essuyez le produit avec un chiffon légèrement humidifié Nettoyage du chargeur Par sécurité débranchez le chargeur de l alimentation électrique avant de le nettoyer Nettoyage du moniteur secondaire Pour éviter une activation accidentelle du moniteur secondaire retirez ses piles avant de le nettoyer Spécifications Corps principal Source d alimen tation Pile nickel métal hydrure Ni MH rechargea...

Page 15: ...relative sans condensa tion jusqu à 90 Remarques R La conception et les spécifications du produit sont susceptibles d être modifiées sans préavis R Le logiciel de ce produit repose partiellement sur le travail de l Independent JPEG Group R Les noms les noms de sociétés les noms de produits les noms de logiciels et les logos cités dans le présent manuel sont des marques ou des marques déposées des ...

Page 16: ...8 Notes ...

Page 17: ...nweise 4 Weitere wichtige Informationen 4 Einsetzen der Akkus 5 Aufladen des Submonitors 5 Wandmontage 6 Registrierung des Produkts bei der Videosprechanlage 6 Reinigung 6 Technische Daten 6 Danke dass Sie sich für ein Panasonic Produkt entschieden haben Lesen Sie dieses Handbuch durch bevor Sie das Produkt verwenden und bewahren Sie es zur späteren Referenz auf Deutsch ...

Page 18: ...ter PNLV226E 1 1 Akkus 2 2 Ladegerät 1 1 Der nicht verwendete AC Adapter muss ordnungsgemäß entsorgt werden 2 Informationen zum Austauschen der Akkus finden Sie in der Bedienungsanleitung der Videosprechanlage Hinweis R Um das Ladegerät an der Wand zu montieren benötigen Sie die folgenden zusätzlichen Materialien vor Ort beziehen Schrauben x 2 zur Wandmontage Verwenden Sie Schrauben die für Materi...

Page 19: ...taub usw vom AC Adapter indem Sie den Stecker aus der Steckdose ziehen und den AC Adapter mit einem trockenen Tuch abwischen Angesammelter Staub kann zu einem Isolationsfehler durch Feuchtigkeit usw führen wodurch ein Feuer entstehen kann R Ziehen Sie bei Rauchentwicklung ungewöhnlicher Geruchsbildung oder auffälligen Geräuschen oder wenn das Produkt fallengelassen oder physisch beschädigt wurde d...

Page 20: ...ur den in diesem Handbuch angegebenen AC Adapter und die angegebenen Akkus Werfen Sie den die Akku s nicht ins Feuer Sie könnten explodieren Erkundigen Sie sich nach den örtlichen Vorschriften zur gesonderten Entsorgung DIESE ANWEISUNGEN AUFBEWAHREN Weitere wichtige Informationen R Der AC Adapter ist die wichtigste Unterbrechungsvorrichtung Stellen Sie sicher dass die Steckdose sich in der Nähe de...

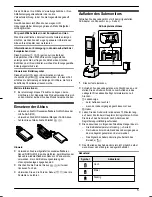
Page 21: ...R03 Verwenden Sie KEINE Alkaline Mangan Ni Cd Akkus Achten Sie auf die korrekte Polarität Hinweis R Verwenden Sie die mitgelieferten wiederaufladbaren Akkus NUR Ni MH Es wird empfohlen beim Ersetzen der Akkus die wiederaufladbaren Akkus von Panasonic zu verwenden die in der Bedienungsanleitung der Videosprechanlage angegeben sind R Wischen Sie die Pole der Akkus mit einem trockenen Tuch ab R Verme...

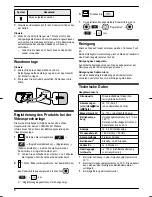
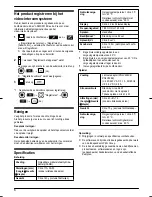
Page 22: ...itors angezeigt wird drücken Sie Ja R Registrierung abgeschlossen wird angezeigt 3 Drücken Sie 1 So registrieren Sie abgemeldete Submonitore erneut Registrieren Ja Reinigung Wischen Sie das Produkt mit einem weichen trockenen Tuch ab Bei übermäßiger Verschmutzung wischen Sie das Produkt mit einem leicht angefeuchteten Tuch ab Reinigung des Ladegeräts Aus Sicherheitsgründen müssen Sie das Ladegerät...

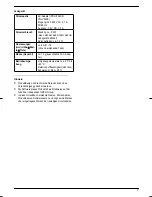
Page 23: ... Masse Gewicht ca 70 g ausschließlich AC Adap ter Betriebsumge bung Umgebungstemperatur ca 0 C bis 40 C Relative Luftfeuchtigkeit nicht kon densierend bis zu 90 Hinweis R Produktdesign und technische Daten können ohne Vorankündigung geändert werden R Die Software dieses Produkts beruht teilweise auf der Arbeit der Independent JPEG Group R In diesem Handbuch erwähnte Namen Firmennamen Produktnamen ...

Page 24: ...8 Notizen ...

Page 25: ...ortanti per la sicurezza 4 Altre informazioni importanti 4 Installazione della batteria 5 Caricamento del monitor secondario 5 Montaggio a parete 5 Registrazione del prodotto nel sistema videocitofono 6 Pulizia 6 Caratteristiche tecniche 6 Grazie per aver acquistato un prodotto Panasonic Leggere attentamente questo manuale prima di utilizzare il prodotto e conservarlo per farvi riferimento in futu...

Page 26: ... ricaricabili 2 2 Caricabatterie 1 1 Smaltire nel modo appropriato l adattatore AC che non verrà utilizzato 2 Per informazioni sulle batterie di ricambio leggere le Istruzioni d uso del sistema videocitofono Nota R Per installare il caricabatterie a parete occorrono i seguenti elementi aggiuntivi da procurarsi a cura dell utente Viti x 2 per il montaggio a parete Preparare le viti più idonee in fu...

Page 27: ...rificare che il prodotto abbia cessato di emettere fumo e contattare un centro assistenza autorizzato R Quando si scollega l adattatore AC afferrarlo dal corpo principale non dalle parti metalliche Se si scollega l adattatore AC tenendolo dal cavo di alimentazione o dai connettori del cavo si possono verificare incendi o rischiare folgorazioni o lesioni personali Prevenzione degli incidenti R Non ...

Page 28: ...mpostazioni del prodotto potrebbero essere modificate o riportate ai valori predefiniti Nota relativa allo smaltimento al trasferimento o alla restituzione del prodotto R Eseguire l impostazione Inizializza per il prodotto Vedere le Istruzioni d uso del sistema videocitofono Quando si esegue l inizializzazione le impostazioni vengono riportate ai valori predefiniti Informazioni per gli utenti sull...

Page 29: ...no 15 minuti prima di registrarlo sul monitor principale Assicurarsi di caricare completamente il monitor secondario una volta completata la registrazione R Il caricamento può richiedere più tempo nelle situazioni elencate di seguito Quando la temperatura operativa è bassa pagina 6 Quando il monitor secondario viene estratto dal caricabatterie o viene utilizzato durante il caricamento Quando il se...

Page 30: ...160 g batterie incluse Ambiente operati vo Temperatura ambiente da 0 C a 40 C circa Umidità relativa senza condensa fino al 90 Display Display a colori da 2 2 pollici circa Intervallo di fre quenze 1 88 GHz 1 90 GHz Metodo di conver sazione A mani libere Durata operativa 1 Utilizzo in standby circa 80 ore Tempo di carica mento 2 Circa 8 ore 3 Raggio di trasmis sione Circa 100 m distanza dal monito...

Page 31: ...7 Note ...

Page 32: ...8 Note ...

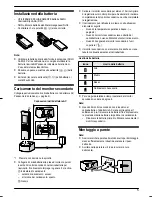
Page 33: ...3 Instrucciones importantes de seguridad 4 Otros datos importantes 4 Instalación de la pila 5 Carga del control secundario 5 Montaje en pared 6 Registro del producto en el Sistema de Videoportero electrónico 6 Limpieza 6 Especificaciones 6 Gracias por adquirir un producto Panasonic Lea este manual antes de utilizar el producto y guárdelo para consultarlo en el futuro Español ...

Page 34: ...1 Pilas recargables 2 2 Cargador 1 1 Deseche correctamente el adaptador de CA que no vaya a utilizar 2 Lea la Instrucciones de funcionamiento del Sistema de Videoportero electrónico para obtener más información sobre cómo cambiar las pilas Nota R Necesitará los siguientes elementos adicionales adquiridos localmente para instalar el cargador en la pared Tornillos x 2 para el montaje en pared Prepar...

Page 35: ... R Si sale humo del producto nota un olor extraño o ruidos inusuales o si el producto se ha caído o se ha dañado desconecte el producto de la salida de corriente Estas condiciones pueden llegar a causar un fuego o una descarga eléctrica Confirme que ya no sale humo del producto y póngase en contacto con un centro de reparaciones autorizado R Sostenga el dispositivo principal del adaptador de CA no...

Page 36: ...cciones de funcionamiento del Sistema de Videoportero electrónico para obtener información sobre las precauciones relativas al uso del producto y el entorno de instalación R Si utiliza el producto cerca de dispositivos eléctricos es posible que se produzcan interferencias Aléjese de los dispositivos eléctricos Atención R Riesgo de explosión si se sustituyen las pilas por otras del tipo incorrecto ...

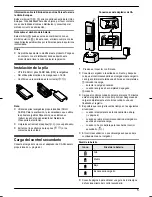
Page 37: ... las pilas con un paño seco R Evite tocar los extremos de las pilas o los contactos de la unidad Carga del control secundario Conecte el cargador solo con el adaptador de CA Panasonic proporcionado página 2 Conexiones del adaptador de CA A 1 B 1 Presione el conector con firmeza R Conecte el cargador a la salida de corriente y después coloque el control secundario en el cargador para cargarlo La ca...

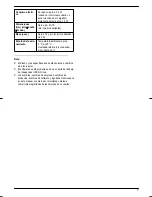
Page 38: ...trar Sí Limpieza Limpie el producto con un paño suave y seco Si hubiese demasiada suciedad limpie el producto con un paño suave ligeramente humedo Cómo limpiar el cargador Por seguridad desconecte el cargador de la alimentación antes de limpiarlo Cómo limpiar el control secundario Para evitar conectar por error el control secundario retire las pilas antes de limpiarlo Especificaciones Dispositivo ...

Page 39: ...e funcio namiento Temperatura ambiente aprox 0 C a 40 C Humedad relativa sin condensa ción hasta 90 Nota R El diseño y las especificaciones están sujetas a cambios sin previo aviso R El software de este producto se basa en parte del trabajo de Independent JPEG Group R Los nombres nombres de empresas nombres de productos nombres de software y logotipos mencionados en este manual son marcas comercia...

Page 40: ...8 Notas ...

Page 41: ...ties 4 Andere belangrijke informatie 4 Batterijen installeren 5 De submonitor opladen 5 Bevestiging aan de muur 5 Het product registreren bij het video intercomsysteem 6 Reinigen 6 Specificaties 6 Bedankt dat u hebt gekozen voor een product van Panasonic Lees deze handleiding goed door voordat u het product gebruikt Bewaar de handleiding voor later Nederlands ...

Page 42: ...ebruikt op de voorgeschreven manier af 2 Zie de Bedieningsinstructies van het video intercomsysteem voor meer informatie over vervangende batterijen Opmerking R Om de oplader tegen de muur te bevestigen hebt u de volgende extra items nodig in de handel verkrijgbaar Schroeven x 2 voor bevestiging aan de muur Zorg voor de juiste schroeven voor het materiaal de constructie de sterkte en andere omstan...

Page 43: ... leiden tot brand of elektrische schokken Controleer of de rook gestopt is en neem contact op met een erkend servicecentrum R Trek de lichtnetadapter aan de behuizing niet aan de metalen delen uit het stopcontact Wanneer u de lichtnetadapter aan het snoer of aan de contacten uit het stopcontact trekt kan dit leiden tot brand elektrische schokken of letsel Ongelukken voorkomen R Gebruik dit product...

Page 44: ... weggooien overdagen of terugsturen R Voer de instelling Initialiseren uit voor het product Zie de Bedieningsinstructies van het video intercomsysteem Wanneer een initialisatie wordt uitgevoerd worden de instellingen teruggezet op de standaardwaarden Informatie voor gebruikers betreffende het verzamelen en afvoeren van oude apparaten en lege batterijen A B C Deze symbolen A B C op de producten ver...

Page 45: ...laden uit B Haak R Laat de submonitor ten minste 15 minuten opladen voordat u het apparaat registreert bij de hoofdmonitor Na de registratie moet u de submonitor volledig opladen R In de volgende omstandigheden kan het opladen langer duren Wanneer de omgevingstemperatuur laag is pagina 6 Wanneer de submonitor van de oplader wordt gehaald of wordt gebruikt tijdens het opladen Wanneer de submonitor ...

Page 46: ...stekende delen Gewicht Circa 160 g inclusief batterijen Gebruiksomge ving Omgevingstemperatuur circa 0 C tot 40 C Relatieve luchtvochtigheid niet condenserend max 90 Display Circa 2 2 inch kleurendisplay Frequentiegebied 1 88 GHz tot 1 90 GHz Spreken Handsfree Bedrijfsduur 1 Stand by circa 80 uur Oplaadtijd 2 Circa 8 uur 3 Zendbereik Circa 100 m zichtlijn vanaf hoofd monitor 1 Bij gebruik volledig...

Page 47: ...7 Notities ...
Page 48: ...1 62 4 chome Minoshima Hakata ku Fukuoka 812 8531 Japan http www panasonic net Panasonic System Networks Co Ltd 2013 PNQX6471ZA PC1113MT0 ...

Reviews: