background image

English

11

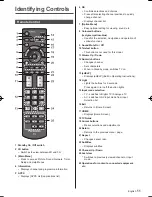
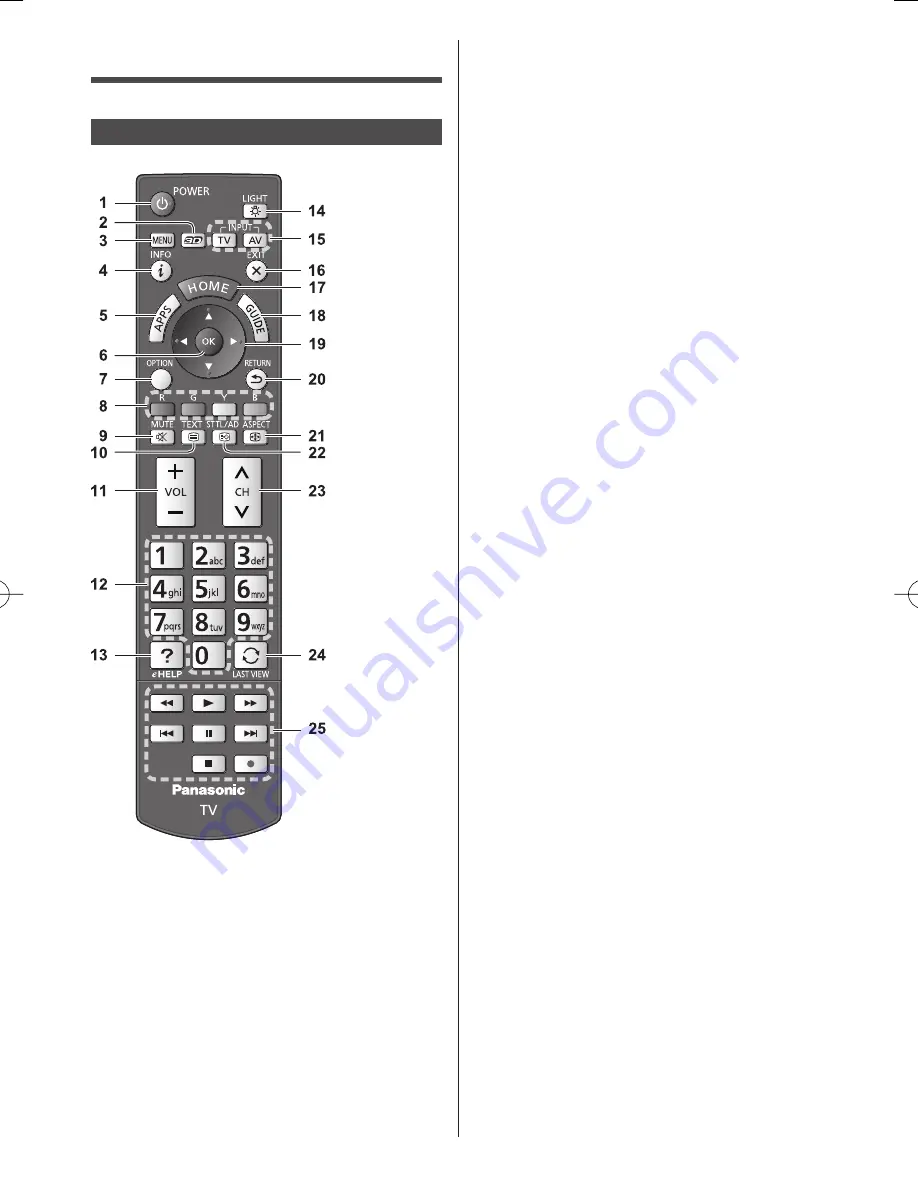
 6 OK


 Confirms selections and choices.


 Press after selecting channel positions to quickly 
change channel.


 Displays channel list.

 7 [Option Menu]


 Easy optional setting for viewing, sound, etc.

 8 Coloured buttons

 (red-green-yellow-blue)


 Used for the selection, navigation and operation of 
various functions.

 9  Sound Mute On / Off
 10 Teletext button


 This button is not used for this model.

 11 Volume Up / Down
 12 Numeric buttons


 Changes channel.


 Sets characters.


 When in Standby mode, switches TV on.

 13 [eHELP]


 Displays [eHELP] (Built-in Operating Instructions).

 14 Light


 Lights the buttons for 5 seconds.
 Press again to turn off the button lights.

 15 Input mode selection


 TV - switches to Digital TV / Analogue TV.


 AV - switches to AV input mode from Input 
Selection list.

 16 Exit


 Returns to [Home Screen].

 17 HOME


 Displays [Home Screen].

 18 TV Guide
 19 Cursor buttons


 Makes selections and adjustments.

 20 Return


 Returns to the previous menu / page.

 21 Aspect


 Changes aspect ratio.

 22 Subtitles


 Displays subtitles.

 23 Channel Up / Down
 24 Last view


 Switches to previously viewed channel or input 
mode.

 25 Operations for contents, connected equipment, 

etc.

  Identifying Controls

  Remote Control


 1  Standby On / Off switch
 2 3D button


 Switches the view between 2D and 3D.

 3 [Main Menu]


 Press to access Picture, Sound, Network, Timer, 
Setup and Help Menus.

 4 Information


 Displays channel and programme information.

 5 APPS


 Displays [APPS List] (applications list).

Summary of Contents for Viera X940H series

Page 1: ...erating this product and retain them for future reference The images shown in this manual are for illustrative purposes only For more detailed instructions refer to eHELP Built in Operating Instructions How to use eHELP p 16 M0914 0 English Operating Instructions LED TV English X940H series TQBC2782 ...

Page 2: ...Contents Be Sure to Read Important Notice 3 Safety Precautions 4 Quick Start Guide Accessories 7 Connections 7 Identifying Controls 11 First time Auto Tuning 14 Using your VIERA Operations 15 How to Use eHELP 16 Viewing 3D images 16 Others FAQs 18 Maintenance 19 Specifications 19 ...

Page 3: ...h applicable copyright legislation in your country Please refer to that legislation for more information on the relevant laws and regulations involved or contact the owner of the rights in the content you wish to record or playback This product is licensed under the AVC patent portfolio license for the personal and non commercial use of a consumer to i encode video in compliance with the AVC Stand...

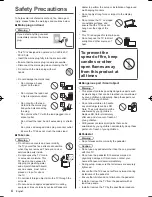
Page 4: ...stallation of the pedestal Ensure that children do not climb onto the pedestal Install or remove the TV from the pedestal with at least two people Install or remove the TV by the specified procedure Safety Precautions To help avoid risk of electrical shock fire damage or injury please follow the warnings and cautions below Mains plug and lead Warning If you detect anything unusual immediately remo...

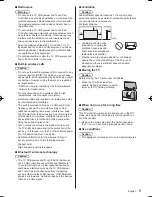
Page 5: ...ad Controller when you have a cardiac pacemaker Radio waves may interfere with the operation of the pacemaker Do not disassemble or alter the TV 3D Eyewear and Touch Pad Controller in any way Built in wireless LAN Caution Do not use the built in wireless LAN to connect to any wireless network SSID for which you do not have usage rights Such networks may be listed as a result of searches However us...

Page 6: ...ouch Pad Controller Caution Incorrect installation may cause battery leakage corrosion and explosion Replace only with the same or equivalent type Do not mix old and new batteries Do not mix different battery types such as alkaline and manganese batteries Do not use rechargeable batteries Ni Cd etc Do not burn or break up batteries Do not expose batteries to excessive heat such as sunshine fire or...

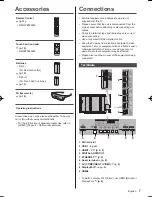
Page 7: ...ected Please also read the manual of the equipment being connected Terminals 5 6 7 2 1 3 4 8 9 1 SD Card slot 2 USB 1 3 port 3 HDMI1 3 p 8 9 4 DIGITAL AUDIO OUT 5 ETHERNET p 8 6 Aerial terminal p 8 7 AV COMPONENT VIDEO p 9 8 DisplayPort p 9 9 HDMI4 To watch contents of 4K format use HDMI terminal or DisplayPort p 9 Accessories Remote Control p 11 N2QAYB000936 Touch Pad Controller p 12 N2QBYA000005...

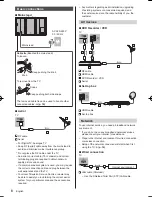
Page 8: ...Pair STP LAN cable Basic connections Mains lead AC 220 240 V 50 60 Hz Mains lead Cable tie Bundled the mains lead To loosen Knob Keep pushing the knob To remove from the TV Keep pushing both side snaps Snaps The removed cable tie can be used to bundle other connected cables p 10 Aerial TV RF cable Aerial For Digital TV Analogue TV Keep RF aerial cable away from the mains lead to avoid and minimise...

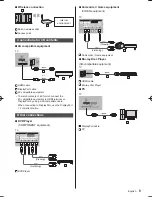
Page 9: ...ironment Built in wireless LAN Access point Connections for 4K contents 4K compatible equipment TV or HDMI cable DisplayPort cable 4K compatible equipment To watch contents of 4K format connect the 4K compatible equipment to HDMI terminal or DisplayPort by using a 4K compatible cable When connecting to DisplayPort use the DisplayPort 1 2 compliant cable Other connections DVD Player COMPONENT equip...

Page 10: ...naps Amplifier to listen with speakers Use HDMI2 for connecting an amplifier This connection is applicable when using an amplifier that has ARC Audio Return Channel function As for an amplifier without ARC function use DIGITAL AUDIO OUT To enjoy multi channel sound from external equipment e g Dolby Digital 5 1ch connect the equipment to the amplifier For the connections read the manuals of the equ...

Page 11: ... to turn off the button lights 15 Input mode selection TV switches to Digital TV Analogue TV AV switches to AV input mode from Input Selection list 16 Exit Returns to Home Screen 17 HOME Displays Home Screen 18 TV Guide 19 Cursor buttons Makes selections and adjustments 20 Return Returns to the previous menu page 21 Aspect Changes aspect ratio 22 Subtitles Displays subtitles 23 Channel Up Down 24 ...

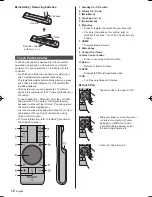
Page 12: ...ll open Hook Note the correct polarity or Close Touch Pad Controller Touch Pad Controller is designed for the convenient operations especially on Home Screen or internet contents You can operate the TV intuitively with this controller Touch Pad Controller can be used by registering to this TV with Bluetooth wireless technology The registration starts automatically when you press any buttons except...

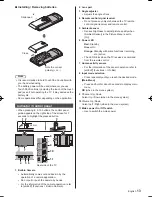
Page 13: ...Up Down when in the menu system 10 Volume Up Down Cursor Left Right when in the menu system 11 Mains power On Off switch Use to switch the mains power Installing Removing batteries Slide open Note the correct polarity or Close Note It is recommended to hold Touch Pad Controller with your hand when using The battery power will be used whenever you use Touch Pad Controller including the touch of the...

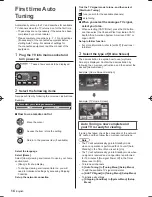
Page 14: ...inutes if No signal Power off in the Timer Menu is set to On To retune all channels Auto Tuning in Tuning Menu Setup Menu To add the available TV signal mode later Add TV Signal in Tuning Menu Setup Menu To initialise all settings Shipping Condition in System Menu Setup Menu First time Auto Tuning Automatically sets up the TV and searches for available TV channels when the TV is turned on for the ...

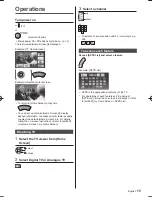
Page 15: ... Operations Turn power on TV or Remote Control Mains power On Off switch should be on p 13 The last viewed Home Screen is displayed Example TV Home Screen Example Selected content screen To return to Home Screen at any time You can set up or make Home Screen to display desired information to access specific features easily to select the default Home Screen etc For details follow the on screen inst...

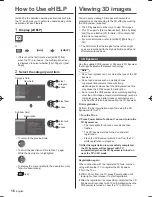
Page 16: ...r on The lamp lights for about 2 seconds and then flashes The 3D Eyewear will be turned on and start registration Place the 3D Eyewear within 50 cm from the TV while registration in progress 3 After the registration is successfully completed the 3D Eyewear will reconnect with TV automatically when the 3D Eyewear is turned on near the TV in 3D mode Registration again When connection with the regist...

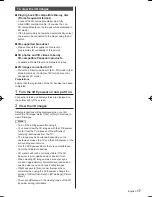
Page 17: ...on status and battery status are displayed on the bottom right of the screen 2 View the 3D images Safety precautions will be displayed when you first watch the 3D image Select Yes or No to continue to view 3D images Note Turn off the 3D Eyewear after using it You cannot view the 3D images with the 3D Eyewear too far from the TV because of the difficulty of receiving radio waves from the TV The ran...

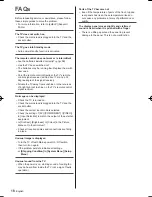
Page 18: ...es may be running low Replace them with new ones Point the remote control directly at the TV s remote control signal receiver within about 7 m and a 30 degree angle of the signal receiver Situate the TV away from sunshine or other sources of bright light not to shine on the TV s remote control signal receiver No image can be displayed Check the TV is turned on Check the mains lead is plugged into ...

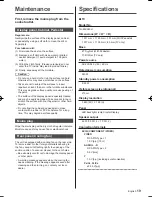
Page 19: ... enter the TV inside May lead to product failure 4 Finally wipe away all the moisture Caution Do not use a hard cloth or rub the surface too hard otherwise this may cause scratches on the surface Take care not to subject the surfaces to insect repellent solvent thinner or other volatile substances This may degrade surface quality or cause peeling of the paint The surface of the display panel is sp...

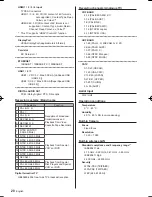
Page 20: ...ur x v Colour HDMI2 4K 3D 3D content of 4K format is not supported Content Type Audio Return Channel Deep Colour x v Colour This TV supports HDAVI Control 5 function DisplayPort VESA DisplayPort applicable to 4K format Card slot SD Card slot 1 ETHERNET 10BASE T 100BASE TX 1000BASE T USB 1 2 3 USB1 2 DC 5 V Max 500 mA Hi Speed USB USB 2 0 USB3 DC 5 V Max 900 mA SuperSpeed USB USB 3 0 DIGITAL AUDIO ...

Page 21: ...iffer depending on the country 3 Not all the Bluetooth compatible devices are available with this TV Up to 5 devices can be used simultaneously except the 3D Eyewear and Touch Pad Controller 3D Eyewear Dimensions W H D 164 7 mm 41 0 mm 170 7 mm Mass Approx 34 Usage temperature range 0 C 40 C Battery Coin shaped lithium battery CR2025 Operation time Approx 75 hours in continuous use of the battery ...

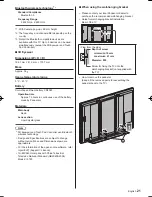
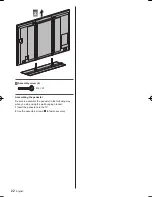
Page 22: ...mbly screw 4 M6 25 Assembling the pedestal Be sure to assemble the pedestal in the following way when you stop using the wall hanging bracket 1 Insert the pedestal into the TV 2 Use the assembly screws to fasten securely ...

Page 23: ......

Page 24: ...chase to aid in identification in the event of theft or loss and for Warranty Service purposes Model Number Serial Number Web Site http panasonic net Panasonic Corporation 2014 English Printed in Japan Information on Disposal in other Countries outside the European Union This symbol is only valid in the European Union If you wish to discard this product please contact your local authorities or dea...

Reviews: