


19
■
Transition Effect
Selects the transition effect for switching the photo during
the slideshow.
●
This function is available when [Frame] is set to [Off].
■
Auto Makeup
Automatically detects the face in the photo and improves
luminance and contrast.
■
Screen Mode
Selects enlarged or normal viewing on Single view and
Slideshow.
●
This function is not available when [Frame] is set to
[Collage], [Drift], [Gallery] or [Cinema] / when [Transition
Effect] is set to [Motion].
●
Depending on the photo size, it may not be fully
enlarged to fill the screen, e.g. portrait style picture.
■
Burst Playback
Selects whether to display burst photos in a fast-paced
slideshow mode.
●
This function is not available when [Frame] is set to
[Drift], [Gallery] or [Cinema] / when [Transition Effect] is
set to [Motion].
■
Interval
Selects slideshow interval.
●
This function is not available when [Frame] is set to
[Drift], [Gallery] or [Cinema] / when [Transition Effect] is
set to [Motion].
■
Repeat
Slideshow repeat
■
Back Ground Music
Selects the back ground music during Photo mode.
●
[Type1 - 5] is fixed installed on this TV.
[User]:
Music data in the device registered by yourself
will be played back.
To register the music
1. Select the music file
Depending on the condition of the device, select folders
until you reach the desired music file.
DCIM
MISC
001photo
002photo
003music
01 song.mp3
PRIVATE
Back Ground Music
Type1
2. Select [File] or [Folder]
[File]: The selected music file will be registered.
[Folder]: All the music in the folder which contains the
selected music file will be registered.
●
If no music has been registered or the device which
has the registered music is removed, no sound will be
produced.
[Auto]:
Music data stored in the root folder of the current
device will be played back randomly.
●
If there is no available music data, no sound will be
produced.
Note
●
Picture quality may become lower depending on the
slideshow settings.
●
Picture setting may not work depending on the
slideshow settings.
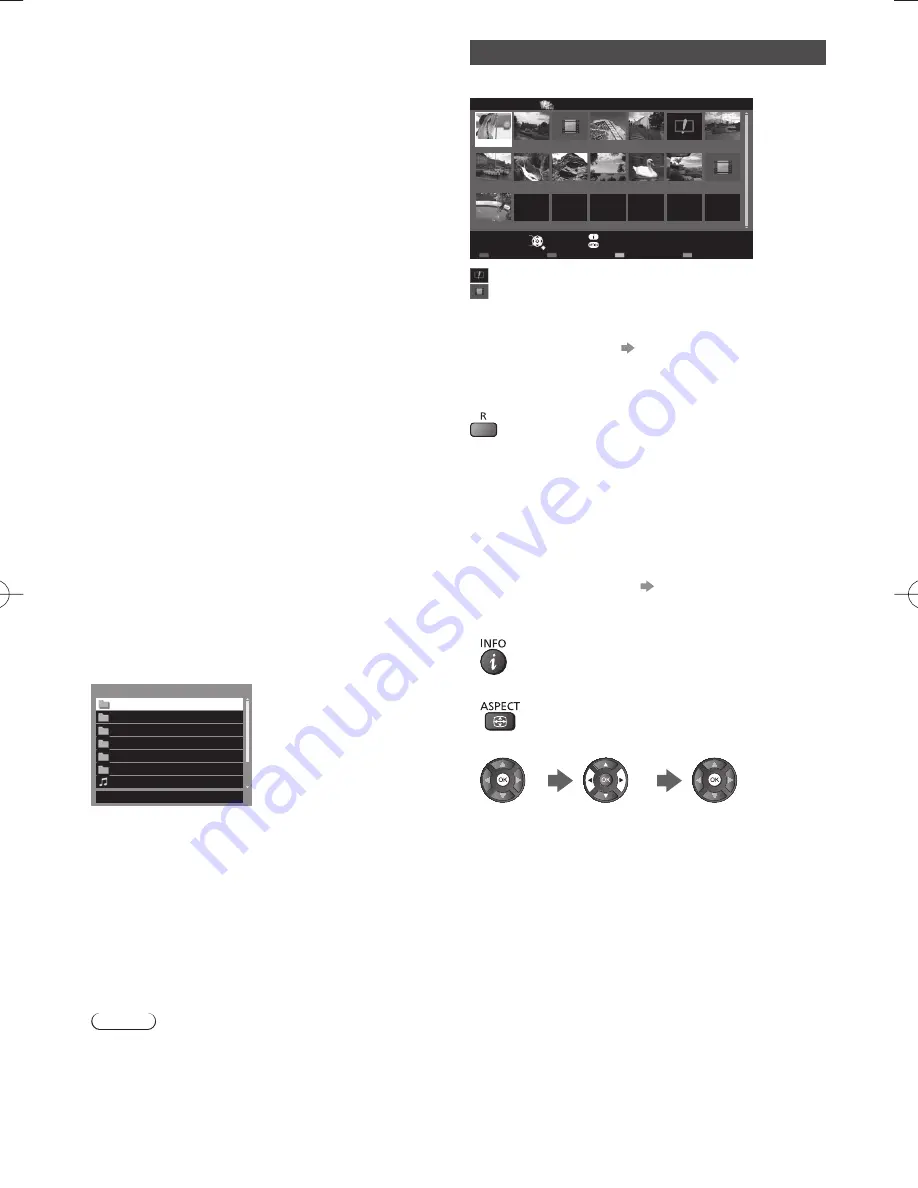
Video mode
Example: Thumbnail - [Title view]
Trip1
Trip2
Trip3
Trip4
Trip5
Room
2011_4
Nature1
2011_7
Nature2
Nature3
Nature4
Nature5
Nature6
2011_9
Media Player
Video
Title view
USB Flash
Select
RETURN
Play
Contents Select
Info
Access
Option Menu
Drive Select
: Error display
: The file does not support thumbnail view.
The preview will start when the title / scene is highlighted
if it supports a preview.
●
To turn off the preview
[Video Preview]
1
Select the title / scene
2
Start playback
(red)
●
If you stopped the last playback on the way, the
confirmation screen is displayed to select whether
to start from where you stopped last time or from the
beginning.
●
Auto Resume (X60D series)
Playback automatically starts from where you watched
last time when you turn the TV on after the TV is turned
off or in Standby mode due to electric outage, etc.
To turn off the auto resume
“Auto Resume Setup”
●
To display / hide the operation guide and information
banner
●
To change aspect
●
To jump to the specified time point
While the time seek bar is displayed, use left and right
cursor button.
Press: Search about 10 seconds
Press and hold: Search rapidly


