


How to Use Menu Functions
46
Not valid when [Viewing Mode] is set
to [True Cinema]
For NTSC
For NTSC / PAL
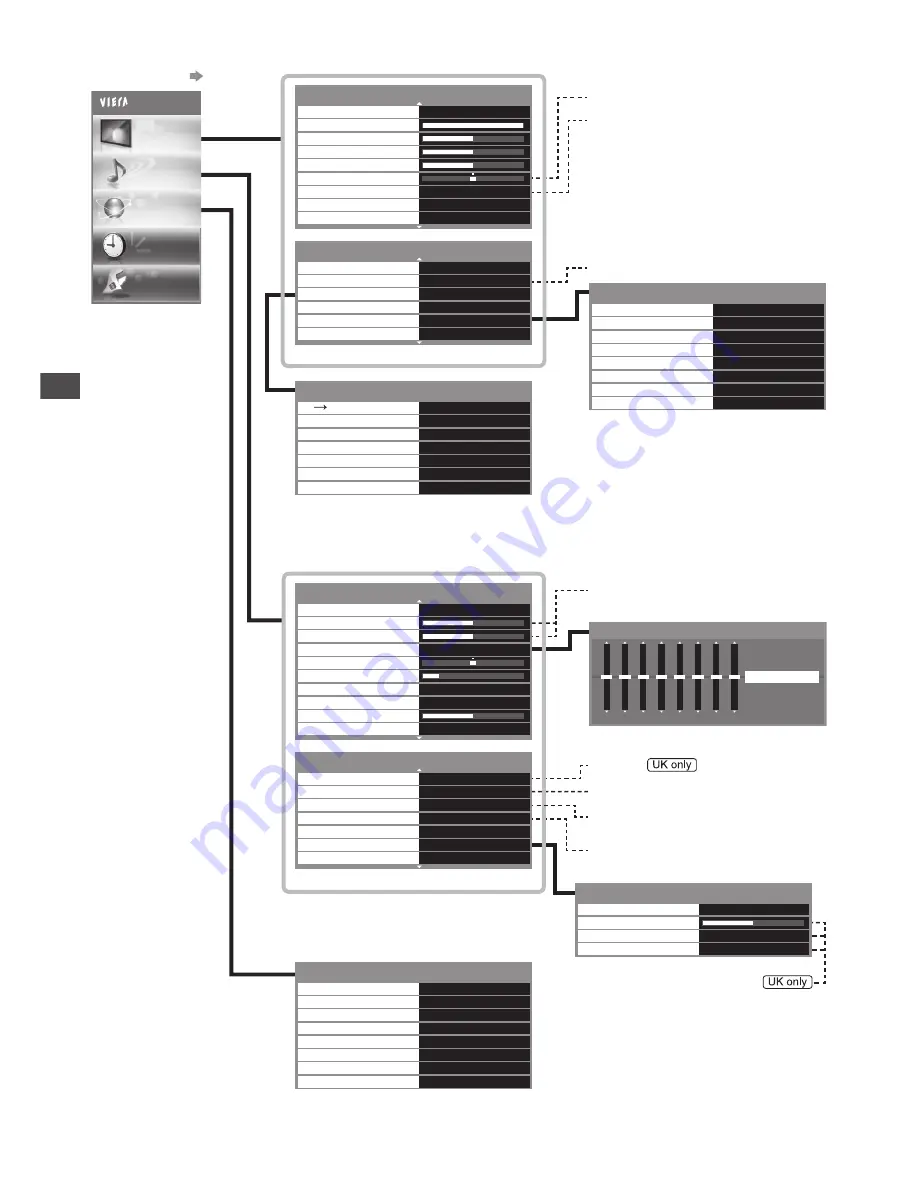
How to operate
(p. 38)
Overview
(Picture, Sound, Network, Timer, Setup)
Available when [Mode] is
set to [Music] or [Speech]
For DVB, network video contents or
Video mode
For HDMI input
For DVB
For Analogue
150 250 500
1k
2k
4k
8k
12k
Hz
Equaliser
Reset to Defaults
Available when [Mode] is set to [User]
3D Adjustment
Off
On
On
Access
Picture Sequence
Edge Smoother
3D Detection
3D Signal Message
Safety Precautions
3D Settings
Access
Normal
2D
3D Depth
Mid
(p. 36)
1/2
Viewing Mode
Dynamic
Contrast
Brightness
Colour
Sharpness
Tint
Colour Balance
Vivid Colour
C.A.T.S.
Off
Off
Warm
2/2
P-NR
Off
Off
Access
Reset
On
3D-COMB
3D Settings
Reset to Defaults
Screen Display
Access
Advanced Settings
(p. 39, 40)
Off
Off
Auto
Off
Intelligent Frame Creation
24p Smooth Film
3D Refresh Rate
Side Panel
Advanced Settings
Off
16:9 Overscan
DVI Input Setting
Normal
Auto
Start
Pixel Orbiter
Scrolling Bar
(p. 40)
Main Menu
Picture
Sound
Network
Timer
Setup
Network Connection
Wired
Access
Wireless Network Settings
IP/DNS Settings
Connection Test
Software Update
Network Link Settings
Access
Access
Access
Access
On
Network Status
New Software Message
Access
(p. 71 - 74)
1/2
Mode
Music
Bass
Treble
Balance
Headphone Volume
Surround
Equaliser
Auto Gain Control
Volume Correction
Speaker Distance to Wall
Over 30cm
Off
Off
Access
2/2
Preferred Multi Audio
English
Off
Auto
Digital
Access
NICAM
SPDIF Selection
HDMI1 Input
Voice Guidance Settings
Audio Description
Access
Reset
Reset to Defaults
(p. 40 - 42)
Audio Description
Off
Off
Volume
Speakers
Headphones
Audio Description Menu
Off
For DVB
(p. 42)


