TY-TP65P30K
9
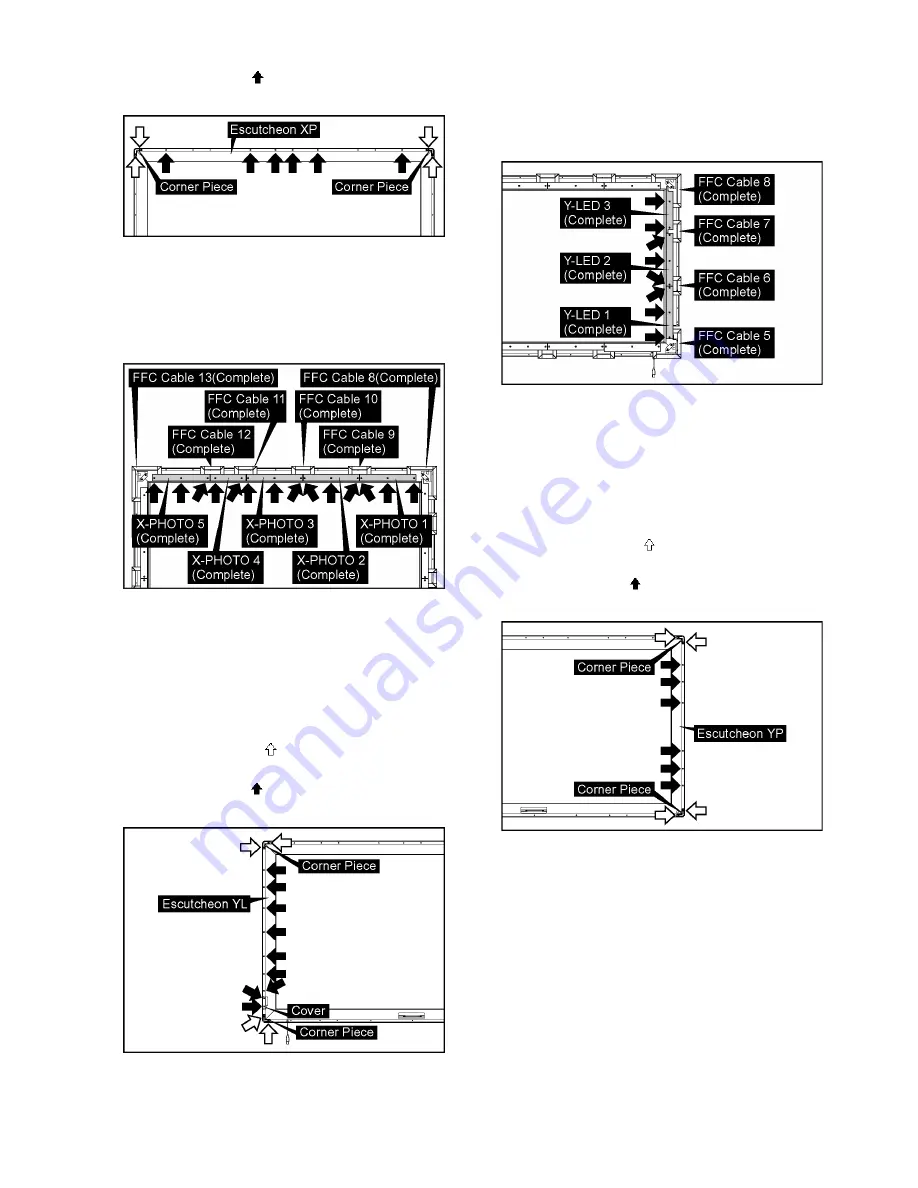
3. Remove 6 screws (
) and then remove the Escutcheon
XP.
4. Turn over the Touch Panel (turn to the front).
5. Remove double-sided tapes on the back side of each
flexible cable.
6. Remove screws of the P.C.B..
7. Turn over the P.C.B. and then remove the flexible cables
from it.
8. Remove the P.C.B..
5.5.
Removal of Y-LED1(Complete),
Y-LED2(Complete) and Y-
LED3(Complete)
1. Remove the Touch Panel.
(Refer to removal of the Touch Panel.)
2. Remove 4 screws (
) and then remove 2 Corner
Piece’s.
3. Remove 9 screws (
) and then remove the Escutcheon
YL and Cover.
4. Turn over the Touch Panel (turn to the front).
5. Remove double-sided tapes on the back side of each
flexible cable.
6. Remove screws of the P.C.B..
7. Turn over the P.C.B. and then remove the flexible cables
from it.
8. Remove the P.C.B..
5.6.
Removal of Y-PHOTO1(Com-
plete), Y-PHOTO2(Complete)
and Y-PHOTO3(Complete)
1. Remove the Touch Panel.
(Refer to removal of the Touch Panel.)
2. Remove 4 screws (
) and then remove 2 Corner
Piece’s.
3. Remove 6 screws (
) and then remove the Escutcheon
YP.
4. Turn over the Touch Panel (turn to the front).
5. Remove double-sided tapes on the back side of each
flexible cable.
6. Remove screws of the P.C.B..


