15
Auto Setup
Auto Setup
Search and store TV channels automatically.
●
These steps are not necessary if the setup has been completed by your local dealer.
●
Please complete connections (p. 11, 12) and settings (if necessary) of the connected equipment before starting
Auto Setup. For details of settings for the connected equipment, read the manual of the equipment.
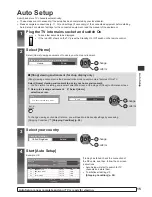
1
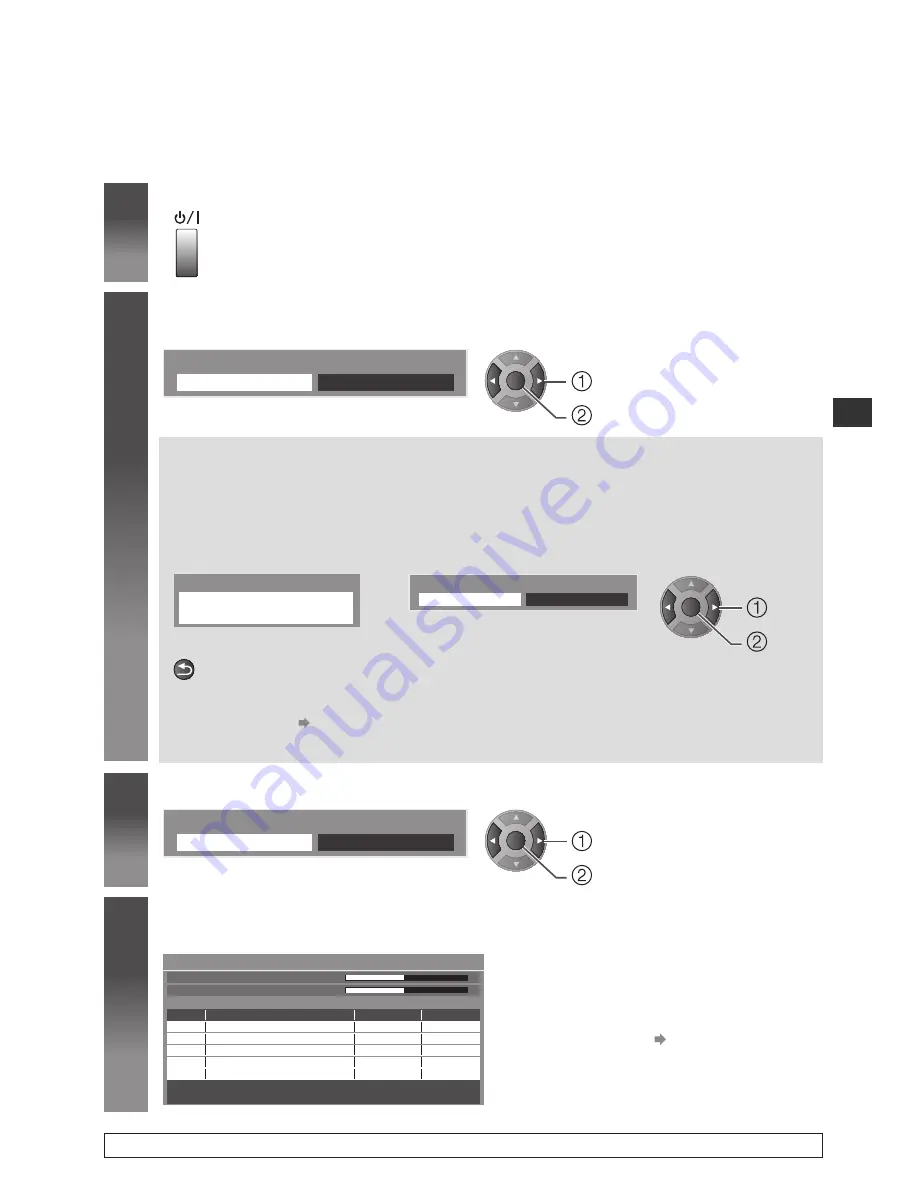
Plug the TV into mains socket and switch On
●
Takes a few seconds to be displayed.
●
If the red LED shows on the TV, press the Standby On / Off switch on the remote control.
2
Select [Home]
Select [Home] viewing environment to use in your home environment.
Please select your viewing environment.
Home
Shop
OK
change
confirm
[Shop] viewing environment (for shop display only)
[Shop] viewing environment is the demonstration mode to explain main features of this TV.
Select [Home] viewing environment to use in your home environment.
●
You can return to viewing environment selection screen at the stage of [Shop] confirmation screen.
1
Return to viewing environment
selection screen
2
Select [Home]
Shop
You have selected shop mode
BACK/
RETURN
Please select your viewing environment.
Home
Shop
OK
change
confirm
To change viewing environment later on, you will need to initialise all settings by accessing
[Shipping Condition].
[Shipping Condition]
(p. 24)
3
Select your country
Country Selection
United Kingdom
Ireland
OK
change
confirm
4
Start [Auto Setup]
Example: UK
CH 21
69
62
62
62
62
Auto Setup - DVB and Analogue
DVB Scan
CH 21
69
Analogue Scan
This will take about 6 minutes.
Free TV : 4
Pay TV : 0
Radio : 0
Searching
100
100
CBBC Channel
E4
100
CH
Channel Name
Type
Quality
BBC Radio Wales
Free TV
Free TV
Free TV
100
Cartoon Nwk
Free TV
Data : 0
Analogue : 0
If tuning has failed, check the connection of
the RF cable, and then, follow the on screen
instructions.
●
Auto Setup will start to search for TV
channels and store them.
●
To initialise all settings
[Shipping Condition]
(p. 24)
Auto Setup is now complete and your TV is ready for viewing.


