


11
Q-Link
Allows you to select which AV terminal is to be used for data
communication between this TV and a com pat i ble recording
device. Choose from
Off
,
AV2
and
AV4
. See page 17.
AV2
/
AV4 out
Offers a choice of signals to send to the Scart terminal
selected in the Q-Link option. You can choose from the
current
TV
programme position, the signal en ter ing
AV1
/
AV2
/
AV3
/
AV4
or
Monitor
- the picture displayed on
screen.
Teletext
Allows you to choose between
TOP/FASTEXT
or
List
mode.
See page 21-23.
Off timer
Switches the TV off within a preset time which you can
choose from between 0 to 90 minutes in 15 minute
intervals.
Text language
Select character set, so that all characters needed are
availabe for text on teletext pages (e.g., cyrillic char ac ters,
etc.).
Mode Languages
West
: English, French, German, Greek, Italian, Span ish,
Swedish, Turkish
East1
: Czech, English, Estonian, Lettish, Rumanian,
Russian, Ukrainian
East2
: Czech, English, German, Hungarian, Lettish, Polish,
Rumanian
Tuning menu
Provides access to many other features including
Programme edit
and
Auto setup
. See page 12-16.
OSD language
When you first install the TV, the On Screen Display
language is set according to your choice of country.
OSD
language
lets you change the language used for On Screen
Displays.
Colour system
During
AV
mode, Colour system is displayed. See page
12.
Volume correction
During
AV
mode, Volume correction is displayed.
You can adjust volume level of AV mode. Volume level is
memorised.
TV
N
1
2
3
4
5
6
7
8
9
0
OK
C
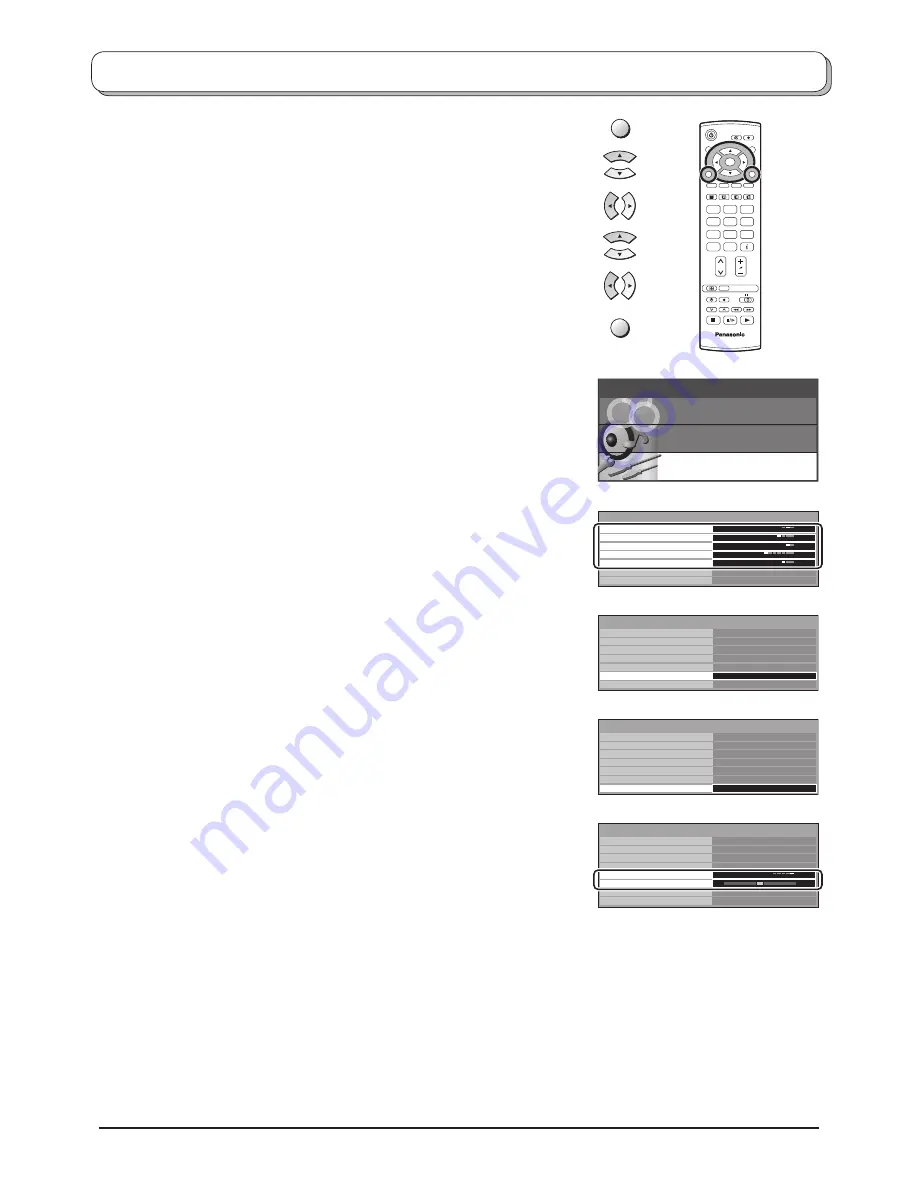
Setup menu
Press the
MENU
button.
Move to choose
Setup menu
.
Access
Setup menu
.
Move to choose menu option.
Adjust chosen option or access chosen menu.
Press the
EXIT
button at any time to go back to watching TV.
AV mode
Main menu
P i c t u r e menu
Setup menu
Sound menu
Q-Link
AV2 out
Off timer
Tuning menu
OSD language
Setup menu
AV2
TV
Off
Text language
West
Teletext
TOP
Q-Link
AV2 out
Off timer
Tuning menu
OSD language
Setup menu
AV2
TV
Off
Text language
West
Access
Teletext
TOP
Q-Link
AV2 out
Off timer
Tuning menu
OSD language
Setup menu
AV2
TV
Off
Text language
West
Access
Teletext
TOP
Q-Link
AV2 out
Off timer
Setup menu
AV2
TV
Off
Text language
West
OSD language
Teletext
TOP
Volume correction
Colour system
Auto
MENU
EXIT


